Festive Kids' Fourth of July Crafts for a Spark-tacular Celebration

Table of Contents
- Introduction
- Why Fourth of July Crafts Matter: Beyond Just Fun
- Patriotic Pointers: Crafting Safety & Setup
- Explosions of Creativity: Firework-Themed Crafts
- Stars and Stripes Spectacular: Flag-Inspired Projects
- Edible Art: Deliciously Patriotic Treats
- Wear Your Patriotism: DIY Accessories & Decor
- Beyond the Craft Table: More Engaging Fourth of July Activities
- The I'm the Chef Too! Difference: Blending Fun, Food & Learning
- Conclusion
- FAQ Section
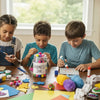
The sizzle of summer, the scent of backyard barbecues, and the distant promise of fireworks painting the night sky – these are the hallmarks of the Fourth of July! But before the grand finale, how do we keep those eager little hands and minds engaged and excited during the daytime? While screens might offer a temporary distraction, we at I'm the Chef Too! believe in sparking curiosity and creativity through tangible, hands-on experiences. Imagine the joy on your child's face as they proudly display a handmade patriotic banner or eagerly present a batch of star-spangled treats they crafted themselves. This Independence Day, let's turn up the fun, dial down the screen time, and ignite a passion for learning through a vibrant array of kids' Fourth of July crafts. We'll explore everything from dazzling DIY fireworks to delicious edible masterpieces, ensuring every activity is not just fun, but also a fantastic opportunity for skill-building, family bonding, and creating cherished memories. Get ready to transform everyday materials into patriotic wonders and celebrate America's birthday with a burst of creativity!
Introduction
There's something truly magical about the Fourth of July, isn't there? The anticipation, the festive atmosphere, the chance to gather with loved ones. For children, it’s a day brimming with excitement, often centered around the spectacular fireworks display. But what about the hours leading up to dusk? How can we harness that energy and channel it into activities that are both entertaining and enriching? This year, let's step away from passive entertainment and dive into a world of hands-on creativity with a fantastic collection of kids' Fourth of July crafts.
At I'm the Chef Too!, our mission is to blend food, STEM, and the arts into one-of-a-kind "edutainment" experiences. We know that the best learning often happens when children are fully immersed, using their hands and imaginations to explore new concepts. These Fourth of July crafts perfectly embody that spirit, offering a screen-free alternative that encourages skill development, fosters creativity, and provides wonderful opportunities for family bonding. From simple projects perfect for toddlers to more involved creations for older children, this post will guide you through a diverse range of patriotic crafts, complete with easy-to-follow instructions, material lists, and insights into the developmental benefits. Get ready to celebrate Independence Day by creating beautiful, memorable, and often delicious works of art together!
Why Fourth of July Crafts Matter: Beyond Just Fun
While the immediate joy of crafting is undeniable, the benefits of engaging children in hands-on activities, especially themed ones like kids' Fourth of July crafts, extend far beyond simple entertainment. These moments are invaluable for holistic development, weaving together critical skills, fostering imagination, and strengthening family connections.
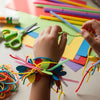
Sparking Curiosity and Creativity: When a child transforms a simple paper plate into a vibrant flag or turns pasta into a dazzling firework, they're not just following instructions; they're engaging their creative problem-solving skills and exploring different artistic mediums. These activities encourage them to think outside the box, experiment with colors and textures, and develop their unique artistic voice. At I'm the Chef Too!, we believe this process of discovery is essential. It's why our kits are designed to spark that very curiosity, blending unexpected elements like science and cooking to open up new worlds of imagination.
Building Essential Skills: Every snip of the scissors, every squeeze of glue, every dab of paint contributes to the development of crucial fine motor skills. These small, precise movements are vital for tasks like writing, dressing, and even eating. Crafting also enhances hand-eye coordination, spatial awareness, and concentration. When children follow multi-step instructions, they're practicing sequencing and patience – skills that translate to academic success and everyday life. Even something as seemingly simple as a color-by-code activity hones number recognition and attention to detail.
Facilitating Family Bonding: In our fast-paced world, finding dedicated time for family activities can be a challenge. Crafts provide a wonderful excuse to slow down, connect, and work together towards a common goal. Sharing laughter over a glitter-covered masterpiece or collaborating on a complex project creates lasting memories and strengthens relationships. These shared experiences are the fabric of childhood, and they're a cornerstone of our philosophy at I'm the Chef Too!. We design our kits to be shared family adventures, fostering those precious moments of connection around a shared, delicious activity. Ready to make more memories? Join The Chef's Club and enjoy free shipping on every box, bringing a new adventure to your door every month. Imagine the delight of consistent, screen-free educational fun delivered right to your home!
Providing a Screen-Free Educational Alternative: With so much of modern life gravitating towards digital screens, offering engaging screen-free activities is more important than ever. Crafts provide a rich sensory experience that screens simply cannot replicate. The feel of salt, the smell of paint, the texture of fabric – these elements engage multiple senses, leading to deeper learning and greater retention. This focus on tangible, hands-on learning is at the heart of our unique approach, where we teach complex subjects through delicious cooking adventures.
Connecting with History and Culture: Fourth of July crafts offer a fantastic opportunity to introduce children to the significance of Independence Day and American symbols. Through creating flags, eagles, or even Statue of Liberty crafts, kids can learn about the history and values behind the celebration in a way that is accessible and meaningful to them. It's a gentle introduction to civics and patriotism, wrapped up in a fun activity.
By embracing these festive crafts, you're not just occupying time; you're investing in your child's development, fostering their creativity, and building beautiful family traditions.
Patriotic Pointers: Crafting Safety & Setup
Before we dive into the exciting world of red, white, and blue creations, a quick word on preparation and safety. While crafting is incredibly rewarding, a little forethought can make the experience smoother and more enjoyable for everyone.
Adult Supervision is Key: For all activities involving scissors, glue guns (even low-temp ones), small embellishments, or paint, always ensure an adult is present and actively supervising. This is especially true for younger children. Our cooking STEM kits also implicitly rely on adult guidance, as safety in the kitchen is paramount.
Designate a Workspace: Choose a well-lit area that can handle a little mess. Cover tables with newspaper, an old tablecloth, or craft paper to protect surfaces. Having a dedicated "craft zone," even if temporary, signals to children that it's time for creative exploration.
Gather Materials in Advance: Nothing disrupts the flow of creativity like having to search for a missing item mid-project. Read through the material list for your chosen craft and gather everything beforehand. Keep materials organized in bins or trays for easy access.
Simplify Where Needed: If you have very young children, don't be afraid to pre-cut shapes, pre-draw outlines, or simplify steps. The goal is engagement and enjoyment, not perfection. Focus on the process, not just the finished product.
Embrace the Mess (Within Reason!): Crafting can get messy, and that's part of the fun! Dress children in old clothes or provide smocks. Have wipes or a damp cloth handy for quick clean-ups. Remember, a little mess often means a lot of learning and creativity.
Set Realistic Expectations: Remember our philosophy: focus on the benefits of the process – fostering a love for learning, building confidence, developing key skills, and creating joyful family memories – rather than expecting guaranteed masterpieces. Every child's creation is perfect in its own unique way!
With these pointers in mind, let's get ready to transform your home into a hub of Fourth of July creativity! Not ready to subscribe but want to explore more engaging projects? Browse our complete collection of one-time kits to find the perfect themed adventure for your little learner today!
Explosions of Creativity: Firework-Themed Crafts
Fireworks are arguably the most iconic symbol of the Fourth of July! Capturing their dazzling beauty in craft form is a fantastic way to engage children and let their imaginations light up. These projects are brilliant for exploring color, texture, and fine motor skills.
Salt Painted Fireworks
Salt painting is a sensory delight that produces incredibly vibrant and unique results. The way the watercolor spreads through the salt creates a stunning effect, reminiscent of fireworks bursting in the night sky.
Materials:
- Black cardstock paper (for that night sky effect)
- Table salt
- School glue
- Liquid watercolors or diluted food coloring
- Small paintbrush
- Pencil
- Art tray or baking sheet (to catch excess salt)
Set-up:
- On the black cardstock, use a pencil to lightly draw various firework shapes – bursts, swirls, and starbursts. Don't worry about perfection; organic shapes work beautifully!
- Carefully trace over your pencil lines with school glue.
- Have the children generously sprinkle salt over all the glue lines. Ensure the glue is completely covered.
- Gently lift the paper and tap off the excess salt onto your art tray or into the trash. You should be left with raised, salty glue lines.
- Let the glue dry for a bit if you want the colors to be more distinct, or proceed immediately for a more blended look.
Activity:
- Dip your paintbrush into the liquid watercolors. Gently touch the tip of the wet brush to the salt-covered glue lines.
- Watch in amazement as the color wicks and spreads along the salt crystals, creating a beautiful, organic explosion of color!
- Encourage kids to use red and blue for patriotic fireworks, or let them experiment with a rainbow of colors.
- Allow the painting to dry completely before displaying. The finished product is a textured, sparkling work of art.
Educational Benefits: This craft is fantastic for sensory exploration, fine motor control (drawing, squeezing glue, painting), and understanding color diffusion. It's a magical introduction to basic science principles disguised as art.
Glitter Glue Fireworks
Glitter glue adds an instant touch of sparkle and festivity, making these fireworks truly pop! This craft is excellent for refining fine motor skills and encouraging precision.
Materials:
- Black cardstock or dark construction paper
- Glitter glue (red, blue, silver, gold – whatever you have!)
- Pencil
Set-up:
- Lightly sketch firework designs onto your dark paper with a pencil. Think simple stars, circles, or abstract bursts.
Activity:
- Hand over the glitter glue tubes and let your little ones trace over the pencil lines. Encourage them to use different colors for different fireworks or to create layers of glitter.
- For added sparkle, they can fill in areas, or simply trace the outlines.
- As they squeeze the glue and carefully follow the lines, they are not only creating art but also building hand strength and precision, which are crucial for early writing skills.
- Add tiny dots around the fireworks to represent distant stars or extra sparkles.
- Let the glitter glue dry completely – this can take a few hours or even overnight, depending on how thickly it's applied.
Educational Benefits: This activity is a fantastic fine motor workout, enhancing hand-eye coordination and pre-writing skills. It also promotes color recognition and creative expression through a glittering medium.
TP Roll Fireworks Prints
Don't toss those empty toilet paper rolls! They're a fantastic, reusable resource for countless crafts, including these fun firework prints. This is a simple, high-impact craft that even the littlest hands can enjoy.
Materials:
- Empty toilet paper rolls
- Scissors
- Washable paint (red, white, blue)
- Paper plates or a paint tray
- Black or dark colored paper
- Optional: Glitter glue for extra sparkle
Set-up:
- Take an empty toilet paper roll and use scissors to make several cuts (about 1-2 inches deep) around one end of the roll, creating "fringes." The more cuts you make, the finer the firework burst will be.
- Gently bend these fringes outwards so they flair out like a flower or a firework burst.
- Repeat with a few rolls, perhaps making some with wider cuts and others with finer cuts to create different effects.
- Squeeze small puddles of red, white, and blue paint onto separate paper plates or sections of a paint tray.
Activity:
- Have your child dip the fringed end of a toilet paper roll into one color of paint, making sure the "petals" are coated.
- Press the painted end firmly onto the dark paper to create a firework print.
- Lift straight up to reveal the burst shape.
- Repeat with different colors and different toilet paper rolls, overlapping prints to create a dynamic firework display.
- Once the paint dries, children can add a swirl of glitter glue to the center of each print for an extra festive touch.
Educational Benefits: This craft encourages creative expression, color mixing, and pattern making. It also introduces the concept of printing and reusing materials, while enhancing hand-eye coordination as they press and lift.
Q-Tip Fireworks
This craft is another wonderful way to refine fine motor skills with a different tool! Using Q-tips for painting encourages precision and control, similar to holding a pencil.
Materials:
- White or dark cardstock paper
- Washable paint (red, white, blue, or other bright colors)
- Q-tips
- Paint tray or small dishes
- Pencil (optional, for pre-drawing outlines)
Set-up:
- If desired, lightly draw some simple firework outlines on the paper with a pencil. This can give children a guide, or you can let them create freehand.
- Squeeze small amounts of different colored paints onto a paint tray or in separate small dishes.
Activity:
- Give each child a few Q-tips. They will dip the Q-tip into a paint color.
- Instead of brushing, they will use the Q-tip to make dots, dashes, and small strokes to create their fireworks. They can trace over pre-drawn lines or create their own bursts of color.
- Encourage them to make clusters of dots for a dense firework, or radiating lines for a burst effect.
- This method requires more precision and control than a paintbrush, making it an excellent fine motor exercise.
- Layer different colors and dot patterns to build up rich, vibrant fireworks.
Educational Benefits: This activity is excellent for developing fine motor control, hand-eye coordination, and pre-writing skills. It also allows for color exploration and pattern creation in a detailed way.
Pasta Fireworks
Who knew pasta could be so festive? This multi-media craft uses different pasta shapes to create textured, dynamic fireworks that are a joy to behold.
Materials:
- Cardboard or heavy paper as a base
- TP rolls (optional, for "launchers")
- Acrylic paint (red, white, blue)
- Art tray or paper plates
- Various pasta shapes (spiral pasta like rotini, straight pasta like spaghetti pieces, star pasta if you have it!)
- School glue
- Paintbrushes
- Hot glue gun (for adult use only)
- Star stickers (optional)
Set-up:
- Have children paint the different pasta shapes using acrylic paints. They can paint spirals red, straight pieces blue, etc. Spread them on an art tray to dry (about 20 minutes).
- If using TP rolls, kids can paint them red, white, or blue while the pasta dries.
- Prepare your cardboard base.
Activity:
- Once the pasta and TP rolls are dry, an adult can hot glue the painted TP rolls to the bottom of the cardboard base, creating little "launchers" for the fireworks.
- Children can then use school glue to attach the painted pasta around the top of the TP rolls, or anywhere on the cardboard, to create firework bursts.
- Encourage them to use spiral pasta for the explosion's body and straight pasta pieces radiating outwards for the "streaks" of the fireworks. Star pasta can be added for extra detail.
- They can overlap pasta, mix colors, and create unique designs.
- Optionally, add star stickers to the cardboard or the TP rolls for extra sparkle.
- This craft allows for incredible creativity and textural exploration.
Educational Benefits: This is a fantastic craft for developing fine motor skills (painting small pasta, gluing), tactile sensory input, understanding shapes and textures, and fostering imaginative design. It's a wonderful example of turning everyday items into art.
Stars and Stripes Spectacular: Flag-Inspired Projects
The American flag is a powerful and recognizable symbol of the Fourth of July. Crafting flags in various ways provides a meaningful opportunity to discuss patriotism and history while engaging in creative expression.
Fingerprint Flag Craft
Fingerprint crafts are wonderfully personal and create cherished keepsakes. This flag project is perfect for even the youngest crafters.
Materials:
- Cardboard or thick paper cut into a rectangle
- Blue, red, and white washable paint
- Pencil and ruler
- Small paper plates or paint tray
Set-up:
- On the cardboard rectangle, use a ruler and pencil to draw light lines for the flag stripes (aim for 13, though fewer is fine for smaller flags).
- Draw a square in the upper left corner for the blue field.
- Squeeze small amounts of blue, red, and white paint onto separate paper plates.
Activity:
- First, have your child dip one finger into the blue paint and make "star" prints in the upper left square. Press firmly to get a good print.
- After wiping their finger clean, they can then dip a finger into red paint and make prints for the red stripes.
- For the white stripes, they can either leave the paper blank or use white paint, depending on the background color of your cardboard.
- This creates a beautiful, textured flag made entirely from their unique fingerprints.
- This is also a wonderful opportunity to talk about the 50 stars and 13 stripes of the real flag.
Educational Benefits: Excellent for sensory exploration, fine motor skill development, color recognition, and understanding patterns. It's also a personalized keepsake that can be proudly displayed year after year.
Paper Plate Flag Craft with Streamers
Paper plates are a versatile crafting staple, and combined with streamers, they make a wonderfully tactile and colorful flag! This is a simple craft that's great for preschoolers and toddlers.
Materials:
- Paper plate
- Blue acrylic paint
- Sponge (optional, for star shape)
- Red and white crepe paper streamers
- Tape or glue
- Scissors
- Small paintbrush
Set-up:
- Cut a paper plate in half. Paint one half blue and let it dry completely (about 30 minutes). This will be the upper corner of your flag.
- Cut red and white streamers into equal lengths, suitable for hanging down from the plate.
- If making sponge stars, cut a small star shape out of a sponge.
Activity:
- Once the blue paint is dry, children can tape or glue the red and white streamers to the flat edge of the painted blue paper plate, alternating colors to create the flag's stripes.
- If using the sponge, dip it into white paint and stamp white stars onto the blue section of the plate.
- This creates a delightful 3D flag that can sway in the breeze.
Educational Benefits: Promotes fine motor skills (cutting, taping/gluing, stamping), color recognition, pattern sequencing, and creative expression. It’s also a good way to introduce the concept of a flag’s basic design.
Ribbon, Lace, and Fabric Flag (Kid-Friendly Adaptation)
While the original might be a shabby-chic adult project, we can easily adapt this idea for a kid-friendly version focusing on textures and simple assembly.
Materials:
- Cardboard or heavy cardstock as a base
- Various scraps of red, white, and blue fabric, ribbon, and lace (different textures encouraged!)
- School glue or fabric glue
- White construction paper or felt for stars
- Scissors
Set-up:
- Cut the cardboard into a flag shape.
- Cut the fabric, ribbon, and lace into strips that will fit the flag's width.
- For stars, children can cut out small white stars from construction paper or felt.
Activity:
- Starting with the blue field, children can glue down blue fabric scraps or pieces of blue ribbon in the upper left corner.
- Then, they can glue down alternating red and white strips of fabric, ribbon, or lace to create the stripes. Encourage them to mix textures!
- Finally, glue the white stars onto the blue field.
- This creates a beautiful, textured flag collage that's rich in sensory detail.
Educational Benefits: Fantastic for tactile sensory input, color matching, understanding patterns, and developing fine motor skills through cutting and gluing different materials. It also encourages creative arrangement and design.
Pony Bead Flag Craft
Pony beads are wonderful for fine motor development, counting, and creating colorful patterns. This craft is a patient and rewarding project for slightly older children.
Materials:
- Cardboard (e.g., from a cereal box or pizza box)
- Blue, red, and white pony beads
- School glue (a generous amount!)
- Pencil and ruler
- Small dish for beads
Set-up:
- Cut a rectangle from cardboard for your flag.
- Lightly draw the flag's outline on the cardboard, including the blue field and the stripe divisions.
- Pour the red, white, and blue pony beads into separate dishes.
Activity:
- Start with the blue field: Apply a generous layer of school glue within the blue square outline.
- Have children carefully place blue pony beads onto the glue, filling the entire square. They can use their fingers or tweezers for extra fine motor practice.
- Repeat for the red stripes, applying glue and then carefully placing red pony beads.
- For the white stripes, either leave the cardboard showing (if it's white) or apply glue and white pony beads.
- For the stars, they can either leave small gaps within the blue beads, or glue tiny white paper stars on top once the beads are dry.
- Allow the flag to dry completely flat for several hours, or even overnight, to ensure all beads are securely attached.
Educational Benefits: This is a powerhouse for fine motor skills, hand-eye coordination, pattern recognition, counting, and patience. The tactile sensation of the beads is also engaging for sensory learners.
Popsicle Stick American Flags
Popsicle sticks (or craft sticks) are another simple, inexpensive material that can be transformed into a patriotic display. This craft combines painting and assembly for a classic look.
Materials:
- Popsicle sticks (regular or jumbo size)
- Red, white, and blue acrylic paint
- Paintbrushes
- School glue or hot glue (adult supervision for hot glue)
- Small wooden stars (or cut stars from white paper/felt)
- Backing paper (optional, for stability)
Set-up:
- Lay out 7-10 popsicle sticks side-by-side. An adult can use a thin line of hot glue or tape across the back to hold them together while painting, or kids can paint them individually.
- Set up paint stations with red, white, and blue paints.
Activity:
- Have children paint alternating red and white stripes across the popsicle sticks.
- Once dry, paint the top left corner blue.
- After all the paint is completely dry, glue white stars onto the blue section.
- If sticks were painted individually, once dry, arrange them in a flag pattern and glue them onto a piece of paper or another set of popsicle sticks (glued horizontally across the back) to hold the flag together.
- These make lovely small flags to display on a shelf or hang.
Educational Benefits: Develops fine motor skills, hand-eye coordination, color recognition, pattern sequencing, and spatial reasoning as they arrange the sticks and paint the stripes correctly.
Edible Art: Deliciously Patriotic Treats
At I'm the Chef Too!, we believe the kitchen is a fantastic laboratory for learning, and what better way to celebrate the Fourth of July than by making delicious, edible crafts? These activities not only satisfy a sweet tooth but also introduce basic food science, math, and following instructions in the most palatable way possible.
Fourth of July Ice Cream Cake
No-bake and absolutely delicious, an ice cream cake is a fantastic project for a hot summer day. Kids can take the lead in decorating this festive dessert.
Materials:
- Store-bought ice cream cake (or layers of ice cream in a pan)
- Whipped topping or frosting
- Red, white, and blue sprinkles
- Fresh berries (strawberries, blueberries, raspberries)
- Star-shaped cookie cutters (optional)
- Spatula or butter knife
Set-up:
- Ensure your ice cream cake is well-frozen but slightly softened for easier decorating.
- Wash and dry your berries.
- Have all decorating components ready in small bowls.
Activity:
- Kids can spread the whipped topping or frosting over the cake, practicing their spreading skills.
- Then, it's time for the creative part! Guide them to arrange the red and blue berries to create flag patterns. For example, blueberries in the top left corner, and alternating rows of sliced strawberries and whipped topping for the stripes.
- Sprinkle with red, white, and blue sprinkles for extra festive flair.
- If using star cookie cutters, they can press them gently into the whipped topping or frosting before adding sprinkles for star outlines.
- Return the cake to the freezer to firm up before serving.
Educational Benefits: This delicious activity teaches basic food preparation, following instructions, fine motor skills (arranging berries, spreading frosting), and encourages creative design with edible elements. It's a sweet introduction to kitchen confidence. For more exciting edible science adventures, explore our Galaxy Donut Kit, where kids can create their own edible solar system while learning about astronomy!
Candy Flag Brownies
Brownies are a perfect canvas for edible art, and with red, white, and blue candies, they transform into a delightful Fourth of July flag.
Materials:
- Baked brownies (either homemade or store-bought, baked in a rectangular pan)
- White frosting or whipped topping
- Red candies (e.g., M&M's, red licorice pieces)
- Blue candies (e.g., blue M&M's, blueberries)
- Spatula or butter knife
Set-up:
- Ensure brownies are completely cooled.
- Divide your red and blue candies into separate bowls.
Activity:
- Have kids carefully spread a layer of white frosting evenly over the cooled brownies.
- Guide them to designate a top-left square for the blue field. They can then fill this area with blue candies (or blueberries).
- For the stripes, they will create alternating rows of red candies and bare frosting (or white candies if you have them).
- This activity requires precision and patience, but the results are incredibly rewarding and delicious!
- This edible craft beautifully demonstrates how we teach complex subjects through tangible, hands-on, and delicious cooking adventures at I'm the Chef Too!.
Educational Benefits: Develops fine motor skills, pattern recognition, spatial reasoning, and introduces basic kitchen decorating techniques. It also reinforces color identification and counting in a fun, edible way.
USA Fizzy Ice
While not strictly "edible art" in the dessert sense, this fun science experiment often involves food-grade ingredients and is a fantastic way to introduce chemical reactions with a patriotic flair.
Materials:
- Ice (made in ice cube trays)
- Red and blue food coloring
- Baking soda
- Vinegar
- Squirt bottles or droppers
- Sensory bin or large tray
Set-up:
- Freeze ice cubes, ideally with a few drops of red or blue food coloring in some compartments for extra color.
- Once frozen, dump the colorful ice into a sensory bin.
- Sprinkle a generous amount of baking soda over the ice.
- Fill squirt bottles or small cups with vinegar. You can even add a few drops of food coloring to the vinegar for more color.
Activity:
- Hand the squirt bottles or droppers to the children and let them squirt the vinegar onto the ice.
- Watch the magic unfold as the vinegar reacts with the baking soda, creating a satisfying fizz and bubbling effect!
- Encourage them to observe what happens when different colored vinegar hits different colored ice.
- Discuss how a chemical reaction occurs when baking soda (a base) and vinegar (an acid) mix, releasing carbon dioxide gas, which causes the fizzing.
Educational Benefits: This is a classic, engaging science experiment that introduces concepts of chemical reactions, acids and bases, and observation. It's also great for fine motor skills (squeezing bottles) and sensory play. For another exciting chemical reaction that bubbles over with deliciousness, check out our Erupting Volcano Cakes Kit!
Fourth of July Lava Lamps
Another captivating science experiment, homemade lava lamps are mesmerizing and use easily accessible kitchen ingredients to demonstrate principles of density and immiscibility.
Materials:
- Clear glass jars or tall clear glasses
- Vegetable oil or baby oil
- Water
- Red and blue liquid watercolors or food coloring
- Alka-Seltzer tablets
- Star confetti (optional)
Set-up:
- Fill each clear glass jar about 3/4 full with oil.
- In a separate small cup, mix a few drops of red or blue food coloring with a small amount of water.
Activity:
- Carefully pour about 1/4 cup of the colored water into the oil-filled jar. Observe how the water sinks to the bottom because it's denser than the oil, and how the oil and water don't mix (immiscible).
- If desired, add a pinch of star confetti for a festive touch – watch how it floats between the oil and water.
- Break an Alka-Seltzer tablet into a few pieces. Drop one piece into the jar.
- Watch as it fizzes, creating colorful bubbles that rise and fall, mimicking a lava lamp!
- Explain that the Alka-Seltzer reacts with the water to produce carbon dioxide gas. This gas attaches to the colored water droplets, making them buoyant and causing them to rise. When the gas escapes at the surface, the water drops sink back down. You can repeat by adding more Alka-Seltzer.
Educational Benefits: A fantastic demonstration of density, immiscibility, and chemical reactions. It encourages observation, prediction, and critical thinking. It’s a captivating visual science lesson perfect for the Fourth!
Wear Your Patriotism: DIY Accessories & Decor
Beyond creating art for display, kids love making things they can wear or use to decorate their immediate surroundings. These crafts add a personal touch to the Fourth of July celebrations and allow children to express their patriotism proudly.
DIY Cardboard 4th of July Hats
A festive hat is the perfect accessory for a Fourth of July parade or backyard party. These cardboard hats are fun to make and customize.
Materials:
- Cardboard (cereal boxes, poster board, or craft cardboard)
- Red, white, and blue paint or markers
- Scissors
- Stapler or glue
- Glitter, star stickers, craft foam stars (for embellishment)
- Elastic string or strips of paper for headbands
Set-up:
- Cut cardboard into various hat shapes (e.g., top hats, party cones, or simple crowns). For a top hat, you might need a cylinder for the body, a wider circle for the brim, and a smaller circle for the top.
- Cut strips of cardboard or paper to make headbands that can be adjusted to fit different head sizes.
Activity:
- Kids can paint or color their hat shapes with patriotic colors. They can create stripes, stars, or even scenes of fireworks.
- Once dry, they can decorate their hats with glitter, star stickers, or foam stars.
- An adult can help assemble the hat pieces with staples or strong glue.
- Attach the hat to the headband or create an elastic chin strap.
- These hats are perfect for wearing during a parade or while waiting for fireworks!
Educational Benefits: Encourages creative expression, design skills, fine motor development (cutting, decorating), and introduces basic engineering concepts if constructing 3D hats.
Patriotic Duct Tape Parade Stick
Duct tape is incredibly versatile and makes for sturdy, colorful crafts. These parade sticks are perfect for waving during celebrations.
Materials:
- Tinfoil tubes (from aluminum foil or plastic wrap rolls) or wooden dowels
- Red, white, and blue duct tape
- Scissors
- Hole punch (optional)
- Ribbon or streamers (optional)
Set-up:
- Gather your tinfoil tubes or dowels.
- Have a variety of colored duct tape available.
Activity:
- Kids can wrap the tinfoil tube completely in red, white, and blue duct tape, creating stripes or patterns.
- For extra flair, an adult can punch holes near one end of the tube, and kids can thread colorful ribbons or streamers through the holes, securing them with a knot or tape. These will flutter in the wind when waved!
- These sticks are lightweight and fun to wave during parades or outdoor play.
Educational Benefits: Develops fine motor skills (tearing and sticking tape), pattern recognition, and encourages creative design. It's a great way to use recycled materials.
Red, White, and Blue Bandana Headband (No-Sew)
For a chic and simple patriotic accessory, these bandanas can be transformed into stylish headbands with minimal effort.
Materials:
- Red, white, or blue bandanas (or patriotic patterned fabric scraps)
- Scissors
- Fabric glue or hot glue (adult supervision for hot glue)
- Hair elastics (optional)
Set-up:
- Lay out bandanas. An adult may pre-cut strips for younger children.
Activity:
- An adult can help cut bandanas into long strips. For a wide headband, fold a bandana into a wide band. For a more elaborate look, cut multiple strips and braid or twist them together.
- Kids can apply fabric glue to secure folds or twists.
- For a simple elastic headband, an adult can glue the ends of a folded bandana strip around a hair elastic.
- These headbands are a fun fashion statement and a great way for kids to personalize their holiday look.
Educational Benefits: Enhances fine motor skills (cutting, folding, gluing), encourages design and fashion sense, and provides a practical, wearable outcome.
Patriotic Cardboard Tube Bracelet
Another wonderful way to repurpose cardboard tubes! These bracelets are easy to make and fun to decorate.
Materials:
- Empty toilet paper rolls or paper towel rolls
- Red, white, and blue construction paper
- School glue
- Glitter, star stickers, sequins, markers
- Scissors
Set-up:
- Cut toilet paper rolls into bracelet-sized rings (about 1-2 inches wide). Make sure to cut through one side of the ring so it can be slipped onto a wrist.
- Cut strips of construction paper to cover the rings.
Activity:
- Kids can glue strips of red, white, or blue construction paper around the cardboard rings.
- Once the paper is secure, they can go wild with decorations: drawing stars, adding glitter, sticking on sequins, or writing patriotic messages.
- The opening in the ring allows the bracelet to be gently bent and slipped onto a wrist.
Educational Benefits: Develops fine motor skills, cutting and gluing practice, creative expression, and encourages recycling and repurposing materials.
DIY Sparkler Tee
Personalized T-shirts are always a hit! This project allows kids to create a wearable piece of art that celebrates the Fourth of July with a "sparkler" design.
Materials:
- Plain white or light-colored T-shirt
- Fabric paint (red, white, blue, silver, gold)
- Paintbrushes or foam stampers
- Cardboard insert (to prevent paint bleed-through)
- Glitter glue (optional)
- Star stencils or cookie cutters (optional)
Set-up:
- Wash and dry the T-shirt.
- Place a piece of cardboard inside the T-shirt to prevent paint from seeping through to the back.
- Set up paint stations with fabric paints.
Activity:
- Kids can use paintbrushes to create "sparkler" designs on the T-shirt – radiating lines, starbursts, or abstract splashes of color.
- They can use stencils or cookie cutters to stamp star shapes.
- For extra sparkle, they can add lines of glitter glue after the fabric paint has dried.
- Follow the fabric paint instructions for curing (usually air drying for 24-72 hours, sometimes with heat setting).
- They'll love wearing their own festive design!
Educational Benefits: Encourages artistic expression, design skills, fine motor control, and introduces the concept of textile art. It results in a tangible, wearable item they can be proud of.
Beyond the Craft Table: More Engaging Fourth of July Activities
While many crafts focus on artistic creation, some activities blend learning with festive fun in different ways, touching on science, puzzles, and imaginative play.
Patriotic Luminaries
These beautiful lanterns add a lovely glow to evening celebrations and are a simple yet effective decorative craft.
Materials:
- Mason jars or clean glass jars
- Tissue paper (red, white, blue)
- School glue or Mod Podge
- Paintbrushes
- Small LED tea lights
Set-up:
- Clean and dry the jars thoroughly.
- Cut or tear tissue paper into small patriotic-colored squares or strips.
Activity:
- Kids can brush Mod Podge (or diluted school glue) onto a section of the jar.
- Then, they carefully place tissue paper pieces onto the wet glue, overlapping them slightly.
- Brush another layer of glue over the tissue paper to seal it.
- Continue until the entire jar is covered in a mosaic of red, white, and blue.
- Once dry, place an LED tea light inside. The light will glow beautifully through the colored tissue paper. Safety note: Only use LED tea lights, never real candles, to avoid fire hazards.
Educational Benefits: Develops fine motor skills, hand-eye coordination, color mixing (when colors overlap), and design skills. It also teaches about light and transparency in an artistic context.
Fourth of July Color by Code
Color-by-code printables are a fantastic way to blend learning with festive fun, perfect for practicing numbers, letters, or even simple math facts.
Materials:
- Fourth of July themed color-by-code printables (many free ones are available online, or create your own!)
- Crayons, markers, or colored pencils
Set-up:
- Print out the desired color-by-code sheets.
Activity:
- Ensure your child understands how to read the key at the top of the page (e.g., 1=Red, 2=Blue, 3=White).
- They will then color each numbered section in the picture according to the key.
- As they color, a hidden patriotic picture will be revealed! This "reveal" element is highly motivating for kids.
Educational Benefits: Reinforces number or letter recognition, color identification, following instructions, and develops fine motor skills through coloring. It's a quiet, engaging activity that builds focus and attention to detail.
Windsocks
Windsocks are a delightful decoration that dance in the breeze. Making them is a fun way to explore design and movement.
Materials:
- Construction paper (red, white, blue)
- Crepe paper streamers or ribbon (red, white, blue)
- Scissors
- Glue or tape
- Hole punch
- Yarn or string
- Star stickers or markers
Set-up:
- Cut a piece of construction paper (e.g., blue) into a rectangle for the main body of the windsock.
- Cut streamers or ribbons into long strips.
Activity:
- Decorate the main rectangle with stars, stripes, or other patriotic designs using stickers or markers.
- Form the decorated rectangle into a cylinder and secure the seam with glue or tape.
- Punch holes around the bottom edge of the cylinder.
- Have kids attach the streamers or ribbons to these holes, creating the "tails" of the windsock.
- Punch two holes at the top of the cylinder, opposite each other. Thread a piece of yarn or string through these holes to create a hanger.
- Hang your windsock outside and watch it flutter!
Educational Benefits: Develops fine motor skills (cutting, gluing, punching holes), encourages creative design, and introduces basic concepts of wind and movement.
Paper Tube Rockets
Kids love rockets, and the Fourth of July is a perfect time to make some that mimic fireworks launching into the sky.
Materials:
- Empty toilet paper rolls or paper towel rolls
- Construction paper (red, white, blue, silver)
- Scissors
- Glue
- Glitter, markers, star stickers (for decoration)
- Tissue paper or crepe paper (for "flames")
Set-up:
- Gather your cardboard tubes.
- Cut construction paper to fit around the tubes.
- Cut small circles for nose cones and strips for fins.
Activity:
- Kids can cover the cardboard tubes with patriotic construction paper.
- Help them cut out and glue on a cone-shaped nose (a circle cut to the center and then overlapped) and fins to the sides of the rocket.
- Decorate the rocket body with glitter, stars, and stripes.
- Cut strips of red, orange, and yellow tissue or crepe paper. Glue these inside the bottom opening of the rocket to look like "flames" when it "launches."
- Kids can then play with their rockets, imagining them blasting off into the sky!
Educational Benefits: Enhances fine motor skills (cutting, gluing, folding), encourages imaginative play, and introduces basic design and assembly concepts. It's a fun way to talk about propulsion and space in a playful context.
The I'm the Chef Too! Difference: Blending Fun, Food & Learning
As you can see, the world of kids' Fourth of July crafts is rich with opportunities for learning, creativity, and family fun. These hands-on activities resonate deeply with the core philosophy of I'm the Chef Too!. We understand that children thrive when they are actively engaged, exploring new concepts through sensory experiences and practical application.
At I'm the Chef Too!, our mission is precisely that: to ignite a passion for discovery by blending food, STEM, and the arts into one-of-a-kind "edutainment" experiences. Just as these crafts encourage fine motor skills, problem-solving, and creative expression, our unique kits take it a step further. We transform the kitchen into an exciting laboratory, where complex subjects like geology, chemistry, and astronomy become tangible and delicious through cooking. Imagine making edible erupting volcanoes, exploring the solar system with galaxy donuts, or even creating prehistoric fudgy fossils!
Our kits are developed by mothers and educators who understand the need for engaging, screen-free educational alternatives that also facilitate precious family bonding. Each month, we deliver a complete experience right to your door, packed with pre-measured dry ingredients, specialty supplies, and a beautifully designed curriculum that teaches STEM and art concepts in an approachable, exciting way. You don't have to worry about shopping for obscure ingredients or endless prep; we've handled the details so you can focus on the fun and the learning.
We believe in fostering a love for learning, building confidence, and developing key skills, all while creating joyful, delicious family memories. We don't promise your child will become a top scientist overnight, but we do promise a journey of discovery, laughter, and incredible edible creations that will spark their curiosity and encourage their natural inclination to explore.
Ready to embark on a culinary STEM adventure every month? Join The Chef's Club and enjoy free shipping on every box delivered right to your door! Choose from our flexible 3, 6, or 12-month pre-paid plans – perfect for ongoing enrichment or as a unique gift that keeps on giving. Discover how delightful learning can be when you combine food, science, and art with I'm the Chef Too!.
Conclusion
As the sun sets and fireworks begin their dazzling display, the memories created through hands-on kids' Fourth of July crafts will shine just as brightly. We've explored a vibrant array of activities, from the explosive artistry of salt-painted fireworks to the delicious science of fizzy ice and candy flag brownies. Each project offers a unique opportunity to blend patriotic celebration with valuable skill-building, fostering creativity, fine motor development, and critical thinking.
More than just pretty decorations or tasty treats, these crafts represent precious moments of family bonding, a screen-free alternative that truly engages young minds. They align perfectly with our philosophy at I'm the Chef Too!, where we champion the power of "edutainment" – making learning fun, tangible, and delicious. We believe in sparking curiosity through hands-on experiences, transforming everyday ingredients into tools for discovery, and nurturing that innate joy of learning that every child possesses.
This Fourth of July, let's cherish the process, celebrate the progress, and revel in the pure joy of creating together. Whether you're painting a popsicle stick flag or assembling a pasta firework, you're building more than just a craft; you're building confidence, imagination, and unforgettable family memories.
Don't let the learning and fun stop after the holiday! Keep the curiosity burning all year long. Ignite a passion for learning in your child and bring the excitement of culinary STEM adventures right to your kitchen. Join The Chef's Club today and experience the magic of I'm the Chef Too! with a new, unique kit delivered monthly, complete with free shipping in the US. It's the perfect way to continue fostering creativity, scientific exploration, and delicious family moments!
FAQ Section
Q1: What are the best Fourth of July crafts for toddlers and preschoolers? A1: For toddlers and preschoolers, focus on simple, sensory-rich crafts with minimal steps and lots of room for creative exploration. Great options include:
- Fingerprint Flag Craft: Easy and personal.
- Paper Plate Flag with Streamers: Involves painting, cutting (adult assistance), and gluing, with a fun 3D effect.
- TP Roll Fireworks Prints: Simple stamping with paint.
- USA Fizzy Ice: A captivating sensory science experiment. Always ensure adult supervision, especially with small pieces or paint.
Q2: How can I make Fourth of July crafts educational? A2: Many crafts naturally incorporate educational elements! You can enhance learning by:
- Discussing colors and shapes: "What colors are we using for our flag?" "What shape is this firework burst?"
- Practicing fine motor skills: Emphasize how cutting, gluing, and painting strengthen hand muscles.
- Introducing basic science: For fizzy ice or lava lamps, explain the chemical reactions or principles of density.
- Counting and patterns: "How many stripes does the flag have?" "Let's make an alternating red and white pattern."
- Talking about the holiday: Explain why we celebrate the Fourth of July and the symbols used in your crafts.
Q3: What are some good edible Fourth of July craft ideas? A3: Edible crafts are always a hit!
- Fourth of July Ice Cream Cake: Decorate a store-bought cake with berries and sprinkles.
- Candy Flag Brownies: Use white frosting and patriotic candies (M&M's, blueberries) to create a flag design on brownies.
- Patriotic Fruit Skewers: Arrange red (strawberries, raspberries), white (banana, marshmallow), and blue (blueberries) fruits on skewers. These are fantastic for introducing basic kitchen skills and food creativity, much like our I'm the Chef Too! kits blend food with STEM learning.
Q4: How can I make crafting less messy? A4: While some mess is inevitable and part of the fun, you can minimize it by:
- Preparing your workspace: Cover tables with old newspapers, a plastic tablecloth, or a craft mat.
- Using washable materials: Opt for washable paints and glues.
- Wearing aprons or old clothes: Protect clothing from stains.
- Using paint trays/palettes: Squeeze small amounts of paint onto trays to avoid spills.
- Having wipes or damp cloths handy: For quick clean-ups of hands and surfaces.
Q5: What STEM concepts can be taught through Fourth of July crafts? A5: Several crafts lend themselves to STEM learning:
-
Science:
- USA Fizzy Ice / Fourth of July Lava Lamps: Chemical reactions (acid-base), density, immiscibility.
- Salt Painted Fireworks: Capillary action, color diffusion.
- Technology: Understanding how tools (scissors, hole punches) work.
- Engineering: Designing and constructing 3D crafts like hats, windsocks, or rockets.
- Math: Counting (stars, stripes), pattern recognition, measuring (for cutting equal strips). These hands-on experiences are precisely how I'm the Chef Too! introduces complex STEM subjects in an engaging, accessible way through our cooking adventures. You can explore more STEM-infused fun by browsing our complete collection of one-time kits!
Q6: Where can I find more screen-free, educational activities for my kids? A6: If you love the idea of screen-free learning that blends creativity, STEM, and deliciousness, you've come to the right place! At I'm the Chef Too!, our monthly subscription boxes are specifically designed to deliver unique "edutainment" experiences directly to your door. Each box provides all the pre-measured dry ingredients and specialty supplies needed for a complete, hands-on cooking STEM adventure. It's the perfect way to consistently spark curiosity, foster skills, and create joyful family memories without relying on screens. Learn more about our flexible plans and how to bring a new adventure home every month by joining The Chef's Club today!