Endless Winter Fun: Your Guide to Making Snow STEM Activity

Table of Contents
- Introduction
- The Magic of Snow: More Than Just Water
- Why "Making Snow" is a Perfect STEM Activity
- Setting Up Your DIY Fake Snow Lab: Essentials for Experimentation
- Unleashing the Science: Exploring Different Fake Snow Recipes
- The Scientific Method in Action: Testing Your Fake Snow Creations
- Beyond the Experiment: Creative Play with Your DIY Snow
- Deepening the Learning: Connecting Fake Snow to Real-World Concepts
- The I'm the Chef Too! Difference: Blending Fun and Education
- Bringing STEM to Your Kitchen (and Beyond!)
- Conclusion
- FAQ: Your Making Snow STEM Activity Questions Answered
Has your child ever peered out the window on a cold winter morning, wishing for a blanket of pristine white snow to play in, only to find bare ground? For many children across the globe, the magic of a snowy day remains a distant dream, limited by geography or climate. But what if we told you that the enchantment of snow—and a fantastic opportunity for hands-on learning—is within reach, right in your own home? Imagine the squeals of delight as your little one plunges their hands into a soft, cold, and wonderfully moldable substance that feels just like the real thing, all while engaging in a powerful "making snow STEM activity."
At I'm the Chef Too!, we believe that the most profound learning happens when it's disguised as pure, unadulterated fun. Our mission is to blend food, STEM, and the arts into one-of-a-kind "edutainment" experiences, and creating fake snow is a perfect example of this philosophy in action. This activity isn't just about mixing a few ingredients; it's a journey into scientific inquiry, a dive into material properties, and a chance to engineer imaginative play. This comprehensive guide will walk you through various exciting fake snow recipes, highlight the rich STEM concepts embedded in each, and offer creative ways to extend the fun, ensuring that every moment is a discovery. Get ready to transform your kitchen into a winter wonderland laboratory, sparking curiosity and creativity in your children, fostering invaluable skills, and creating heartwarming family memories.
Introduction
There's a unique wonder in snow. Its delicate crystals, its soft, cool touch, and the way it transforms the landscape capture the imagination of children and adults alike. For those of us who don't live in regions blessed with regular snowfall, or even for those who do but want to enjoy winter fun year-round, the idea of creating our own snow is incredibly appealing. This isn't just about sensory play; it's a fantastic entry point into the world of Science, Technology, Engineering, and Math (STEM).
This blog post is your ultimate resource for making snow STEM activity right in your home. We'll explore several popular and easy-to-make fake snow recipes, breaking down the simple science behind each. You'll learn how to set up your own "snow lab," what supplies you'll need, and how to guide your child through observation and experimentation, much like real scientists do. Beyond the recipes, we’ll delve into how this playful activity naturally integrates core STEM principles, fostering critical thinking, problem-solving, and creativity. Get ready to roll up your sleeves, embrace a little mess, and embark on a delightful educational adventure that promises to be both informative and incredibly fun.
The Magic of Snow: More Than Just Water
Before we dive into creating our own wintry magic, let's take a moment to appreciate real snow. It’s far more intricate than just frozen water. Snowflakes begin their journey high in the clouds when tiny dust or pollen particles act as nuclei, attracting water vapor that freezes onto them. As these ice crystals fall through varying temperatures and humidities in the atmosphere, they grow, collide, and merge, forming the unique, six-sided structures we recognize as snowflakes. The specific conditions they encounter determine their size and shape – from delicate needles to broad, feathery stars.
Real snow possesses specific characteristics: it's cold (obviously!), often makes a distinctive crunching sound when compressed, can be packed into balls for snowmen and snowball fights, and melts to become wet. These properties make it ideal for building, playing, and transforming the world around us. While our homemade versions won't perfectly replicate every single characteristic of natural snow, the goal of a making snow STEM activity is to come as close as possible while understanding the scientific principles at play. It's about bringing the wonder of winter indoors, making it accessible for everyone, and turning a simple play session into a rich learning experience. This kind of tangible, hands-on exploration is at the heart of what we do at I'm the Chef Too!, making complex concepts understandable and exciting for young learners.
Why "Making Snow" is a Perfect STEM Activity
At first glance, mixing ingredients to create a sensory material might seem like just a fun craft. However, the process of making snow, especially when approached with an inquisitive mind, is a powerhouse of STEM learning. It beautifully embodies our I'm the Chef Too! mission: to blend food, STEM, and the arts into one-of-a-kind "edutainment" experiences that spark curiosity and creativity.
Here's how making fake snow engages each component of STEM:
Science (S)
- States of Matter and Phase Changes: While fake snow doesn't undergo the same phase changes as real snow, discussing the difference allows you to introduce concepts like solids, liquids, and gases, and how temperature affects them. You can talk about how water freezes to become ice, and how snow is actually formed from ice crystals in the air.
- Chemical Reactions: Many fake snow recipes involve chemical reactions. For instance, the classic baking soda and vinegar recipe demonstrates an acid-base reaction, producing carbon dioxide gas that creates fizz and texture. This is similar to the exciting chemical reactions that make our Erupting Volcano Cakes bubble over with deliciousness – a concept that is truly captivating for young scientists!
- Polymers and Absorption: Instant snow uses super-absorbent polymers. This is a fantastic opportunity to discuss how these long chains of molecules can absorb hundreds of times their weight in water, just like the polymers found in disposable diapers. It's a real-world application right at their fingertips!
- Material Properties: As children experiment with different recipes, they'll observe and compare properties like texture (gritty, smooth, fluffy), consistency (packable, crumbly), temperature (some mixtures actually feel cold!), and appearance (color, sheen). This is fundamental to scientific observation and classification.
- Observation and Hypothesis: Encourage children to make predictions ("What do you think will happen when we add water to this powder?"), observe carefully, and describe their findings. This mimics the scientific method.
Technology (T)
- Understanding Tools and Materials: Using measuring cups, spoons, bowls, and even blenders (with adult supervision!) helps children understand how different tools are used to achieve specific outcomes. They learn about the properties of the ingredients and how they interact.
- Application of Scientific Principles: The development of materials like super-absorbent polymers (used in instant snow) is a direct result of technological innovation driven by scientific discovery. Discussing these applications broadens their understanding of how science translates into practical uses in our daily lives.
- Data Recording (Optional for older kids): For older children, introduce the concept of recording observations in a simple chart or journal, just like a technologist might log data.
Engineering (E)
- Problem-Solving and Design: If a recipe isn't working as expected, children can experiment with ratios to achieve the desired consistency. "How can we make this snow more moldable?" "What if we add a little more conditioner?" This iterative process of adjusting and refining is core to engineering design.
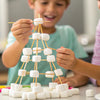
- Building and Construction: Once the fake snow is made, the ultimate engineering challenge is to build with it! Can they make a mini snowman? A tiny fort? This encourages spatial reasoning and practical application of the material's properties.
- Testing and Iteration: Trying different recipes and then testing them against criteria (like "can it form a snowball?") is a perfect example of engineering principles. They design (mix ingredients), build (the snow), test (its properties), and then refine their "design" by trying another recipe.
Math (M)
- Measurement: This is perhaps the most obvious mathematical component. Accurately measuring ingredients (cups, tablespoons, ounces) is crucial for consistent results. It reinforces fractions, ratios, and basic arithmetic.
- Comparison and Quantity: Children compare quantities ("which recipe uses more baking soda?") and understand concepts like "half" or "double" when scaling recipes.
- Data Analysis (for comparative experiments): If you make multiple types of snow and compare their properties, older children can use simple charts or graphs to represent their findings, analyzing which "snow" is "best" based on their criteria.
- Symmetry and Geometry (Optional): Discussing real snowflakes can lead to an exploration of hexagonal symmetry, introducing geometric concepts in a natural way. For another stellar example of blending math and art, consider how we might explore astronomy by creating your own edible solar system with our Galaxy Donut Kit.
By engaging in a making snow STEM activity, children aren't just playing; they're developing critical thinking skills, fostering a love for discovery, and building confidence in their ability to understand and interact with the world around them. This screen-free educational alternative is fantastic for facilitating family bonding and offers a tangible, hands-on experience that digital screens simply cannot replicate.
Ready for a new adventure every month? Don't miss out on the ongoing educational fun and convenience. Join The Chef's Club and enjoy free shipping on every box, bringing a fresh blend of food, STEM, and art right to your door!
Setting Up Your DIY Fake Snow Lab: Essentials for Experimentation
Turning your kitchen into a "fake snow lab" is part of the fun! Preparation makes the experience smoother and more educational. Think of yourselves as budding scientists gathering their tools and organizing their workspace.
General Supplies You'll Need:
- Mixing Bowls: Have several dedicated bowls, one for each snow recipe you plan to try. This prevents cross-contamination and makes comparisons easier.
- Measuring Tools: A set of dry measuring cups (1/2 cup, 1 cup) and measuring spoons (tablespoon, teaspoon) is essential for accurate recipe following. A beaker with metric and tablespoon measurements can add another layer of learning about different units.
- Stirring Utensils: Forks, spoons, or spatulas work well for mixing. Sometimes, hands are the best tools, especially for feeling the textures.
- Small Containers for Ingredients: Pre-measuring ingredients into smaller containers before mixing can help with organization, especially if you have multiple children participating.
- Labels (Index cards or paper & pen/marker): This is crucial for your "lab." Label each bowl with the recipe name as you create it (e.g., "Instant Snow & Water," "Baking Soda & Conditioner"). This helps with tracking and comparison later.
- Tray or Tarp (Optional but Recommended): Place a large tray, baking sheet, or even a plastic tablecloth under your mixing area to contain any spills or mess. This makes cleanup much easier.
- Paper Towels or Cleaning Cloths: Keep these handy for quick cleanups.
Specific Ingredients (Depending on Recipes Chosen):
- Instant Snow Powder (Sodium Polyacrylate): Often sold in science kits or online. A little goes a long way!
- Baking Soda: A kitchen staple, usually found in large boxes.
- White Hair Conditioner: Choose an inexpensive white conditioner; the color ensures your snow stays white.
- White Shaving Cream (not gel): The foam consistency is key.
- White Vinegar: Another common kitchen item.
- Paper Towels: For one specific recipe.
- Blue Food Coloring (Optional): Can be added to water when using instant snow to make the expansion more visible, or just for fun!
Safety Considerations:
While most ingredients for fake snow are relatively harmless, adult supervision is always key to any kitchen activity.
- Gloves (Optional but Recommended): If you or your child have sensitive skin, or if you're using vinegar, disposable gloves can prevent minor irritation.
- Avoid Ingestion: Remind children that while these ingredients are generally safe, the "snow" is not meant for eating. While our I'm the Chef Too! kits are designed for edible creations, these sensory play "snow" recipes are not.
- Clean Workspace: Ensure the area is clean before and after the activity.
By setting up your "lab" thoughtfully, you create an environment that encourages careful work, observation, and a truly immersive experience in the making snow STEM activity. This structured yet fun approach is central to our philosophy at I'm the Chef Too!, where we believe in providing children with engaging, hands-on learning that feels like play.
Not ready to subscribe just yet, but eager for a unique, educational adventure? You can explore our full library of adventure kits available for a single purchase in our shop. Find the perfect theme for your little learner and start your culinary STEM journey today!
Unleashing the Science: Exploring Different Fake Snow Recipes
Now for the exciting part – mixing up some snow! Each of these recipes offers a unique texture and demonstrates different scientific principles. Encourage your child to observe closely, touch, and describe what they notice as you create each batch.
Recipe 1: Instant Snow (Super Absorbent Polymer Snow)
This recipe often feels the most "magical" due to its rapid expansion!
-
What You Need:
- 1 scoop (or about 1 teaspoon) instant snow powder (sodium polyacrylate)
- 2 ounces (about 4 tablespoons) cool tap water
- Optional: 2-3 drops blue food coloring (added to water first)
- Small container/bowl
- Fork or stirring stick
-
Instructions:
- Measure the water into your bowl. If using food coloring, add it now and stir.
- Add the instant snow powder.
- Watch the incredible transformation! The powder will rapidly absorb the water and expand into a fluffy, white substance.
- Mix gently with your hand or a fork to ensure all the powder is hydrated.
- The Science Behind It: Instant snow powder is made of a super-absorbent polymer called sodium polyacrylate. Polymers are long chains of repeating molecules. This particular polymer has a special ability to soak up huge amounts of water – sometimes up to 500 times its own weight! The water molecules are drawn into the polymer chains through a process called osmosis, making the powder swell and expand into a fluffy, snow-like material. The process also causes a slight cooling sensation due to the endothermic reaction and evaporation.
- Properties: This snow is very fluffy and light. It often feels cool to the touch. It typically doesn't pack well into snowballs, making it better for sprinkling or sensory play.
Recipe 2: Baking Soda and Water Snow
This is a very simple recipe that offers a different tactile experience.
-
What You Need:
- 4 tablespoons baking soda
- 1 tablespoon cool tap water (or room temperature water)
- Bowl
-
Instructions:
- Measure the baking soda into your bowl.
- Slowly add the water, a little at a time, mixing with your hands.
- Continue to mix until the baking soda is just moistened enough to clump together when squeezed, but still crumbles easily. You want a consistency that feels like damp, crunchy snow. Adjust water slightly if needed.
- The Science Behind It: This is primarily a physical mixture. Baking soda (sodium bicarbonate) is a fine, crystalline powder. When water is added, it dissolves some of the baking soda and helps the individual crystals bind together. The "crunch" you feel comes from the friction of these tiny crystals against each other as they are compressed. It's a great way to explore how water acts as a binder!
- Properties: This snow has a distinct "crunch" when squeezed, similar to real snow. It can be somewhat moldable, though it might be a bit crumbly. It often feels cooler than the surrounding air.
Recipe 3: Baking Soda and Hair Conditioner Snow
This recipe creates a soft, moldable snow with a pleasant scent.
-
What You Need:
- 2 ½ cups baking soda
- ½ cup white hair conditioner (an inexpensive dollar store brand works great!)
- Large bowl
-
Instructions:
- Pour the baking soda into the large bowl.
- Add the hair conditioner.
- Mix well with your hands. It might take a few minutes of squishing and kneading to fully combine the ingredients and achieve a uniform, snowy texture.
- The Science Behind It: This is another physical mixture where the conditioner acts as a binding agent and lubricant. Hair conditioner typically contains emollients and fatty alcohols that give it a smooth, slippery feel. These ingredients help the baking soda particles stick together, making the snow moldable and soft. The baking soda itself can absorb some of the conditioner's moisture, contributing to the "snowy" feel. It might even feel slightly cool due to the conditioner's properties and potential evaporation.
- Properties: This snow is typically very soft, smooth, and easily moldable, making it great for building mini snowmen or snowballs. It often feels cold to the touch and smells nice from the conditioner.
Recipe 4: Baking Soda and Shaving Cream Snow
A fluffy and moldable option that's quick to make.
-
What You Need:
- 1 cup baking soda
- 1 cup white shaving cream (make sure it's foam, not gel!)
- Bowl
- Fork or hands
-
Instructions:
- Add the baking soda to your bowl.
- Squirt in the shaving cream.
- Mix thoroughly with a fork or your hands. You may need to add a few more drops of water if it's too crumbly, or a bit more baking soda if it's too wet, depending on your shaving cream and local humidity.
- The Science Behind It: Shaving cream is essentially soap, water, and air, whipped into a foam. The baking soda particles get suspended within this foam, creating a light, airy, and moldable texture. The chemical interaction between the slightly acidic shaving cream and the basic baking soda can contribute to the texture, similar to a very mild acid-base reaction, though it's less pronounced than with vinegar. The rapid expansion of shaving cream from the can also demonstrates gas expansion.
- Properties: This snow is typically very light, fluffy, and cold to the touch. It's often highly moldable and can hold its shape well for building.
Recipe 5: Paper Towels, Baking Soda, and Vinegar Snow
This recipe introduces a fascinating chemical reaction and a unique texture.
-
What You Need:
- 1 paper towel, cut into tiny pieces (yields about 1 cup of pieces)
- ½ cup baking soda
- 3 tablespoons white vinegar
- Large bowl
- Separate cup for vinegar
- Optional: Gloves (vinegar can irritate sensitive skin)
-
Instructions:
- Tear or cut the paper towel into very small pieces. The smaller, the better for a snow-like texture. Place them in your large bowl.
- Add the baking soda to the paper towel bits and gently mix them together.
- In a separate cup, measure out the vinegar.
- Slowly pour the vinegar into the bowl with the paper towel and baking soda. You'll observe fizzing!
- Mix well with your hands, squishing and combining the ingredients until the fizzing subsides and a snow-like consistency is formed.
- The Science Behind It: This recipe features a classic acid-base chemical reaction between the baking soda (a base) and vinegar (an acid). When they combine, they produce carbon dioxide gas, which creates the fizzing and lightens the mixture. The paper towel pieces absorb the moisture and gas, acting as a binder and adding texture, mimicking the fibrous nature of some snow types when it clumps.
- Properties: This snow has a rougher texture due to the paper pieces but can still have a surprising crunch. Its moldability will vary depending on how much liquid is absorbed and the fineness of the paper.
Each of these recipes offers a distinct sensory and scientific experience, making the making snow STEM activity a multi-faceted exploration. By trying several, your child can truly engage in comparative analysis, a core scientific skill.
Don't let the learning stop here! The best way to keep the STEM adventures coming is by joining our monthly "Chef's Club." With free shipping in the US and flexible plans, it's the gift of learning that lasts all year. Join The Chef's Club today!
The Scientific Method in Action: Testing Your Fake Snow Creations
Once you've made a few different batches of fake snow, the true STEM fun begins: testing them like real scientists! This is where children develop critical thinking, observation skills, and learn to compare and contrast.
Defining "Good Snow" Properties
Before you begin testing, engage your child in a discussion about what makes "real" snow fun to play with. What qualities does it have? Their answers will help define your testing criteria. Here are some common properties to consider:
- Coldness: Does it feel cool to the touch? (Surprisingly, some fake snows do!)
- Appearance: Does it look like real snow? Is it white? Fluffy?
- Texture: How does it feel? Is it smooth, gritty, soft, rough, crumbly?
- Sound: Does it make a "crunch" when you squeeze it?
- Moldability: Can you pack it into a snowball? Can you build a mini snowman?
- Durability/Longevity: How long does it last before drying out or changing consistency?
Setting Up Your Tests: A Comparative Lab
For each batch of fake snow, you'll conduct the same "tests" to ensure a fair comparison. This is a great way to introduce the concept of controlled variables in an experiment.
- Labeling is Key: Ensure each bowl of snow is clearly labeled with its recipe name (e.g., "Instant Snow," "Baking Soda & Conditioner").
-
Sensory Exploration:
- The Touch Test: Have your child gently touch each snow type. Ask: "How does this feel? Is it warm or cool?" Record their observations.
- The Look Test: Visually inspect each snow. Ask: "Does this look like real snow to you? What color is it? Is it fluffy or dense?"
- The Sound Test: Take a small handful of each snow and squeeze it. Does it make any sound? A little crunch?
-
The Moldability Challenge: This is often the most fun and definitive test for kids!
- Snowball Test: Try to form a small ball from each type of snow. "Can you roll this into a snowball?" "Does it hold its shape?"
- Mini Snowman Test: If it passes the snowball test, can you stack two balls to make a tiny snowman? This tests its structural integrity.
- Observation Over Time: Set a timer and check your snow samples after an hour, two hours, and then 24 hours. Does the texture change? Does it dry out? Does it become harder or softer?
Recording Your Findings (Optional Lab Worksheet)
For older children, or those who love to draw, create a simple "Fake Snow Lab Worksheet." This doesn't need to be complex – just a piece of paper divided into sections for each snow type. For each snow, they can:
- Draw a picture of what it looks like.
- Write down words to describe its feel, look, and sound.
- Circle "Yes" or "No" if it can form a snowball or snowman.
- Give it a "Snow Score" (e.g., 1-5 for how much it's like real snow).
Analyzing the Results and Drawing Conclusions
Once all tests are complete, gather your "data."
- Compare and Contrast: Look at all the observations. Which snow felt the coldest? Which could make the best snowball? Which one looked the most like real snow?
- Discuss Preferences: While one snow might be "best" for certain qualities (like moldability), another might win for fluffiness. There's no single "right" answer, and that's okay! Encourage a healthy debate based on their observations. For example, some might find the baking soda and conditioner recipe to be the most authentic due to its moldability and cool feel, while others might prefer the instant snow for its visual resemblance to powdery snow.
- Relate to Science: Revisit the science behind each recipe. Why did the instant snow feel cold? (Evaporation, endothermic reaction). Why did the baking soda and vinegar fizz? (Carbon dioxide gas from a chemical reaction). This reinforces their understanding.
By systematically testing and analyzing, your child isn't just playing; they're actively participating in the scientific method, developing critical thinking, and learning to draw conclusions based on evidence. This hands-on, inquiry-based learning is a cornerstone of our educational philosophy at I'm the Chef Too!.
If you're looking for more exciting STEM adventures delivered right to your home, remember to Join The Chef's Club! Each month brings a new, unique experience complete with pre-measured dry ingredients and specialty supplies, making family learning convenient and fun.
Beyond the Experiment: Creative Play with Your DIY Snow
Once the scientific exploration is complete, the art and imaginative play component of our "edutainment" truly shines! Your homemade snow is a fantastic sensory medium for open-ended play, sparking creativity and fostering imaginative scenarios.
Here are some ideas to extend the fun:
-
Build a Mini Winter Wonderland:
- Snowmen & Snow Animals: Use the most moldable fake snow (like baking soda and conditioner, or baking soda and shaving cream) to sculpt tiny snowmen, snow dogs, or other creatures. Use peppercorns for eyes, a tiny carrot scrap for a nose, or small twigs for arms.
- Mini Landscapes: Use a shallow tray or cookie sheet as your base. Add small toy trees (from train sets or craft stores), miniature houses, plastic animals (polar bears, penguins, arctic foxes), or even small action figures. Create paths, hills, or even "frozen" ponds using blue paper or foil.
- Sparkle & Shine: Add a sprinkle of iridescent glitter to your snow for an extra magical, frosty effect.
-
Sensory Bin Fun:
- Pour the different types of fake snow into separate bins or large containers. Provide scoops, spoons, small cups, and various figurines. Children can explore the different textures, scoop and pour, and engage in imaginative play without specific instructions.
- Add small items like buttons, pom-poms, pipe cleaners, or even a few clean pinecones for additional sensory exploration and building.
-
Pretend Snowball Fight (Soft Version!):
- If you have a particularly moldable batch, gently form small, soft "snowballs" and have a very gentle, indoor snowball toss. Emphasize light throws and aiming for soft targets, or simply toss them into a bucket.
-
Artistic Impressions:
- Press leaves, cookie cutters, or small toys into the snow to make impressions. This is a great way to explore negative space and simple design.
-
Themed Play:
- Arctic Expedition: Imagine you're explorers in the Arctic! Use the snow to create an icy landscape for toy polar bears, seals, and Inuit figures.
- Winter Baking: Pretend the snow is flour or sugar. Use small measuring cups, spoons, and cookie cutters to "bake" snow cookies or cakes. This helps reinforce those math skills learned during the initial measuring.
- I'm the Chef Too! Connection: Just like our Peppa Pig Muddy Puddle Cookie Pies bring beloved characters into edible adventures, your DIY snow can become the backdrop for any imaginative play scenario, blending the arts with sensory and scientific exploration.
Hypothetical Case Study: The Rodriguez Family's Arctic Adventure
Seven-year-old Leo, a budding paleontologist, was initially skeptical about "fake" snow. His parents, looking for a screen-free weekend activity, introduced him to the baking soda and conditioner recipe. As Leo mixed the ingredients, he was amazed by how cold and soft it felt. They decided to make an "Arctic expedition" rather than just a snowman. Using a large sensory bin, Leo shaped snow mountains and valleys. He then used small plastic dinosaurs (which he insisted had once roamed icy lands!) and arctic animals to populate his landscape. His dad helped him rig a "zip line" for a tiny explorer figure, using string and clothespins, extending the engineering challenge. The activity lasted for hours, fostering not just an understanding of material properties, but also imaginative storytelling and collaborative problem-solving. This exemplifies how our unique approach at I'm the Chef Too! of teaching complex subjects through tangible, hands-on, and delicious cooking adventures can be adapted to other STEM play, sparking a holistic learning experience.
Remember, the goal is to follow your child's lead once the snow is made. The open-ended nature of sensory play allows children to explore their creativity, develop fine motor skills, and express themselves without rigid rules. It's a testament to how even simple materials can provide rich learning and joyful memories.
Deepening the Learning: Connecting Fake Snow to Real-World Concepts
The making snow STEM activity is more than just fun; it's a springboard for deeper conversations and connections to the world around us. As parents and educators, we have the unique opportunity to leverage these hands-on experiences to foster a genuine love for learning.
Here are some discussion points to help expand the educational impact:
-
Polymers in Everyday Life:
- If you used instant snow, revisit the concept of polymers. Explain that these amazing long chains of molecules are used in many common products beyond fake snow and diapers. Discuss how they are used in:
- Absorbent Pads: In wound dressings or for cleaning up spills.
- Gelling Agents: In some foods (though different types of polymers) to give texture, or in cosmetics.
- Slow-Release Fertilizers: Polymers can trap water and nutrients, slowly releasing them to plants.
- This helps children see how scientific discoveries translate into useful technologies that impact their daily lives.
- If you used instant snow, revisit the concept of polymers. Explain that these amazing long chains of molecules are used in many common products beyond fake snow and diapers. Discuss how they are used in:
-
Chemical Reactions All Around Us:
- For recipes involving baking soda and vinegar (or even subtle reactions with shaving cream/conditioner), talk about what a chemical reaction is. It's when two or more substances combine to create something new.
- Point out other common chemical reactions:
- Baking a cake (ingredients transform into something new with heat).
- Rust forming on metal.
- Digestion in our bodies.
- The fizzing of the baking soda and vinegar is a visible sign of a gas (carbon dioxide) being produced, which is the same gas we exhale!
-
States of Matter and Phase Changes (Revisited):
- While fake snow doesn't melt in the same way, you can compare its properties to real ice or water.
- Discuss how water can exist as a solid (ice/snow), liquid (water), or gas (steam/vapor). Talk about how temperature influences these changes.
- You can even put a small sample of your fake snow in the freezer and see if it changes significantly (some might get firmer, but won't become truly "frozen" like water).
-
Weather and Climate:
- This activity is a natural lead-in to discussing real weather phenomena. How does real snow form? What are blizzards? Why do some places get snow and others don't?
- Introduce concepts of temperature (freezing point) and moisture in the air. This helps children understand the conditions necessary for different types of precipitation.
-
The Importance of Experimentation and Observation:
- Reinforce that scientists learn by trying things, observing carefully, and recording what happens – even when things don't go as expected! Every "failed" attempt is a learning opportunity.
- Emphasize that the process of asking questions, experimenting, and discovering is just as important, if not more important, than getting a "right" answer.
- This fosters a growth mindset, encouraging perseverance and curiosity.
At I'm the Chef Too!, our unique approach, developed by mothers and educators, is all about taking these complex subjects and making them tangible and exciting. We don't promise that your child will become a top scientist overnight, but we do promise to foster a genuine love for learning, build confidence through hands-on success, and provide meaningful screen-free alternatives that lead to joyful family memories. Our engaging activities are designed to spark that "aha!" moment and connect the dots between what children learn in their playtime and how it applies to the real world.
For parents and educators seeking to bring more of this dynamic, hands-on STEM learning into their homes or classrooms, remember that our one-time kits are always available. Browse our complete collection of one-time kits to find your next educational adventure!
The I'm the Chef Too! Difference: Blending Fun and Education
At I'm the Chef Too!, we wholeheartedly believe that learning should be an adventure—a delicious, hands-on, and unforgettable one! Our approach to "edutainment" is truly unique, seamlessly weaving together the wonders of science, technology, engineering, and mathematics with the creativity of culinary arts and artistic expression. We're not just about delivering ingredients; we're about delivering experiences that spark imagination and build foundational skills.
Our journey began with mothers and educators who understood the profound impact of tactile, real-world learning. We saw the potential in turning complex subjects into tangible, delightful cooking adventures. This is why every I'm the Chef Too! kit is thoughtfully designed to be more than just a recipe; it's a complete, immersive learning journey.
Consider how a making snow STEM activity mirrors our core values:
- Sparking Curiosity and Creativity: Just as children are fascinated by the transformation of powder to snow, our kits present engaging themes that naturally ignite curiosity, encouraging kids to ask "how?" and "why?" and then explore the answers through hands-on creation.
- Facilitating Family Bonding: These activities are designed for families to do together. The shared experience of mixing, experimenting, and discovering creates invaluable moments of connection, conversation, and collaboration. It's about cooking up memories as much as it is about cooking up treats.
- Providing a Screen-Free Educational Alternative: In an increasingly digital world, we offer a refreshing break. Our kits and activities encourage children to step away from screens and engage with the physical world, developing fine motor skills, problem-solving abilities, and sensory awareness.
- Teaching Complex Subjects Through Tangible Adventures: We take abstract scientific principles and bring them to life. Whether it's the chemistry of baking, the physics of food structures, or the mathematics of measurement, our activities make these concepts concrete, understandable, and, most importantly, fun.
- Developed by Mothers and Educators: This ensures that every experience is not only educational and safe but also practical for busy families and effective in a learning environment. We understand what kids love and how they learn best.
When you engage in a making snow STEM activity, you're embracing the very spirit of I'm the Chef Too! – a commitment to hands-on learning that transforms playtime into a powerful educational tool. We provide all the specialized tools and pre-measured dry ingredients in our kits, but the fundamental principles of discovery and connection remain the same.
Ready to bring this magic to your home every single month? With our Chef's Club subscription, a new adventure arrives at your door with free shipping in the US. Choose from our flexible 3, 6, or 12-month pre-paid plans – perfect for ongoing enrichment or as a truly unique gift that keeps on giving. Join The Chef's Club and embark on endless "edutainment" journeys!
Bringing STEM to Your Kitchen (and Beyond!)
The beauty of a making snow STEM activity is how easily it demonstrates that science is everywhere—even in your kitchen! This isn't just a one-off experiment; it's an invitation to explore the scientific principles embedded in everyday activities. From the moment you measure ingredients for a cake to the way bread rises, STEM is at play.
At I'm the Chef Too!, we make it easy to continue these exciting explorations. Our expertly designed kits go beyond snow, covering a vast range of STEM and art topics through delicious, edible projects. Imagine discovering the geology of crystals while making rock candy, or understanding the principles of buoyancy and density as you bake a floating boat. Every kit is a complete experience, providing not only pre-measured dry ingredients but also specialty supplies, ensuring you have everything you need for a seamless and educational adventure.
Perhaps your child was captivated by the chemical reactions in the baking soda and vinegar snow. They might love delving deeper into acids and bases with our Erupting Volcano Cakes, where they create a delicious cake that actually "erupts" with edible lava! Or if the idea of polymers sparked their imagination, thinking about how materials expand and change, they might enjoy exploring other physical transformations in our wide range of activities.
Whether you're looking for a delightful one-time activity or an ongoing source of engaging learning, we've got you covered. Browse our complete collection of one-time kits to find the perfect theme that matches your child's current interests. Or, for consistent, hassle-free fun, consider our monthly subscription. We're dedicated to making STEM and the arts accessible, exciting, and truly memorable for children and families.
Conclusion
The "making snow STEM activity" is more than just a creative pastime; it's a dynamic gateway to understanding fundamental scientific principles, fostering critical thinking, and igniting a lifelong passion for discovery. By mixing a few simple ingredients, you and your child can explore concepts like chemical reactions, material properties, measurement, and the scientific method—all while creating a delightful, tactile experience that brings the magic of winter indoors, regardless of the season or your geographic location.
At I'm the Chef Too!, we champion this kind of hands-on, engaging, and screen-free learning. Our mission is to transform complex subjects into delicious, tangible adventures, encouraging children to think like scientists, create like artists, and problem-solve like engineers. Developed by mothers and educators, our unique "edutainment" experiences are designed not just to teach, but to spark genuine curiosity, build confidence, and, most importantly, facilitate invaluable family bonding moments.
So, gather your ingredients, set up your mini lab, and embark on this wonderful making snow STEM activity. Watch as your child’s eyes light up with understanding and delight. And when you're ready for more innovative and exciting learning experiences, remember that a new adventure is always just around the corner. Give the gift of learning that lasts all year, with convenience and creativity delivered right to your door.
Ready to make every month an unforgettable journey of discovery? Join The Chef's Club today and let the "edutainment" begin!
FAQ: Your Making Snow STEM Activity Questions Answered
Q1: Is homemade fake snow safe for kids to play with?
A1: Generally, yes, the ingredients used in these recipes (baking soda, conditioner, shaving cream, vinegar, instant snow powder) are considered non-toxic for external use. However, it's crucial to always supervise children during play, especially younger ones, and ensure they understand that the fake snow is not for eating. While I'm the Chef Too! specializes in edible STEM experiences, these particular snow recipes are for sensory play, not consumption. Some ingredients, like vinegar, can cause mild skin irritation in sensitive individuals, so optional gloves are recommended.
Q2: How long does homemade fake snow last?
A2: The longevity of fake snow depends on the recipe and environmental factors like humidity.
- Instant Snow (Sodium Polyacrylate): Can last for several days to a week or more if kept in an airtight container. It may dry out over time but can often be rehydrated by adding a little more water.
- Baking Soda & Water: Tends to dry out faster, often within a day, becoming hard and crumbly.
- Baking Soda & Conditioner/Shaving Cream: These recipes generally last longer, typically a few days to a week, especially if stored in an airtight container to prevent drying.
- Paper Towels, Baking Soda & Vinegar: This one also dries out relatively quickly due to the reaction and paper base, usually within a day or two.
Q3: How do I clean up fake snow?
A3: Cleanup depends on the type of fake snow:
- Instant Snow: Can be swept or vacuumed when dry. If wet, it can be scooped up with paper towels. Avoid washing large quantities down the drain, as it can swell and clog pipes. Dispose of it in the trash.
- Baking Soda & Water/Conditioner/Shaving Cream: These are generally easy to wipe up with a damp cloth. Most can be rinsed down the drain with plenty of water, but avoid dumping large clumps.
- Paper Towels, Baking Soda & Vinegar: Best to scoop up and dispose of in the trash due to the paper bits. Always recommend setting up on a tray or easy-to-clean surface like a plastic tablecloth from the start to minimize mess.
Q4: Can I use different colors for my fake snow?
A4: Yes! Food coloring can be added to the water component of most recipes (especially instant snow or baking soda/water) to create colorful snow. Just remember that the colors might transfer to hands during play, so prepare for a little stained fun!
Q5: What are the key STEM concepts taught through making snow?
A5: Making snow is rich in STEM learning:
- Science: Chemical reactions (acid-base), material properties (texture, absorbency), states of matter, observation, hypothesis.
- Technology: Understanding how materials are used, the application of scientific principles (polymers).
- Engineering: Problem-solving through adjusting ingredient ratios, designing structures (snowmen), testing prototypes.
- Math: Measurement (fractions, volume), comparison, data recording (for older kids).
Q6: My child isn't interested in the "science" part. How can I still make it educational?
A6: That's perfectly fine! At I'm the Chef Too!, we believe in "edutainment" – learning through play. Even if your child is just enjoying the sensory experience, they are still developing crucial skills:
- Fine Motor Skills: Mixing, squeezing, molding.
- Sensory Exploration: Understanding textures, temperatures, and smells.
- Imagination and Creativity: Building and role-playing with the snow.
- Language Development: Describing what they feel and see. The scientific explanations can be gently introduced through open-ended questions ("What do you notice happening here?"), rather than formal lessons. The goal is to spark curiosity, not force memorization.
Q7: Where can I find instant snow powder?
A7: Instant snow powder (sodium polyacrylate) can often be found in science kit sections of toy stores, craft stores, or purchased online through various retailers. A small amount usually comes in a container with a scoop, designed specifically for this type of activity.
Q8: What if my fake snow isn't the right consistency?
A8: This is a great opportunity for engineering and problem-solving!
- Too Wet/Sticky: Add a little more of the dry ingredient (baking soda, instant snow powder).
- Too Dry/Crumbly: Add a tiny bit more of the liquid ingredient (water, conditioner, shaving cream) incrementally, mixing well after each addition until the desired consistency is reached. Encourage your child to experiment with the ratios and observe how the texture changes. This iterative process is how engineers refine their designs!