Easy Kids Holiday Ornament Crafts & Family Fun

Table of Contents
- Introduction
- Why Kids Holiday Ornament Crafts Are More Than Just Decorations
- Getting Started: Essential Supplies for Your Crafting Nook
- A Treasure Trove of Kids Holiday Ornament Craft Ideas
- Beyond the Tree: Displaying and Gifting Kids' Creations
- Making it a Learning Experience: Integrating STEM & Art
- The I'm the Chef Too! Difference: Fostering Curiosity Year-Round
- Conclusion
- Frequently Asked Questions (FAQ)
Remember that lopsided, glitter-covered ornament from your childhood? The one that looked nothing like the picture in the craft book but hung proudly on the tree year after year, a shimmering testament to tiny hands and boundless imagination? That’s the magic of kids holiday ornament crafts! As the festive season approaches, many of us find ourselves searching for ways to slow down, connect with our children, and create memories that will truly last. In a world increasingly dominated by screens, the simple act of crafting together offers a refreshing, tangible, and incredibly rewarding alternative. This post isn't just about making pretty decorations; it's about fostering creativity, developing essential skills, and weaving cherished family traditions that sparkle brighter than any store-bought bauble. We'll explore a sleigh-full of delightful ornament ideas, from classic favorites to innovative twists, ensuring every child, regardless of age or skill level, can experience the joy of making something truly special. Get ready to transform everyday materials into holiday treasures, all while building confidence and sparking a lifelong love for hands-on discovery!
Introduction
The holidays are a time for warmth, wonder, and creating those heartwarming family traditions that we look back on fondly for years to come. While twinkling lights and festive music certainly set the scene, there's a unique joy that radiates from a Christmas tree adorned with homemade ornaments. Each little craft tells a story, a tiny timestamp of a child's growth, imagination, and the precious moments spent together. Far from being just decorative items, these projects are powerful catalysts for learning, bonding, and imaginative play.
At I'm the Chef Too!, we deeply understand the value of hands-on learning and the magic that happens when children engage their minds and bodies in creative activities. Our mission is to blend food, STEM, and the arts into one-of-a-kind "edutainment" experiences, and holiday ornament crafting perfectly embodies this philosophy. Just like our cooking adventures, making ornaments encourages children to explore, experiment, and express themselves in a tangible way. This comprehensive guide is designed to inspire parents and educators with a wealth of ideas for kids holiday ornament crafts, offering practical advice, educational insights, and plenty of opportunities to make this holiday season truly unforgettable. We believe in sparking curiosity and creativity in children, facilitating family bonding, and providing screen-free educational alternatives that lead to genuine discovery and delicious memories.
Why Kids Holiday Ornament Crafts Are More Than Just Decorations
The allure of a beautifully decorated tree is undeniable, but when those decorations are crafted by the enthusiastic hands of children, they take on an entirely new level of significance. These aren't just baubles; they're tiny portals to moments shared, lessons learned, and imaginations unleashed. Engaging in holiday ornament crafts offers a multitude of benefits that extend far beyond simply having something new to hang on the tree.
The Magic of Making: Sparking Creativity & Imagination
Every child possesses an innate wellspring of creativity, and crafting provides the perfect outlet for it. When given a pile of materials – be it clay, felt, pinecones, or glitter – children are invited into a world of endless possibilities. There’s no single "right" way to make an ornament; instead, it’s an invitation to explore textures, colors, and forms, to imagine a miniature world, a festive character, or an abstract design. This freedom of expression is crucial for developing a child's artistic sensibilities and their ability to think outside the box. It teaches them that their unique ideas are valuable and that beauty can be found in the unconventional. This kind of imaginative play builds confidence and encourages a playful approach to problem-solving, skills that are invaluable in all areas of life, much like how our science-based cooking kits challenge kids to think creatively in the kitchen.
Building Essential Skills: Fine Motor, Problem-Solving, Patience
While kids are immersed in the fun of making, they are simultaneously honing a myriad of developmental skills without even realizing it. The intricate tasks involved in ornament crafting – cutting shapes, gluing small pieces, threading beads, painting details – are excellent exercises for fine motor skill development. These small, precise movements strengthen hand-eye coordination and dexterity, which are fundamental for everything from writing to self-care.
Crafting also inherently involves problem-solving. What happens if the glue doesn't hold? How can I attach this piece so it stays? Which colors will look best together? Children learn to assess situations, experiment with different solutions, and adapt their plans. This iterative process fosters resilience and an understanding that mistakes are simply opportunities for learning. Furthermore, many crafts require a degree of patience, from waiting for paint to dry to carefully assembling multiple components. In our instant-gratification world, cultivating patience is a precious skill, teaching children the satisfaction of working towards a finished product. These are precisely the kinds of tangible, hands-on learning moments we champion at I'm the Chef Too!, believing that genuine understanding comes from doing.
Family Bonding & Cherished Memories: Screen-Free Togetherness
Perhaps one of the most heartwarming benefits of holiday ornament crafting is the unparalleled opportunity for family bonding. In our busy lives, dedicated screen-free time together can feel like a rare commodity. Crafting sessions provide a natural space for conversation, laughter, and collaborative effort. Parents can guide, encourage, and share stories, while children revel in the undivided attention and shared activity.
Imagine a cozy afternoon, hot cocoa steaming, festive music playing softly, and everyone gathered around a table, cutting, gluing, and chatting. These are the moments that truly form the fabric of family life, creating memories that will be recalled with fondness for years to come. Each year, as those handmade ornaments emerge from storage, they don't just decorate the tree; they tell a story of a particular holiday season, a child's age, and the love that went into making them. This tradition creates a tangible history that grows with your family. Ready for a new adventure every month that continues this spirit of hands-on family fun? Join The Chef's Club and enjoy free shipping on every box, bringing creative edutainment right to your door!
A Dash of STEM & Arts: Our "Edutainment" Philosophy
At I'm the Chef Too!, we believe that learning is most impactful when it's engaging, interdisciplinary, and fun. Holiday ornament crafts are a perfect example of how STEM (Science, Technology, Engineering, and Math) principles can be seamlessly integrated with artistic expression. From understanding the chemical reactions in certain paints or glues, to the engineering involved in building a stable structure, to the mathematical patterns in snowflake designs, these activities are ripe with educational potential.
When children experiment with different materials and techniques, they are essentially conducting mini-experiments. They observe, hypothesize, test, and refine, all fundamental aspects of scientific inquiry. The artistic component allows them to personalize their creations, fostering self-expression and an appreciation for aesthetics. This unique approach of teaching complex subjects through tangible, hands-on, and delicious cooking adventures is central to our mission, and it extends beautifully to the world of holiday crafting. We're committed to sparking curiosity and creativity in children, facilitating family bonding, and providing a screen-free educational alternative that blends food, STEM, and the arts into one-of-a-kind "edutainment" experiences.
Getting Started: Essential Supplies for Your Crafting Nook
Before diving headfirst into a flurry of glitter and glue, it’s helpful to have a well-stocked crafting station. Think of it as preparing your kitchen for a delicious recipe – having the right ingredients and tools makes the process smoother and more enjoyable for everyone. While you don't need to buy out the entire craft store, a few basic supplies will open up a world of possibilities for kids holiday ornament crafts.
Basic Crafting Staples
These are the workhorses of any good crafting setup, versatile enough for almost any project:
- Glue: A variety is best! White school glue for general paper and fabric, a glue stick for no-mess paper projects, and perhaps a low-temperature hot glue gun (for adult use, or supervised older children) for quick, strong bonds.
- Scissors: Kid-friendly safety scissors for little ones, and a sharper pair for adult cutting needs.
- Paper: Construction paper in various holiday colors, cardstock for sturdier projects, tissue paper for delicate details, and even plain white paper for drawing and painting.
- Paint: Washable tempera or acrylic paints in a range of colors. Don't forget brushes of different sizes, and sponges for texture.
- Markers & Crayons: For drawing, detailing, and adding vibrant color.
- Glitter: A holiday staple! Opt for glitter glue or fine glitter with a tray to catch excess.
- Ribbon, Yarn, & Twine: Essential for hanging ornaments, adding decorative bows, or wrapping.
- Miscellaneous Embellishments: Pom-poms, pipe cleaners, googly eyes, sequins, buttons, beads – these small additions can bring so much character to an ornament.
Specialty Materials for Unique Ornaments
Once you have your basics, you can expand with more specific items for particular projects:
- Air-Dry Clay: A fantastic, less-mess alternative to traditional clay or salt dough. Perfect for handprints, stamped designs, or sculpted figures.
- Wood Slices or Shapes: Unfinished wood is a blank canvas for painting, drawing, and adding natural charm.
- Felt Sheets: Easy to cut, doesn't fray, and comes in a rainbow of colors, great for layered designs or soft characters.
- Popsicle Sticks & Clothespins: Inexpensive and surprisingly versatile for building structures like snowflakes or miniature fences.
- Clear Plastic Ornaments: These hollow spheres can be filled with anything from fake snow and tiny trinkets to glitter and paint swirls.
- Natural Elements: Pinecones, small twigs, dried leaves (collected during a nature walk!) add an organic touch.
Not ready to subscribe and want to explore some of our kits that provide pre-measured ingredients and specialty supplies for stress-free crafting? Browse our complete collection of one-time kits to find the perfect theme for your little learner!
Safety First: Tips for a Smooth Crafting Experience
Creating with kids should be fun, not stressful. A few safety and preparation tips can make all the difference:
- Adult Supervision: Always implicit for kitchen activities and especially important when using scissors, hot glue, or small beads that could be choking hazards for younger children.
- Work Surface Protection: Lay down old newspapers, a plastic tablecloth, or a craft mat to protect your table from spills and glue.
- Aprons: Protect clothing with aprons or old t-shirts.
- Washable Materials: Whenever possible, opt for washable paints and glues for easy cleanup.
- Organize: Keep supplies in labeled bins or trays for easy access and cleanup.
- Patience & Flexibility: Remember, the goal is the process, not perfection. Let children experiment and make their own choices, even if the outcome isn't exactly what you envisioned. The joy is in the making!
A Treasure Trove of Kids Holiday Ornament Craft Ideas
Now for the fun part – exploring a myriad of creative ideas to bring festive cheer to your home! We've gathered a diverse collection of kids holiday ornament crafts, ensuring there's something for every age, skill level, and interest. Each idea offers unique opportunities for learning, imagination, and creating lasting holiday keepsakes.
Clay & Dough Creations: Hands-On Fun
Working with dough and clay is incredibly tactile and satisfying for children, strengthening hand muscles and encouraging sensory exploration. These crafts often result in beautiful, sturdy ornaments that can be cherished for years.
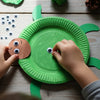
- Air-Dry Clay Handprints & Stamped Designs: Air-dry clay is a dream to work with – no baking required! Roll out the clay (a little thicker than a cookie), press a child's hand firmly into it, and then carefully lift. For Santa gnome ornaments, you can trim around the handprint shape, with the fingers forming the beard. Use rubber stamps to add names, dates, or festive patterns before it dries. Once fully dry (this can take a few days, so flip it daily), kids can paint their creations. This is a wonderful way to capture a child's growth each year.
- Scented Applesauce & Cinnamon Dough Ornaments: A classic for a reason! Mix applesauce with ground cinnamon to form a dough. Roll it out and use cookie cutters to create festive shapes like stars, gingerbread men, or bells. Don't forget to poke a hole for hanging! Let them air dry (again, flipping daily) or bake on a very low temperature. The best part? These ornaments smell absolutely divine and will fill your home with the scent of the holidays. This activity is a fantastic precursor to understanding basic baking principles, much like our very own cooking kits, which turn edible experiments into learning opportunities!
- Felt Mountain Ornaments: For a softer, whimsical look, felt is an excellent medium. Kids can cut out mountain shapes from green or white felt and glue on smaller pieces to create snowcaps or tiny trees. Older children might enjoy adding decorative stitching for extra detail, developing basic sewing skills.
Natural Wonders: Bringing the Outdoors In
Connecting with nature during the holidays is a beautiful tradition. These crafts use elements found outdoors, encouraging observation and appreciation for the natural world.
- Painted Pinecones: Sometimes, the simplest ideas are the most effective. Collect pinecones (ensure they are clean and dry) and let kids go wild with paint. They can opt for classic red and green, sparkling metallics, or their favorite bright, bold colors. Once dry, an adult can hot-glue a loop of ribbon or twine to the top for hanging. These also make wonderful homemade gift toppers!
-
Wood Slice Ornaments: Purchase plain wood slices from a craft store, or if you're handy, cut some from fallen branches. These are fantastic canvases for personalized art.
- Animal Wood Slices: Kids can paint animal faces – bears, foxes, owls, reindeer – and then glue on felt ears and tails to the back. Add small eye screws and twine for hanging.
- Drawing Wood Slice Ornaments: Let your child draw directly onto a plain wood slice. A light coat of decoupage medium can seal and protect their artwork. You can even add their name and the year with a marker or sticker vinyl for a truly personalized keepsake. This showcases their artistic skills and captures a moment in time, much like how our kits help kids create edible art.
Paper & Felt Fantasies: Flat or 3D, Always Fun
Paper and felt are incredibly versatile, allowing for both flat designs and impressive 3D creations. They are generally low-cost and offer endless possibilities.
- Popsicle Stick Snowflakes: Simple yet elegant, these are a wonderful way to explore symmetry and design. Kids can paint or draw on popsicle sticks, then an adult can hot-glue them together in various snowflake patterns. Hang with fishing wire for a "falling snow" effect.
- Clothespin Snowflakes: Similar to popsicle sticks, clothespins can be transformed! Help kids glue the ends of clothespins together in a circular pattern to form intricate-looking snowflakes. They can then paint them in festive colors. Using large, medium, and miniature clothespins creates a delightful variety.
- Paper Snowflakes & Fan Ornaments: A timeless classic, cutting paper snowflakes helps children understand symmetry and negative space. For fan ornaments, cut a circle of tissue paper, pinch the middle, secure with a twist tie, and then fan out the sides. Kids can draw designs on the paper before fanning.
- Felt Cookie Ornaments: Once you've baked and decorated real cookies, try making felt versions! Use cookie cutters to trace shapes onto tan or white felt. Kids can then sew or glue on beads as "sprinkles" or add felt "icing" for a fun, zero-calorie treat. This combines artistic expression with a playful connection to baking, a core aspect of our I'm the Chef Too! experiences.
Upcycled & Everyday Items: Creative Transformations
Turning ordinary household items into extraordinary decorations teaches resourcefulness and encourages children to see the creative potential in everything around them.
- Mini Landscape Ornaments (Mason Jar Lids): Repurpose Mason jar lids to create miniature winter wonderland scenes. Kids can paint the inside of the lid blue, then glue in cotton balls for snow, small pom-poms for trees, or tiny toy animals. A pipe cleaner glued around the outside edge and a ribbon loop complete this charming diorama.
- Cookie Cutter Wrapped Ornaments: Perfect for the littlest hands! Take inexpensive metal cookie cutters and let children wrap them with colorful yarn or ribbon until completely covered, securing the ends with glue. A loop of twine makes them ready to hang. This is a fantastic exercise in fine motor skills and color recognition.
- Filled Ornaments: Clear plastic sphere ornaments are a blank canvas for miniature worlds. Kids can fill them with faux snow, small pinecones, tiny bells, glitter, colorful beads, or even mini toys. Seal the halves with a dab of hot glue (adult supervision required) and add a ribbon. This encourages imaginative scene-setting and spatial reasoning.
- Surprise Ball Ornaments: A delightful idea for an older child. Gather small, lightweight gifts and candies, then help kids wrap them tightly in layers of crepe paper streamers to form a ball. Once formed, they can decorate the outside with cardstock additions like ears, tails, or facial features to create whimsical characters.
Beads, Marbles & Bling: Sparkle and Shine!
These crafts often involve mesmerizing patterns, vibrant colors, and a touch of scientific magic, creating truly unique and dazzling ornaments.
- Beaded Candy Canes: A simple yet engaging project for developing fine motor skills and patterning. Take a pipe cleaner and bend it into a candy cane shape. Kids then thread on red and white wooden beads (or any color combination they like) to create a striped effect. This is a great exercise in counting and color sequence.
-
Marbled Ornaments: These are truly one-of-a-kind and incorporate a fascinating science lesson!
- Water Marbling: With adult help, fill a tub with water and drop in small amounts of water-marbling paints. Use a toothpick to gently swirl the colors. Dip a plain wooden cutout ornament directly into the swirled paint, and watch the patterns transfer! Let it dry completely.
- Shaving Cream Marbling: A more kid-friendly alternative. Spread shaving cream thinly on a tray. Drop dots of liquid food coloring onto the cream. Swirl gently with a toothpick. Press a paper or wooden ornament into the colored cream, lift, and scrape off the excess shaving cream to reveal a beautiful marbled design. This demonstrates the science of surface tension and color mixing in a fun, sensory way. This kind of hands-on chemistry is a staple of our I'm the Chef Too! adventures! For example, a chemical reaction that makes our Erupting Volcano Cakes bubble over with deliciousness teaches similar scientific principles in a delicious way.
Personalized & Sentimental Touches: Ornaments with Heart
These crafts celebrate individuality and capture precious moments in time, making them truly invaluable.
- Chalkboard Ornaments: Start with a round papier-mâché ornament or a wooden circle. Spray it with chalkboard paint. Once dry, kids can draw, write messages, or even their names using white chalk markers. Add a snowflake cutout or pom-pom trim for extra flair. The beauty is they can be erased and re-decorated each year!
- Drawing Wood Slice Ornaments: As mentioned before, giving kids a wood slice to color or draw on captures their artistic skills at that particular age. Covering it with decoupage medium preserves their masterpiece, making it a wonderful heirloom.
- Festive Christmas Faces: Using felt, buttons, and scrap fabric, children can create smiling faces of Santa, Frosty the Snowman, or even their own imaginative characters. Fabric glue can secure the pieces, or older kids might try simple stitching.
Beyond the Tree: Displaying and Gifting Kids' Creations
Once the glue has dried and the glitter has settled, what do you do with all these wonderful handmade treasures? Their purpose isn't limited to just hanging on the Christmas tree. These creations can bring joy in many other ways, extending the learning and appreciation for the effort put in.
Home Decor Beyond the Tree
Think beyond the traditional evergreen! Kids holiday ornament crafts can add a personal, whimsical touch to various spots around your home.
- Garlands and Banners: String together a collection of lightweight ornaments (like paper snowflakes, felt cutouts, or painted popsicle stick creations) to create a unique garland to drape across a mantelpiece, along a stairway railing, or above a doorway.
- Window Displays: Hang translucent ornaments (like marbled designs on clear plastic, or suncatchers made from painted wood or paper) in a window where they can catch the light, adding a festive glow.
- Door Knob Hangers: Attach a single, special ornament to the doorknob of a child's bedroom or a guest room for a welcoming touch.
- Table Centerpieces: Arrange a collection of sturdier ornaments (like painted pinecones or clay creations) in a festive bowl or on a decorative tray as part of a holiday table centerpiece.
- Gift Toppers: Use a small, handmade ornament as a unique and thoughtful addition to a wrapped present. It's two gifts in one!
These alternative display methods help children see their hard work in new contexts and understand that creativity can enhance every corner of their environment. It reinforces the value of their efforts and the beauty of handmade items.
Thoughtful Handmade Gifts
Perhaps the most cherished way to share these creations is by giving them as gifts. A handmade ornament from a child is a deeply personal and heartfelt present that grandparents, aunts, uncles, teachers, and friends will treasure.
- Gifts for Grandparents: A handprint clay ornament or a wood slice with a child’s drawing makes an incredibly sentimental gift for grandparents, who often adore anything made by their grandchildren.
- Teacher Appreciation: A small, festive ornament created by a student can be a lovely way to thank a teacher for their hard work and dedication during the year.
- Host/Hostess Gifts: Attending a holiday party? A collection of unique, kid-made ornaments presented in a small basket or festive bag makes a charming and memorable hostess gift.
- Family Exchange: Encourage children to make ornaments specifically for a sibling or another family member, fostering a spirit of generosity and personal connection.
The act of gifting a handmade item teaches children about giving, thoughtfulness, and the joy of creating something specifically for someone else. It highlights that the most valuable gifts often come from the heart, not a store. This aligns perfectly with our values at I'm the Chef Too!, where our kits are designed not just for learning, but also to create shared experiences and delightful treats that can be proudly shared with loved ones. Give the gift of learning that lasts all year with a 12-month subscription to our STEM cooking adventures, perfect for continuous creative development and family fun.
Making it a Learning Experience: Integrating STEM & Art
At I'm the Chef Too!, our core philosophy revolves around "edutainment" – the seamless integration of education and entertainment. We firmly believe that learning is most profound and enjoyable when it's hands-on, engaging, and multi-faceted. Kids holiday ornament crafts are a prime example of how everyday activities can become powerful learning laboratories, naturally blending STEM principles with artistic expression. This isn't about formal lessons; it's about fostering curiosity and making connections between creativity and the world around us.
The Science Behind the Sparkle
Many ornament crafts offer fascinating glimpses into scientific principles:
- Chemistry in Action: Think about the different types of glue – why does some dry faster? What makes paint stick? The marbled ornament craft, whether with water-marbling paints or shaving cream and food coloring, is a fantastic, visible lesson in the science of immiscible liquids and surface tension. Children can observe how oil and water don't mix, or how colors spread and swirl without fully blending. Just like how a chemical reaction that makes our Erupting Volcano Cakes bubble over with deliciousness, understanding simple chemistry can elevate your ornament marbling to a scientific experiment!
- Properties of Materials: As children work with clay, felt, wood, or paper, they naturally learn about the properties of these materials – which ones are flexible, rigid, absorbent, or strong. They discover what happens when you cut felt versus paper, or how clay changes texture as it dries. This hands-on material science builds a foundational understanding of the physical world.
- Observation: Collecting natural elements like pinecones or leaves for crafts encourages keen observation of nature. What shapes do the leaves have? How do pinecone scales open and close? This fosters scientific inquiry and appreciation for biodiversity.
Math in Measurements & Patterns
Math isn't just about numbers; it's about patterns, shapes, and spatial reasoning. Ornament crafting provides many opportunities to explore these concepts:
- Geometry: Cutting paper snowflakes involves understanding symmetry. Gluing popsicle sticks or clothespins into snowflake patterns requires thinking about angles and radial symmetry. Creating felt shapes or using cookie cutters introduces basic geometric forms like circles, triangles, and stars.
- Measurement & Estimation: When cutting ribbon for hanging or deciding how many beads to string for a candy cane, children are implicitly engaging with measurement and estimation. How long should this piece be? How many beads will fit?
- Pattern Recognition & Creation: Beaded candy canes, wrapped cookie cutters, and even the simple repetition of painting dots or stripes on an ornament help children recognize, create, and extend patterns – a fundamental mathematical skill.
Engineering Structures & Design
Every time a child constructs an ornament, they are engaging in basic engineering principles:
- Structural Integrity: How do you make sure your popsicle stick snowflake doesn't fall apart? Which glue will hold these heavy items? Children learn to think about how different components fit together and how to create a stable structure. This is a foundational aspect of engineering design.
- Balance & Weight Distribution: When creating a layered ornament or one with multiple dangling parts, children instinctively experiment with balance. They learn that heavier elements need stronger support or different placement.
- Problem-Solving & Iteration: If an ornament doesn't turn out as planned, children learn to troubleshoot, adapt their design, or try a different approach. This iterative design process is at the heart of engineering.
Artful Expression & Creativity
While STEM provides the framework, art gives the crafts their soul. The artistic component allows for:
- Color Theory: Children experiment with mixing colors, choosing palettes, and understanding how different colors evoke different moods or themes.
- Texture & Form: Working with diverse materials – the roughness of a pinecone, the softness of felt, the smoothness of clay – helps children appreciate and manipulate texture and form to create visual interest.
- Personalization & Self-Expression: The beauty of handmade ornaments is that each one is unique, a reflection of the child's individual style, preferences, and imagination. This fosters self-confidence and validates their creative voice.
- Aesthetics: Children develop an eye for what they find beautiful, learning about composition, balance, and how different elements contribute to an overall pleasing design.
By subtly highlighting these connections as you craft, you're not just making ornaments; you're nurturing future scientists, engineers, mathematicians, and artists. You're teaching them that the world is a place of wonder, ripe for exploration and creative expression. Or, for a journey into astronomy, imagine creating your own edible solar system with our Galaxy Donut Kit, where each planet is a sweet, learnable sphere, demonstrating how we bring these concepts to life in our kits.
The I'm the Chef Too! Difference: Fostering Curiosity Year-Round
While holiday ornament crafts offer a fantastic seasonal burst of creativity and learning, the desire for engaging, educational, and screen-free activities doesn't end when the decorations come down. This is precisely where I'm the Chef Too! steps in, offering a continuous journey of discovery that mirrors the same joy and skill-building found in holiday crafting, but with a unique, delicious twist.
At I'm the Chef Too!, our mission is dedicated to providing children with hands-on "edutainment" experiences that seamlessly blend food, STEM, and the arts. We understand the power of tangible learning – of seeing, touching, tasting, and doing. Our approach is much like holiday ornament crafting: it’s about taking an idea, gathering materials, following a process, and marveling at the satisfying, often delicious, end result.
Here’s how our kits align with the benefits and joy of holiday crafting, offering year-round enrichment:
- Hands-On Engagement: Just as cutting felt or molding clay engages fine motor skills, our cooking kits require children to measure, mix, knead, and decorate. These activities are critical for developing dexterity and coordination.
- STEM Integration: Every I'm the Chef Too! kit is developed by mothers and educators to teach complex subjects through delicious cooking adventures. Whether it's understanding chemical reactions in baking, the physics of freezing, or the mathematics of ratios and fractions, our kits bring STEM concepts to life in a relatable and edible format. This is the same spirit of inquiry that children experience when they experiment with colors for a marbled ornament or engineer a stable popsicle stick snowflake.
- Sparking Curiosity and Creativity: Our adventures are designed to ignite a child's imagination. From creating edible volcanoes to crafting planetary donuts, each kit offers a unique theme that encourages creative thinking, problem-solving, and artistic expression, much like designing a personalized ornament.
- Family Bonding: Just as holiday crafting creates cherished family memories, our cooking kits are designed for families to do together. They provide a perfect opportunity for screen-free quality time, fostering conversation, collaboration, and shared laughter in the kitchen. The joy of baking together and then sharing the delicious results is an unparalleled bonding experience.
- Convenience and Value: We take the stress out of planning and shopping. Each I'm the Chef Too! box is a complete experience, containing pre-measured dry ingredients and specialty supplies, along with easy-to-follow instructions and educational content. This means less prep time for parents and more quality time for creating and learning. It’s the ultimate antidote to the "what should we do today?" dilemma, delivered right to your door.
Imagine the excitement of a new, themed adventure arriving every month, filled with opportunities to bake, learn, and bond. Ready to bring this level of ongoing educational fun and delicious discovery into your home? Join The Chef's Club and embark on a continuous journey of hands-on learning with free shipping on every box. We offer flexible 3, 6, and 12-month pre-paid plans, perfect for consistent enrichment or as a truly unique gift that keeps on giving. Don't let the learning stop after the holidays; explore our full library of adventure kits available for a single purchase in our shop for immediate fun, or consider our versatile programs for schools and groups, available with or without food components, to extend the "edutainment" to larger settings.
Conclusion
As we've explored, kids holiday ornament crafts are far more than just a way to decorate a tree. They are vibrant opportunities for children to ignite their imaginations, refine their motor skills, engage in critical thinking, and build unforgettable memories with loved ones. Each handcrafted bauble becomes a tangible piece of family history, sparkling with the joy of creation and the warmth of shared moments. By embracing these simple, screen-free activities, we're not just fostering creativity; we're nurturing resilience, patience, and a lifelong love for hands-on discovery.
At I'm the Chef Too!, we champion this very spirit of "edutainment" year-round. Our unique kits, developed by mothers and educators, seamlessly blend food, STEM, and the arts, turning complex concepts into accessible, delicious adventures. Just as a simple pinecone can be transformed into a dazzling ornament, our kits transform everyday ingredients into exciting learning experiences. We are committed to sparking curiosity, building confidence, and facilitating family bonding through tangible, hands-on activities that delight and educate.
This holiday season, take a moment to slow down, gather your supplies, and create some magic with your children. Let their little hands shape the clay, paint the pinecones, and glue the glitter. The ornaments they make will undoubtedly become treasured keepsakes, but the real gift will be the laughter, the learning, and the love shared during the process. And when the holidays pass, and you're looking for more ways to continue this journey of discovery and connection, remember that a new adventure is always waiting at your doorstep.
Ready to fill your home with year-round educational fun and delicious discoveries? Join The Chef's Club today! With a new adventure delivered every month and free shipping in the US, it’s the perfect way to spark ongoing curiosity and create joyful family memories. Don't miss out on blending food, STEM, and the arts into one-of-a-kind "edutainment" experiences with us. Join The Chef's Club!
Frequently Asked Questions (FAQ)
Q1: What are the best ornament crafts for toddlers and preschoolers? A1: For the youngest crafters, focus on activities that involve simple actions, large pieces, and washable materials. Excellent options include:
- Painted Pinecones: Simply let them paint pinecones with washable tempera paints.
- Wrapped Cookie Cutters: Provide large cookie cutters and chunky yarn or wide ribbon for wrapping.
- Glitter Glue & Pom-Poms: Give them pre-cut paper shapes (stars, circles) and let them apply glitter glue, pom-poms, or large sequins.
- Air-Dry Clay Handprints: Help them press their hand into air-dry clay. Adults can do the shaping and hole-poking.
- Filled Clear Ornaments: Offer large, easy-to-handle items like cotton balls, large glitter flakes, or big beads to put inside clear plastic ornaments. Always supervise closely to prevent choking hazards.
Q2: How can I make holiday ornament crafting less messy? A2: Mess is often part of the fun, but you can certainly minimize it:
- Preparation is Key: Lay down old newspapers, a large plastic tablecloth, or a dedicated craft mat on your work surface.
- Wear Aprons: Protect clothing with old t-shirts or craft aprons.
- Use Washable Materials: Opt for washable paints and glues whenever possible.
- Portion Control: Dispense small amounts of paint, glitter, or glue onto individual palettes or small paper plates.
- Glitter Management: Use glitter glue instead of loose glitter, or if using loose glitter, do so over a contained tray or box to catch excess.
- Wet Wipes & Paper Towels: Keep a stack of wet wipes and paper towels nearby for quick cleanups.
- "No-Glue" Options: Consider crafts that use tape, stickers, or interlocking pieces to reduce glue mess.
Q3: My child gets frustrated easily when crafting. How can I help? A3: Frustration is common, but you can create a more positive experience:
- Choose Age-Appropriate Crafts: Ensure the craft matches their developmental stage. A complex sewing project might be too much for a young child, while a very simple project might bore an older one.
- Focus on the Process, Not Perfection: Emphasize that it's about having fun and creating something unique, not making it look exactly like a sample. Celebrate their effort and creativity.
- Offer Choices: Let them pick colors, materials, or which step to do next to give them a sense of control.
- Break Down Steps: For multi-step crafts, break them into smaller, manageable chunks.
- Provide Assistance: Offer help when needed, but allow them to do as much as they can independently. It’s okay to step in and guide a tricky part.
- Positive Reinforcement: Offer plenty of praise for their efforts and accomplishments.
- Short Sessions: If attention spans are short, do crafting in shorter bursts. You can always come back to a project later.
Q4: Can these crafts be adapted for a classroom or group setting? A4: Absolutely! Holiday ornament crafts are fantastic for groups:
- Station-Based Approach: Set up different "stations" with various craft options, allowing children to move between them.
- Pre-Prep Materials: Cut out shapes, portion ingredients, or set up individual kits beforehand to make assembly smoother and quicker.
- Clear Instructions: Provide visual step-by-step instructions or demonstrate each step clearly.
- Buddy System: Pair older children with younger ones for peer assistance.
- Theme Integration: Connect crafts to other learning themes, like local wildlife for pinecone crafts or geometry for snowflake designs.
- Our Solutions: For larger groups, consider I'm the Chef Too!'s specialized programs for schools and groups, which offer flexible options with or without food components, designed to bring our hands-on STEM adventures to your classroom, camp, or homeschool co-op with ease.
Q5: How can I store these precious handmade ornaments safely after the holidays? A5: Proper storage ensures these treasures last for years:
- Individual Wrapping: Wrap fragile ornaments individually in tissue paper, bubble wrap, or even paper towels.
- Sectioned Boxes: Use ornament storage boxes with cardboard dividers or create your own sections within a larger container using cardboard inserts.
- Labeled Containers: Label storage boxes clearly with the year and "kids handmade ornaments" for easy identification.
- Acid-Free Materials: If you're concerned about long-term preservation for paper or photo ornaments, use acid-free tissue paper or storage boxes.
- Avoid Extreme Temperatures: Store boxes in a cool, dry place like a closet, rather than an attic or garage which can experience extreme temperature fluctuations that might damage delicate crafts.