Creative Pumpkin Kids Crafts & STEM Fun

Table of Contents
- Introduction
- The Magic of Pumpkin Crafts: More Than Just Decoration
- No-Carve Pumpkin Decoration Ideas: Unleashing Artistic Flair
- Recycled & Repurposed Pumpkin Crafts: Sustainable Creativity
- Sensory & Edible Pumpkin Adventures: A Feast for the Senses
- Advanced & Themed Pumpkin Crafts: Deeper Dives into Creativity
- Bringing Learning to Life: The I'm the Chef Too! Way
- Tips for a Successful Craft Session: Cultivating Joyful Learning
- Conclusion
- FAQ
As the crisp autumn air arrives and leaves transform into a vibrant tapestry of reds, oranges, and golds, there’s an undeniable shift in the rhythm of our homes. Suddenly, the urge to embrace all things cozy, comforting, and quintessentially fall takes over. For many, this season evokes images of steaming apple cider, pumpkin spice everything, and, of course, the cheerful, round gourds that symbolize harvest and celebration. But beyond decorative jack-o'-lanterns, pumpkins offer an incredible canvas for children's creativity and a fantastic opportunity for hands-on learning.
Have you ever watched a child’s eyes light up as they transform a simple object into something entirely new? That’s the magic we chase at I'm the Chef Too! We believe that learning should be an adventure, a joyous exploration that sparks imagination and builds foundational skills without feeling like schoolwork. And what better way to embark on such an adventure than with the humble pumpkin? This blog post will dive deep into a treasure trove of pumpkin kids crafts, exploring how these delightful activities aren't just about glue and glitter, but about nurturing critical thinking, fine motor skills, scientific curiosity, and artistic expression. We'll show you how to turn autumn's favorite squash into a springboard for "edutainment" – a blend of education and entertainment that truly captivates young minds. Get ready to discover how pumpkin crafts can become unforgettable moments of discovery, creativity, and family bonding, right in your own kitchen or craft space.
Introduction
Imagine a quiet Saturday morning, the scent of cinnamon wafting through the house, and your child deeply engrossed in painting, gluing, or sculpting a pumpkin creation. This isn't just a pretty picture; it's a profound learning experience disguised as play. In a world increasingly dominated by screens, finding engaging, tactile activities that encourage children to use their hands and minds is more crucial than ever. Pumpkin crafts, whether elaborate or wonderfully simple, offer a powerful antidote, fostering a love for learning through tangible, imaginative exploration.
At I'm the Chef Too!, our mission is rooted in this very philosophy: to blend food, STEM, and the arts into one-of-a-kind "edutainment" experiences. We are committed to sparking curiosity and creativity in children, facilitating family bonding, and providing a much-needed screen-free educational alternative. The pumpkin, with its versatile shape and seasonal charm, serves as a perfect medium for embodying our unique approach. Through the following sections, we will explore a diverse array of pumpkin craft ideas, each designed to be accessible, enjoyable, and packed with hidden educational benefits. From basic decorating to more complex projects involving recycled materials and even edible creations, we’ll guide you through turning seasonal fun into meaningful developmental milestones. Our ultimate goal is to inspire you to create not just beautiful crafts, but lasting memories and a foundational love for discovery in your children.
The Magic of Pumpkin Crafts: More Than Just Decoration
Pumpkin crafts are far more than just a way to decorate for fall or Halloween. They are a fantastic gateway to holistic child development, engaging multiple senses and skill sets simultaneously. When children immerse themselves in a craft project, they are silently building a repertoire of essential life skills that will serve them long beyond the autumn season.
Think about the sensory experience alone: the smooth, cool surface of a pumpkin, the vibrant colors of paint or paper, the tactile sensation of glue, yarn, or clay. These sensory inputs are vital for brain development, helping children to understand and interact with the world around them. Beyond sensory engagement, pumpkin crafts are powerful tools for enhancing:
- Fine Motor Skills: Holding a paintbrush, cutting shapes with scissors, threading beads onto a pipe cleaner, or carefully applying glue all require precision and dexterity. These actions strengthen the small muscles in the hands and fingers, which are crucial for tasks like writing, tying shoelaces, and buttoning clothes.
- Problem-Solving and Critical Thinking: What happens if I use too much glue? How can I make this piece of paper curve around the pumpkin? Which colors will look best together? Every craft presents mini-challenges that encourage children to experiment, adapt, and think creatively to achieve their desired outcome. This process teaches valuable resilience and innovation.
- Creativity and Self-Expression: There's no single "right" way to decorate a pumpkin. This open-ended nature allows children to express their unique personalities, ideas, and emotions. It fosters imagination and encourages them to think outside the box, building confidence in their own artistic voice.
- STEM Concepts in Disguise: Geometry appears when discussing shapes and sizes. Basic physics comes into play when understanding balance or how materials adhere. Chemistry is explored through color mixing or creating slime. The "Engineering" aspect shines as they design and construct. These aren't formal lessons, but incidental discoveries that pique curiosity and lay groundwork for future learning, much like how our kits effortlessly blend STEM into delicious cooking adventures.
- Patience and Focus: Crafting takes time. From the initial idea to the final touches, children learn to concentrate on a task, follow steps, and wait for materials to dry. This practice in sustained attention is incredibly beneficial in a world of instant gratification.
- Family Bonding: Crafting together provides precious, screen-free time for connection. Parents and children can share ideas, help each other, and simply enjoy being in the moment, creating shared memories that last a lifetime. This emphasis on family engagement is at the heart of what we do at I'm the Chef Too!, believing that shared educational experiences strengthen family ties.
By offering these varied benefits, pumpkin crafts truly embody our "edutainment" philosophy, proving that learning can be incredibly fun and deliciously engaging. Ready for a new adventure every month? Join The Chef's Club and enjoy free shipping on every box, bringing these types of enriching experiences right to your door.
No-Carve Pumpkin Decoration Ideas: Unleashing Artistic Flair
Carving pumpkins can be a beloved tradition, but for younger children or those looking for a safer, less messy alternative, no-carve decorations are a fantastic choice. These methods open up a world of artistic possibilities, allowing kids to explore color, texture, and design without sharp tools.
Painting & Decorating Pumpkins: A Canvas for Imagination
Painting a pumpkin is perhaps the most straightforward and universally loved pumpkin craft. It's a primal joy for children to watch colors come alive on a three-dimensional surface.
Materials:
- Pumpkins (mini to large, real or craft foam)
- Acrylic paints (various fall colors, metallics, glow-in-the-dark)
- Paintbrushes (different sizes, sponges, cotton swabs)
- Old newspaper or a drop cloth
- Smocks or old clothes
- Optional: Glitter, permanent markers, stencils, masking tape
Process & Educational Takeaways:
- Preparation is Key: Lay down newspaper and dress for mess! This teaches responsibility and organization.
- Color Exploration: Provide a range of colors and let children experiment with mixing. This is a foundational step in understanding color theory. What happens when orange and yellow mix? What about blue and red?
-
Technique Variety:
- Brush Painting: Develops fine motor control and hand-eye coordination.
- Sponge Painting: Introduces texture and different application methods.
- Finger Painting: A wonderful sensory experience, especially for younger children, fostering tactile exploration.
- Splatter Painting: (outdoors!) A fun way to explore cause and effect and unleash energy creatively.
- Masking Tape Designs: Apply tape in stripes or geometric patterns before painting. Once dry, peel off the tape to reveal crisp lines. This introduces the concept of negative space and basic geometry.
- Adding Details: Once the base paint is dry, encourage children to add faces, patterns, or scenes with markers or smaller brushes. This refines fine motor skills and promotes imaginative storytelling.
STEM Connection: Color mixing is basic chemistry. Understanding how different consistencies of paint behave (physics) and creating symmetrical or asymmetrical patterns (math/geometry) are all part of the fun.
Yarn & Wrapping Wonders: Exploring Texture and Form
This craft is excellent for developing fine motor skills and introducing concepts of texture and wrapping. It's a cozy, tactile activity perfect for a fall afternoon.
Materials:
- Empty toilet paper or paper towel rolls (or small styrofoam pumpkins)
- Various colors and textures of yarn or twine
- Scissors
- Craft glue or tape
- Small sticks for stems (gathered from outdoors)
- Optional: Googly eyes, felt scraps
Process & Educational Takeaways:
- Gathering Natural Elements: A walk to find small sticks encourages observation of nature.
- Preparing the Base: Cut the cardboard roll to desired pumpkin height. This involves measurement and cutting skills.
-
The Art of Wrapping: Secure one end of the yarn inside the roll with tape or glue. Children then wrap the yarn tightly around the roll, covering the entire surface.
- This repetitive action is calming and builds hand strength and dexterity.
- Experiment with different wrapping styles (horizontal, diagonal, criss-cross) to see how it changes the texture and appearance. This is an early exploration of patterns and structural design.
-
Adding Details: Once wrapped, insert a stick for the stem. Use glue to attach felt leaves or googly eyes.
- Using different yarn textures (chunky, thin, fuzzy) adds a sensory dimension.
- Creating multiple "yarn pumpkins" allows children to compare and contrast, learning about variations in size, shape, and texture.
STEM Connection: Understanding how yarn covers a 3D form relates to surface area and basic geometry. The tension of the yarn and how it holds together involves simple physics.
Googly Eyes & Accessories: Bringing Pumpkins to Life
Sometimes, the simplest additions can have the biggest impact, turning a plain pumpkin into a character with personality.
Materials:
- Pumpkins
- Googly eyes (various sizes)
- Pipe cleaners
- Felt scraps, construction paper
- Craft glue (or hot glue with adult supervision)
- Markers
Process & Educational Takeaways:
- Character Design: Encourage children to think about what kind of character their pumpkin will be. Silly? Spooky? Friendly? This sparks imaginative play and storytelling.
-
Applying Features: Glue on googly eyes. Use pipe cleaners to create arms, legs, antennae, or funny glasses. Felt or paper can be cut into mouths, noses, or ears.
- This is wonderful for fine motor practice, especially positioning small elements.
- It encourages children to visualize and then execute their design, building spatial reasoning.
- Pumpkin Mummies: For a fun variation, wrap a pumpkin with gauze or strips of white fabric, securing with glue. Then, add googly eyes. This simple transformation is surprisingly engaging and introduces the concept of covering and concealing.
STEM Connection: Understanding balance when attaching accessories, experimenting with different angles for eyes to convey emotions (psychology/art), and constructing simple figures (engineering).
Nature's Touch: Decorating with Outdoor Finds
A walk in nature becomes the supply gathering mission for this eco-friendly craft.
Materials:
- Pumpkins
- Leaves, small twigs, acorns, pinecones, moss, pebbles, seeds (from a nature walk)
- Craft glue (PVA or school glue works well)
- Optional: Clear sealant spray (adult use only)
Process & Educational Takeaways:
- Nature Hunt: Take a deliberate walk to collect materials. This is an excellent opportunity to discuss different types of leaves, trees, and seeds, connecting children to botany and local ecosystems.
-
Arranging and Attaching: Children can arrange their collected treasures onto the pumpkin, gluing them in place. They might create patterns, scenes, or completely cover the pumpkin with natural textures.
- This activity fosters observation skills and appreciation for the natural world.
- It encourages creative composition and understanding of natural textures.
- Discussing why certain items stick better than others introduces basic material science.
- Pumpkin Fairy Houses: Using larger twigs for structural elements, moss for roofs, and pebbles for pathways, children can create miniature whimsical homes directly on a pumpkin. This promotes imaginative world-building and micro-architecture.
STEM Connection: Classification of natural objects (biology), understanding adhesion (physics/chemistry), and creating miniature landscapes (engineering/design).
Stamping Fun: Patterns and Repetition
Stamping is a fantastic way for even the youngest crafters to create repetitive patterns and explore cause and effect.
Materials:
- Pumpkins (real or paper)
- Washable paints
- Old toilet paper rolls (shaped into an oval)
- Apples (cut in half)
- Paper plates for paint
- Optional: Sponges cut into shapes
Process & Educational Takeaways:
-
Toilet Paper Roll Stamps: Reshape an empty toilet paper roll into an oval "pumpkin" shape. Dip one end in orange paint and stamp repeatedly onto paper or a lightly painted pumpkin. Add green stems with a finger or brush.
- This simple action demonstrates how shapes can be created through repetition.
- It's an excellent exercise in fine motor control and understanding pressure.
-
Apple Stamping: Cut apples in half (adult task!). The natural star pattern inside is beautiful, or use the flat side for simple circular stamps. Dip the apple half into paint and press onto the pumpkin.
- This introduces the concept of natural patterns and textures.
- It's a multi-sensory experience – the feel of the apple, the smell, and the visual result.
STEM Connection: Observing patterns (math), understanding how pressure affects the transfer of paint (physics), and identifying natural forms (biology).
If you're curious to explore our diverse range of hands-on learning experiences beyond pumpkins, we invite you to browse our complete collection of one-time kits today! Each kit is a unique adventure, blending culinary fun with STEM education.
Recycled & Repurposed Pumpkin Crafts: Sustainable Creativity
At I'm the Chef Too!, we champion creativity that’s both engaging and resourceful. Repurposing everyday items for crafts teaches children the value of sustainability and encourages them to see potential in what might otherwise be considered trash. These crafts demonstrate how imagination can transform ordinary objects into extraordinary works of art.
Egg Carton Pumpkins: Building in Three Dimensions
Transforming egg cartons into pumpkins is a delightful way to teach about upcycling and 3D construction.
Materials:
- Cardboard egg cartons
- Orange and green paint
- Paintbrushes
- Scissors
- Craft glue
- Pipe cleaners or small twigs for stems
- Optional: Googly eyes, markers
Process & Educational Takeaways:
- Prepping the Cartons: Cut individual egg cups from the carton. For a fuller pumpkin, glue two cups together at their open ends. This introduces basic construction and spatial reasoning.
-
Painting: Paint the egg carton segments orange. Once dry, add green stems and optional faces.
- Discuss how a 2D material (flat cardboard) can be manipulated to create a 3D form.
- Fine motor skills are honed through precise cutting and detailed painting.
- Assembly: Glue multiple painted segments together to create a larger, multi-faceted pumpkin. This fosters problem-solving in design and stability.
STEM Connection: Understanding geometry and how to assemble 3D shapes from flat components (engineering), and the environmental aspect of recycling (science).
Paper Plate & Paper Bag Pumpkins: Simple Shapes, Big Fun
These crafts are perfect for younger children, focusing on basic shapes, cutting, and gluing, which are foundational for many future creative endeavors.
Materials:
- Paper plates
- Brown paper bags
- Orange, green, black paint or construction paper
- Scissors
- Craft glue or stapler
- Markers
Process & Educational Takeaways:
-
Paper Plate Pumpkins: Paint paper plates orange. Once dry, cut out eyes, noses, and mouths from black paper (or draw with markers) and glue them on to create jack-o'-lantern faces.
- Practices scissor skills for cutting shapes.
- Explores facial expressions and emotion through art.
-
Paper Bag Pumpkins: Crumple brown paper bags to create texture, then paint them orange. Once dry, add stems and faces. Stuff with newspaper or scrap paper to create a plump, 3D pumpkin shape. Tie off the top with string and add a stem.
- This teaches about transforming materials – flat paper to textured 3D form.
- Discusses volume and how to fill a space.
STEM Connection: Understanding shapes (geometry), the properties of paper (material science), and the concept of volume and filling space (math/physics).
Mason Jar Luminaries: Light, Transparency, and Design
Turning old mason jars into glowing pumpkin luminaries combines crafting with an exploration of light and transparency.
Materials:
- Clean mason jars
- Orange tissue paper or paint
- Mod Podge or craft glue
- Paintbrushes or sponges
- Black construction paper or permanent marker
- Battery-operated tea lights
Process & Educational Takeaways:
-
Decorating the Jar:
- Tissue Paper Method: Tear or cut orange tissue paper into small pieces. Apply Mod Podge to the outside of the jar, then press tissue paper pieces onto the glue, overlapping slightly. Seal with another layer of Mod Podge. This creates a stained-glass effect.
- Painting Method: Paint the inside of the jar with orange acrylic paint (or exterior if preferred).
- This activity develops fine motor skills, especially with the delicate tissue paper.
- It introduces concepts of transparency, light diffusion, and how materials affect light.
- Adding Faces: Once dry, cut out black paper shapes for eyes and mouths and glue them onto the jar, or draw them directly with a permanent marker.
-
Illumination: Place a battery-operated tea light inside.
- Observe how the light interacts with the orange paper/paint, creating a warm, pumpkin-like glow.
STEM Connection: Optics and how light travels and diffuses, the properties of different materials (paper, glass, glue) and how they interact, and understanding the function of a luminary (engineering/design).
Craft Stick Pumpkin Frames: Geometry and Keepsakes
Craft sticks (popsicle sticks) are incredibly versatile and perfect for building simple structures, like these pumpkin-themed frames.
Materials:
- Craft sticks (popsicle sticks)
- Orange paint
- Craft glue
- Green felt or paper for leaves
- Scissors
- Optional: Magnets, glitter, family photos
Process & Educational Takeaways:
- Painting Sticks: Paint several craft sticks orange.
-
Building the Frame: Once dry, arrange 6-8 craft sticks side-by-side. Glue two additional sticks across the back horizontally to secure them. This creates a flat "pumpkin" base.
- This teaches basic carpentry skills and understanding how to create a stable structure.
- It reinforces counting and one-to-one correspondence.
-
Adding Details: Cut a green stem and leaves from felt or paper and glue them to the top. Children can add a photo to the front or draw a pumpkin face.
- If adding a magnet to the back, discuss why magnets stick to certain surfaces, introducing magnetic principles.
STEM Connection: Geometry (lines, rectangles, creating a frame), structural integrity (engineering), and understanding magnetic forces (physics) if a magnet is added.
Wooden Spoon Characters: Storytelling and Role Play
Wooden spoons transform into charming pumpkin characters, encouraging imaginative play and storytelling.
Materials:
- Wooden spoons
- Orange, green, and black acrylic paint
- Paintbrushes
- Permanent markers
- Fabric scraps or felt for accessories
- Craft glue
Process & Educational Takeaways:
- Painting the Spoon: Paint the round part of the spoon orange to form the pumpkin's head. Paint the handle green for a stem.
- Adding Features: Once dry, use markers or paint to create a pumpkin face. Add details like rosy cheeks, scars, or mischievous grins.
-
Accessorizing: Glue small felt leaves to the handle, or fabric scraps to create little costumes.
- This activity fosters creativity in character design.
- It promotes imaginative play as children use their spoon puppets to tell stories. Discussing different emotions and how to express them through facial features is also a wonderful social-emotional learning opportunity.
STEM Connection: Understanding how 2D painted features create a 3D character illusion (art/design), and developing narratives (language arts, critical thinking).
Sensory & Edible Pumpkin Adventures: A Feast for the Senses
At I'm the Chef Too!, we believe that learning truly comes alive when all the senses are engaged, especially taste! That's why our signature approach blends delicious cooking adventures with STEM education. Incorporating edible elements or highly tactile experiences into pumpkin crafts takes engagement to a whole new level.
Pumpkin Slime: Gooey Science Fun
Slime is a perpetual favorite, and a pumpkin-themed version adds a seasonal twist to this fascinating chemistry experiment.
Materials:
- Clear school glue
- Liquid starch or baking soda and contact lens solution
- Orange food coloring
- Pumpkin spice or cinnamon (optional, for scent)
- Glitter or tiny pumpkin-shaped confetti (optional)
- Mixing bowls and spoons
Process & Educational Takeaways:
-
The Science of Slime: Combine glue with orange food coloring and a pinch of pumpkin spice. Slowly add liquid starch (or baking soda/contact lens solution) while stirring. Observe as the liquid transforms into a cohesive, stretchy solid.
- This is a fantastic, hands-on chemistry lesson about polymers and non-Newtonian fluids. Children witness a chemical reaction firsthand, understanding how different ingredients combine to create a new substance.
- Sensory exploration is high with the unique texture, color, and optional scent.
-
Play and Explore: Encourage children to stretch, poke, and squish the slime. What happens if you pull it slowly versus quickly?
- This fosters observational skills and encourages hypothesis testing.
STEM Connection: States of matter (chemistry), polymers (chemistry), cause and effect, and sensory science.
Pumpkin Playdough: Tactile Creativity
Homemade playdough is a wonderful, non-toxic sensory experience that can be easily customized for any theme, including pumpkins!
Materials:
- Flour, salt, cream of tartar
- Water, cooking oil
- Orange food coloring
- Pumpkin spice or cinnamon
- Mixing bowls, spoons
Process & Educational Takeaways:
- Making the Dough: Combine dry ingredients, then add wet ingredients and knead until smooth. Add orange food coloring and pumpkin spice for a full sensory experience.
-
Shaping and Sculpting: Provide pumpkin-shaped cookie cutters, rolling pins, and plastic knives. Children can sculpt pumpkins, create vines, or make mini pumpkin patches.
- This strengthens hand muscles, develops fine motor skills through pinching, rolling, and shaping.
- The open-ended nature of playdough encourages imaginative construction and storytelling.
- Adding scents like pumpkin spice stimulates the olfactory sense, deepening the sensory experience.
STEM Connection: Exploring material properties (texture, malleability), understanding proportions in a recipe (math), and sensory integration.
Edible Pumpkin Crafts: Our I'm the Chef Too! Specialty!
This is where I'm the Chef Too! truly shines! Our belief that complex subjects are best learned through tangible, delicious cooking adventures developed by mothers and educators comes to life in edible crafts. These aren't just crafts; they're delicious lessons.
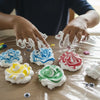
1. Pumpkin Patch Cookie Decorating
Materials:
- Pre-baked pumpkin-shaped or round sugar cookies
- Orange, green, brown, and black icing (store-bought or homemade)
- Sprinkles (fall colors, candy corn, edible glitter)
- Piping bags with various tips or squeeze bottles
- Edible markers
Process & Educational Takeaways:
- Icing Fundamentals: Show children how to outline cookies and then "flood" them with a thinner icing. This introduces precision and technique in a fun way.
-
Artistic Expression: Let them decorate their "pumpkins" with faces, vines, patterns, or sprinkles. Create a whole "pumpkin patch" by arranging finished cookies.
- This is a fantastic way to practice fine motor control and hand-eye coordination.
- Children learn about color application, pattern design, and edible art.
- It encourages following instructions and sequencing steps to achieve a delicious outcome.
2. Pumpkin Spice Themed Treats
While not a "craft" in the traditional sense, baking anything pumpkin spice related is an experience filled with sensory and scientific learning. Imagine making mini pumpkin muffins, pumpkin bread, or even a simple pumpkin dip for apples.
Materials:
- Age-appropriate recipes for pumpkin muffins, cookies, or bread
- Pre-measured dry ingredients (flour, sugar, pumpkin spice, baking soda/powder)
- Wet ingredients (pumpkin puree, eggs, oil/butter)
- Mixing bowls, measuring cups and spoons, spatulas
- Cookie cutters (pumpkin shapes)
Process & Educational Takeaways:
- Measuring and Mixing: Children can help measure ingredients (math skills!), pour, and mix. This teaches precision and the importance of following a recipe.
- Observing Transformations: Witnessing how separate ingredients combine to form a batter, and how that batter changes when baked, is a real-world chemistry lesson. Why does the batter rise? What does the heat do?
- Sensory Exploration: The aroma of pumpkin spice, the texture of the batter, and the taste of the final product engage multiple senses, making the learning memorable.
- Tangible Rewards: The best part? Enjoying their delicious creations! This reinforces the positive outcomes of their efforts.
This is exactly the kind of "edutainment" we specialize in! Imagine a new culinary adventure arriving at your doorstep every month, complete with pre-measured dry ingredients and specialty supplies. That's the magic of The Chef's Club subscription! It’s the perfect way to spark ongoing curiosity and creativity.
Advanced & Themed Pumpkin Crafts: Deeper Dives into Creativity
For older children, or those seeking a more intricate challenge, these crafts offer opportunities for greater artistic expression, refined skills, and deeper engagement with specific art forms and scientific concepts.
Clay Pumpkin Pins: Sculpting and Wearable Art
Working with clay is a wonderfully tactile experience that encourages sculpting skills and the creation of wearable art.
Materials:
- Oven-bake clay (orange, green, brown)
- Halloween-themed or pumpkin-shaped cookie cutters (optional)
- Mini googly eyes
- Craft glue
- Pin backs
- Tools for sculpting (plastic knives, toothpicks)
Process & Educational Takeaways:
-
Sculpting Techniques: Children can roll, flatten, and shape the orange clay into small pumpkins. They can use cookie cutters for uniform shapes or freehand sculpt for unique designs.
- This develops fine motor skills, hand strength, and spatial reasoning.
- It introduces basic sculpting principles and the malleability of materials.
- Adding Details: Use green clay for stems and vines, and brown for subtle shading. Press mini googly eyes onto the clay.
-
Baking and Finishing: Bake the clay according to package instructions (adult supervision required). Once cooled, glue pin backs to the pumpkins.
- This teaches about material transformation through heat.
- The finished pins offer a sense of accomplishment and a tangible, wearable piece of art.
STEM Connection: Understanding material properties (clay's malleability and hardening with heat – chemistry/material science), 3D form creation (geometry/engineering), and the process of design and fabrication.
Beaded Pipe Cleaner Pumpkins: Patience and Pattern Making
This craft requires a bit more patience and fine motor control, making it ideal for older preschoolers and elementary-aged children.
Materials:
- Orange pipe cleaners
- Green pipe cleaners (for vines)
- Assorted beads (orange, yellow, brown, clear)
- Scissors
Process & Educational Takeaways:
- Creating the Pumpkin Shape: Take several orange pipe cleaners and twist them together at one end to form a central point. Spread them out to create a fan-like structure.
-
Beading: Children string beads onto each individual pipe cleaner. This is excellent for developing fine motor skills, hand-eye coordination, and concentration.
- Encourage children to create patterns with the beads, introducing early algebraic thinking.
- Discuss color combinations and symmetrical designs.
- Forming the Pumpkin: Once beads are strung, twist the free ends of the pipe cleaners together at the top, forming a round pumpkin shape. Shape green pipe cleaners into vines and leaves and attach them.
STEM Connection: Pattern recognition and creation (math), fine motor control and dexterity (biology/physical development), and structural design using flexible materials (engineering).
Pumpkin Fairy Houses: Imagination and Miniature Worlds
This imaginative craft transforms a pumpkin into a magical dwelling, perfect for fostering creative storytelling and miniature world-building.
Materials:
- A medium to large pumpkin
- Natural elements: twigs, moss, pebbles, small leaves, acorns, seed pods
- Craft glue (strong, quick-drying is helpful)
- Small foam core pieces or cardboard for doors/windows
- Paint or markers
- Miniature accessories (optional: tiny furniture, figurines)
Process & Educational Takeaways:
- Design and Planning: Before gluing, encourage children to sketch out their fairy house design. Where will the door go? What about windows? This introduces architectural planning and spatial arrangement.
-
Construction: Use twigs to create doorframes or fences, moss for roofs, and pebbles for pathways. Foam core can be cut into tiny doors and windows, which can be painted.
- This is a detailed construction project that requires problem-solving (how to make elements stick, how to create stable structures).
- It promotes understanding of scale and proportion when creating miniature elements.
- Storytelling: Once the house is built, children can invent stories about the fairies or creatures that live there. This enhances language development and imaginative play.
STEM Connection: Architecture and structural design (engineering), understanding scale and proportion (math), and integrating natural materials (biology/environmental science).
Melted Crayon Pumpkin Suncatchers: Heat, Light, and Color
This colorful craft explores the properties of crayons when heated and creates a beautiful decoration that plays with light.
Materials:
- Old crayons (peeled)
- Wax paper
- Pencil sharpener or grater (adult use for grating)
- Iron (adult use only) or hairdryer (child can use with supervision)
- Scissors
- Black construction paper
- Craft glue or tape
Process & Educational Takeaways:
- Crayon Shavings: Have an adult carefully grate or sharpen peeled crayons into small shavings. Encourage children to sort colors or create color palettes.
-
Creating the Suncatcher Base: Place crayon shavings between two sheets of wax paper. Cover with a thin cloth and have an adult gently iron over it until the crayons melt and blend. (Alternatively, children can use a hairdryer on low with adult supervision).
- This demonstrates how heat changes the state of matter (solid crayons to liquid, then solid again when cooled). It's a visual chemistry and physics lesson.
- Children observe color blending and mixing.
-
Pumpkin Shape: Once cooled, children can cut the wax paper into a pumpkin shape. Cut out a pumpkin frame from black construction paper and glue it around the edges of the suncatcher.
- This practices scissor skills and understanding positive/negative space.
- Hang the suncatcher in a window and observe how light filters through the melted crayons. Discuss transparency and how colors glow.
STEM Connection: States of matter and heat transfer (physics/chemistry), color theory and light interaction (optics/art), and understanding transparency.
For educators, homeschool groups, or anyone looking to bring these enriching, hands-on STEM adventures to a larger audience, our programs are designed to inspire collective learning. Learn more about our versatile programs for schools and groups, available with or without food components, to bring STEM fun to your community.
Bringing Learning to Life: The I'm the Chef Too! Way
The wide array of pumpkin kids crafts we've explored vividly illustrates our core belief at I'm the Chef Too!: that learning doesn't have to be confined to textbooks or screens. It can be hands-on, messy, delightful, and utterly delicious. Every pumpkin painted, every slime stretched, and every edible cookie decorated is a step in a child's developmental journey, fostering skills that extend far beyond the craft itself.
We are mothers and educators who understand the profound impact that engaging, tangible experiences have on young minds. Our mission is to seamlessly blend food, STEM, and the arts into one-of-a-kind "edutainment" experiences that ignite curiosity and creativity. Just as a simple pumpkin can be a canvas for scientific exploration or artistic expression, our kits transform complex subjects into approachable, fun culinary adventures. We want to empower children to become "chefs" of their own learning, experimenting, problem-solving, and celebrating their delicious results.
Whether your child is learning about chemical reactions through pumpkin slime, exploring geometry by building a craft stick frame, or understanding fractions while baking a pumpkin pie, these activities provide invaluable opportunities for growth. They build confidence, encourage resilience, and create joyful family memories that reinforce the idea that learning is a continuous, exciting journey.
By choosing these screen-free alternatives, you're not just occupying your child's time; you're nurturing their inherent desire to discover, to create, and to understand the world around them. And when these adventures lead to a delicious treat, the learning becomes even more memorable! We invite you to continue these journeys with us. Give the gift of learning that lasts all year with a 12-month subscription to our STEM cooking adventures. Join The Chef's Club today and receive a new adventure delivered to your door every month with free shipping in the US!
Tips for a Successful Craft Session: Cultivating Joyful Learning
To ensure your pumpkin crafting adventures are more joyous than jumbled, here are some practical tips to help facilitate a smooth and enriching experience for everyone involved. Remember, the goal isn't perfection, but participation and the process of discovery.
- Preparation is Paramount: Before your child even sees the supplies, gather everything you'll need. Lay down newspaper or a washable tablecloth. Have wipes or paper towels ready. Pre-pour paints into small containers. This minimizes interruptions and frustration, keeping the creative flow going.
- Embrace the Mess: Crafting with kids will be messy. It's an inevitable part of the creative process! Dress children (and yourself!) in old clothes or smocks. A relaxed attitude about spills and splatters will make the experience more enjoyable for everyone. Focus on the learning and fun, not pristine cleanliness.
- Safety First, Always: Adult supervision is crucial, especially when using scissors, graters, irons, or any potentially hazardous materials. Teach children how to use tools safely and always be present to assist when needed. Our kits, developed by mothers and educators, always implicitly understand and advocate for adult supervision.
- Focus on the Process, Not Just the Product: Encourage experimentation and creative freedom. Remind children that there's no "right" or "wrong" way to make art. Praise their effort, their unique ideas, and the joy they find in creating, rather than just the final appearance of the craft.
- Provide Choices, But Not Too Many: Offer a selection of materials and colors, but don't overwhelm children with too many options. This helps them make decisions without feeling paralyzed by choice. For example, "Would you like to use orange or yellow paint today?"
- Talk About It: Engage your child in conversation throughout the crafting process. Ask open-ended questions: "What colors are you choosing and why?" "How does that feel?" "What do you think will happen if...?" These conversations foster language development, critical thinking, and allow children to articulate their creative decisions.
- Set Realistic Expectations: Not every craft will look like a Pinterest masterpiece, and that's perfectly okay! The aim is to foster a love for learning, build confidence, develop key skills, and create joyful family memories. Don't push for perfection; celebrate their unique creations.
- Display Their Work: Showcasing your child's pumpkin craft helps to validate their efforts and boosts their self-esteem. Find a special spot for it in your home, on a windowsill, or even as part of your autumn decor.
- Keep it Age-Appropriate: Adapt crafts to your child's developmental stage. Younger children might focus on simple painting and sticking, while older children can handle more intricate cutting, detailed sculpting, or complex baking steps. Remember, the journey is just as important as the destination.
By following these simple guidelines, you can transform a pumpkin craft session into a rich, rewarding, and memorable experience for your entire family, much like the engaging and educational adventures found in every I'm the Chef Too! kit. If you're looking for even more convenient and educational fun delivered straight to your home, remember to explore our full library of adventure kits available for a single purchase in our shop! Browse our complete collection of one-time kits today.
Conclusion
As we've journeyed through a world of vibrant colors, tactile textures, and delicious aromas, it's clear that pumpkin kids crafts are far more than just seasonal decorations. They are powerful conduits for learning, creativity, and precious family moments. From the simplest painted gourd to the most intricate edible masterpiece, each project offers a unique opportunity to engage young minds, develop essential skills, and foster a lifelong love for discovery. These hands-on, screen-free activities exemplify the very heart of I'm the Chef Too!’s mission: to blend food, STEM, and the arts into unforgettable "edutainment" experiences. We believe that by sparking curiosity and creativity through tangible, delicious adventures, we empower children to learn, grow, and truly shine.
So, as autumn unfolds its magic, gather your little ones, embrace the glorious mess, and dive into the wonderful world of pumpkin crafting. Whether you’re experimenting with chemical reactions in pumpkin slime, honing fine motor skills with beaded creations, or exploring the science of baking with a pumpkin-spiced treat, you're building memories and foundational knowledge. Let these joyful moments be a testament to the power of hands-on learning and the warmth of family bonding.
Ready to keep the adventure going all year long? Give your child the gift of continuous discovery and delicious learning. Join The Chef's Club today and have a new, exciting STEM cooking kit delivered right to your door every month with free shipping in the US! It's the perfect way to spark imagination, inspire learning, and create even more unforgettable family memories.
FAQ
Q1: What age group are these pumpkin crafts suitable for?
A1: Many pumpkin crafts are highly adaptable! Simple painting, sticker decorating, and large stamping activities are great for toddlers and preschoolers (ages 2-5) with adult supervision. Crafts involving cutting, detailed gluing, sculpting, or baking are best for elementary school-aged children (ages 5-10+), again with adult guidance. Always adapt the complexity to your child's skill level and attention span.
Q2: How can I make pumpkin crafts less messy?
A2: While a certain level of mess is part of the fun, preparation is key to managing it. Lay down plenty of newspaper, old sheets, or a washable tablecloth. Have wet wipes, paper towels, and a damp cloth ready. Dress children in old clothes or smocks. Use shallow containers for paint to prevent spills, and consider washable paints and glues for easier cleanup.
Q3: What kind of pumpkins should I use for crafting?
A3: Both real and artificial pumpkins work!
- Real pumpkins: Great for painting, decorating with natural elements, or even making edible crafts. They bring an authentic sensory experience but will eventually rot.
- Artificial craft pumpkins (foam, plastic): Perfect for permanent decorations, reusable year after year. They are lighter and often have a smoother surface for painting. Choose based on your craft idea and desired longevity.
Q4: My child gets frustrated easily during crafts. How can I help?
A4: Focus on the process, not perfection. Keep activities short and engaging. Offer choices to give them a sense of control, but not so many that they feel overwhelmed. Break down complex steps into smaller, manageable tasks. Provide plenty of praise for their effort and unique ideas. Remember, it's about the joy of creating and learning, not about achieving a flawless end product. Sometimes taking a break and coming back to it later can also help.
Q5: How can I incorporate more STEM learning into pumpkin crafts?
A5: Every craft offers STEM potential!
- Science: Discuss color mixing (chemistry), how paint dries (physics), properties of materials (e.g., how clay hardens), or the life cycle of a pumpkin (biology).
- Technology: If you use tools like scissors or a hairdryer, talk about how they work.
- Engineering: Discuss how to build stable structures (e.g., craft stick frames), or how to make a fairy house stand up.
- Math: Count materials, measure ingredients for edible crafts, discuss shapes, patterns, symmetry, or concepts like volume. Our kits at I'm the Chef Too! are specifically designed to highlight these connections in a fun, engaging way.
Q6: Can these crafts be done in a classroom or group setting?
A6: Absolutely! Many of these pumpkin crafts are fantastic for group activities. Simple projects like pumpkin painting, stamping, or paper plate pumpkins are easy to set up for multiple children. For educators, our programs are designed to inspire collective learning. Learn more about our versatile programs for schools and groups, available with or without food components, to bring STEM fun to your community.
Q7: What are the benefits of edible pumpkin crafts?
A7: Edible crafts, like those found in our I'm the Chef Too! kits, offer multi-sensory learning. Children learn about:
- Measurement and proportions (math).
- Chemical reactions (e.g., baking soda with acid, how ingredients transform with heat).
- Fine motor skills through mixing, kneading, and decorating.
- Following instructions and sequencing.
- Sensory exploration (smell, taste, texture). And the best part is the delicious, tangible reward for their efforts!
Q8: Where can I find more ideas for engaging, screen-free educational activities?
A8: I'm the Chef Too! is dedicated to providing "edutainment" experiences that blend food, STEM, and the arts. We offer a range of options, from single-purchase kits for a specific adventure to our monthly subscription club. For ongoing educational fun, consider our Chef's Club subscription for a new kit delivered to your door every month. You can also browse our complete collection of one-time kits for a variety of themes and adventures!