Crafting Cozy Connections: The Enduring Charm of Pot Holder Crafts for Kids

Table of Contents
- Introduction
- The Enduring Appeal of Potholder Crafts for Kids
- Handprint & Fingerprint Potholders: A Timeless Keepsake
- Weaving Wonders: The Potholder Loom Experience
- Beyond the Basics: Innovative Potholder Craft Ideas
- The "Edutainment" Factor: Connecting Potholder Crafts to STEM & Life Skills
- Fostering Family Bonds Through Creative Kitchen Adventures
- Conclusion
- FAQ Section
Ever found yourself in a moment, gazing at a tiny handprint on a piece of paper, and felt a rush of warmth and nostalgia? Those fleeting imprints of childhood are precious, aren't they? Now imagine capturing that magic on something truly practical, something that will be used, admired, and cherished in your kitchen for years to come: a handmade pot holder.
At I'm the Chef Too!, we believe that learning should be an adventure, a delightful blend of creativity and discovery that leaves a lasting impression – much like those handprints. That's why we’re diving deep into the wonderful world of pot holder crafts for kids. This isn't just about keeping little hands busy; it's about igniting curiosity, fostering essential skills, and creating tangible memories that will warm hearts long after the craft is complete. From simple painted masterpieces to intricate woven designs, pot holder crafts offer a unique opportunity for "edutainment," blending art, science, and even a touch of engineering into a fun, screen-free activity. Join us as we explore the myriad ways your children can transform humble fabric into functional works of art, building confidence and critical thinking along the way.
Introduction
In a world overflowing with digital distractions, finding activities that truly engage a child's hands, mind, and heart can feel like a quest. Parents and educators are constantly searching for screen-free alternatives that offer both entertainment and genuine educational value. This is where the humble pot holder craft for kids shines, proving that some of the most profound learning experiences come from the simplest, most tangible projects. Far from being a mere time-filler, crafting a pot holder is an enriching journey into art, basic engineering, and even a dash of material science.
This comprehensive guide will walk you through various pot holder craft ideas suitable for different ages and skill levels, from colorful handprint designs to traditional woven creations and beyond. We'll delve into the supplies you'll need, provide step-by-step instructions, and, most importantly, explore the incredible educational benefits hidden within each stitch and stroke of paint. You'll discover how these crafts boost fine motor skills, encourage pattern recognition, spark creativity, and even introduce foundational STEM concepts. At I'm the Chef Too!, our mission is to blend food, STEM, and the arts into one-of-a-kind "edutainment" experiences, and pot holder crafts align perfectly with our philosophy of teaching complex subjects through tangible, hands-on adventures. By the end of this post, you'll be inspired and equipped to embark on a delightful crafting journey with the children in your life, creating not just pot holders, but cherished memories and a lifelong love for learning.
The Enduring Appeal of Potholder Crafts for Kids
There’s something truly special about a handmade gift, especially one crafted by a child. A pot holder, in particular, holds a unique place in this category. It’s practical, functional, and often finds a permanent home in the heart of the home: the kitchen. Unlike a drawing that might eventually get tucked away, a handmade pot holder is a constant reminder of love, effort, and creative spirit, serving its purpose day in and day out.
But the appeal goes far beyond sentimentality. For children, the process of creating a pot holder is incredibly enriching. It’s an activity that provides immediate gratification and a tangible end product, which is deeply satisfying for young learners. The journey from a plain piece of fabric or a bag of colorful loops to a finished, usable item builds a profound sense of accomplishment and pride. This sense of achievement is a powerful motivator, encouraging children to take on more complex challenges and nurturing their self-confidence.
At I'm the Chef Too!, we understand the importance of activities that engage children deeply, fostering their innate curiosity and creativity. Pot holder crafts exemplify our commitment to providing screen-free educational alternatives that facilitate family bonding. When children are immersed in a hands-on project, they are not just consuming information; they are actively creating, exploring, and problem-solving. These are the very skills we aim to cultivate through our unique approach of teaching complex subjects through tangible, hands-on, and delicious cooking adventures developed by mothers and educators. Crafting a pot holder mirrors this process, offering a playful yet purposeful experience that contributes to a child’s holistic development.
Ready to explore even more hands-on fun that blends learning with delicious outcomes? Why not spice up your kitchen with a monthly adventure? Join The Chef's Club today and enjoy free shipping on every box! Each box is a complete experience, brimming with pre-measured dry ingredients and specialty supplies, ensuring a new "edutainment" experience delivered right to your door.
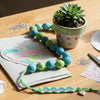
Handprint & Fingerprint Potholders: A Timeless Keepsake
One of the most beloved and simple pot holder crafts for kids involves using their own hands and fingers to create unique designs. Handprint and fingerprint art captures a moment in time, preserving the size and shape of tiny hands and giving them a special place in your home. These crafts are not only adorable but also incredibly personal, making them perfect gifts for family members on holidays, birthdays, or just because.
Materials You'll Need:
- Plain Cloth Pot Holders: Opt for solid colors (white, cream, light grey work best) to make the handprints stand out. You can find these at craft stores, dollar stores, or online.
- Fabric Paint: This is crucial! Regular acrylic paint might crack or wash off. Fabric paint is designed to adhere to cloth and withstand washing (though gentle washing is recommended for longevity). Choose non-toxic varieties safe for children. A variety of colors will allow for more creativity.
- Foam Paint Brushes or Sponges: For applying paint evenly to hands.
- Small Paper Plates or Palettes: To squirt paint onto.
- Baby Wipes or Damp Cloths: For quick cleanup of hands.
- Newspaper or Craft Mat: To protect your work surface.
- Optional Embellishments: Fabric markers, glitter glue, small fabric scraps, buttons (for older children, with supervision for attachment).
Step-by-Step Guide to Creating Handprint Potholders:
- Prepare Your Workspace: Lay down newspaper or a craft mat to catch any spills. Have all your materials within easy reach, including your baby wipes.
- Choose Your Colors: Let your child pick their favorite fabric paint colors. For a single handprint "flower," one or two colors might be enough. For a more abstract design, they can use several!
- Apply the Paint: Squirt a small amount of fabric paint onto a paper plate. Using a foam brush, carefully paint the palm and fingers of your child’s hand. Ensure an even coat, but not too thick that it drips. For younger children, you might need to help them spread the paint.
- Make the Imprint: Gently guide your child’s painted hand onto the center of the plain pot holder. Press down firmly but carefully, making sure all fingers and the palm make contact with the fabric. Encourage them to wiggle their fingers slightly to ensure a good transfer.
- Lift and Reveal: Carefully lift your child's hand straight up to avoid smudging. The magic of their unique handprint will be revealed!
- Clean Up: Immediately use baby wipes or a damp cloth to clean your child’s hand.
-
Add Details (Optional):
- Flower Stem and Leaves: With a green fabric marker or a fine brush and green fabric paint, your child can draw a simple stem and leaves below the handprint to transform it into a blooming flower.
- Fingerprint Dots: Use their fingertips to create colorful dots around the handprint, or to add smaller "petals" or "leaves."
- Personalization: Once the handprint is dry, use a fabric marker to write their name, the date, or a loving message like "Hands that cook with love" or "Thanks for growing with me."
- Glitter or Embellishments: A touch of fabric-safe glitter glue can add sparkle, or small fabric shapes can be glued on for extra texture.
- Drying and Curing: This is a crucial step! Allow the pot holder to dry completely, which can take several hours (check paint instructions). Most fabric paints require "curing" – often by air drying for 24-72 hours, and then heat-setting with an iron to make them truly permanent and washable. Follow the specific instructions on your fabric paint bottle.
- Care: To ensure your cherished creation lasts, we highly recommend hand-washing these personalized pot holders in cool water and air-drying them.
Educational Connections:
- Fine Motor Skills: Painting hands and carefully pressing them down, as well as adding details with brushes, all refine dexterity and hand-eye coordination.
- Color Recognition & Mixing: Children learn about colors as they choose and apply them. They might even experiment with mixing two colors on their hand to see the result.
- Self-Expression: This craft is a canvas for their unique personality and creativity. There’s no right or wrong way, just their way!
- Memory and Keepsake: Understanding the concept of preserving a moment or making a special gift for someone fosters emotional intelligence and a sense of connection.
Beyond these simple pot holders, we love how cooking can connect kids to history and science. For instance, imagine exploring geology and chemistry with a delightful treat! Our Erupting Volcano Cakes kit creates a chemical reaction that makes cakes bubble over with deliciousness – a perfect example of hands-on learning that tastes amazing.
Not quite ready for a monthly commitment but eager to dive into creative kitchen adventures? Explore our full library of adventure kits available for a single purchase in our shop! You'll find a wide variety of themes to spark curiosity and creativity in every child.
Weaving Wonders: The Potholder Loom Experience
For generations, the simple act of weaving has captivated children, and the pot holder loom is often their first introduction to this ancient art form. Far from being an outdated craft, the jersey-loop pot holder loom is experiencing a massive resurgence, cherished for its simplicity, therapeutic rhythm, and the satisfying creation of a truly useful object. This craft connects children to foundational principles of textile art and engineering, offering a unique blend of creativity and structured thinking.
A Brief History and Enduring Appeal:
The concept of the jersey-loop loom dates back to the 1930s, designed to utilize off-cuts of factory-woven socks – a testament to thriftiness and ingenuity during challenging economic times. What began as a practical solution for resourceful housewives quickly became a beloved children's activity. Its appeal lies in its straightforward "over and under" technique, which is easy for small hands to grasp, and the rapid production of a functional item. The satisfaction of turning a pile of colorful loops into a sturdy, usable pot holder in a short amount of time is immensely rewarding for kids.
Materials You'll Need:
- Pot Holder Loom: These typically consist of a square frame with pegs around the perimeter. They come in various sizes, with an 18-peg loom being a common starter.
- Cotton or Jersey Loom Loops: These are the pre-cut fabric loops that you weave with. They come in an array of vibrant colors. Cotton loops offer a tighter weave, while jersey loops are softer and more flexible.
- Weaving Hook: Usually included with the loom, this tool helps children pick up and pull loops through.
- Scissors (Optional): For trimming any loose threads.
The Basic Weaving Technique: Over and Under
-
Warping the Loom (Vertical Loops):
- Show your child how to stretch the first loop over two opposite pegs on the loom, creating a "warp" thread.
- Continue stretching loops across the loom, ensuring they are snug but not overly tight. These will be your vertical threads.
- For an 18-peg loom, you'll typically use 9 loops for the warp.
-
Weaving the Weft (Horizontal Loops):
- Take a new loop (this is your "weft" thread).
- Using the weaving hook, guide the loop over the first warp thread, under the second, over the third, and so on, alternating "over and under" across the entire row.
- Hook the ends of this weft loop over the pegs on the sides of the loom.
- Crucial Step: For the next row, reverse the pattern. If the first loop went over the first warp thread, the second loop must go under the first warp thread, then over the second, and so forth. This alternating pattern is what creates a strong, interlocking weave.
- Continue this process, row by row, until the entire loom is filled.
-
Finishing the Edges (Binding Off):
- This step requires a bit more dexterity and adult supervision initially.
- Starting at one corner, use the hook to lift the first loop off its peg.
- Then, lift the next loop off its peg and pull it through the first loop. This creates a chain stitch.
- Continue this process all the way around the loom, pulling each new loop through the previous one, effectively "locking" the edges together.
- When you reach the last loop, pull it tightly and knot it, or pull another loop through it to create a hanging loop for the pot holder.
Exploring Patterns and Designs:
Beyond the basic over-under weave, the pot holder loom offers surprising possibilities for pattern exploration:
- Color Patterns: The simplest way to add design is through color. Children can create stripes, checkerboards, or random "chaos of color" designs by choosing specific colored loops for each warp or weft row. This introduces basic sequencing and design principles.
- Twill Weaves: For older children or those seeking a challenge, different peg-skipping techniques can create diagonal patterns characteristic of a twill weave. For example, going "over two, under one," and then offsetting the pattern on subsequent rows. This introduces more complex spatial reasoning.
- Basket Weave Variations: By skipping one or more warp loops (e.g., going over two, under two), children can create a looser, more open basket weave effect, or even a half-basket weave. This teaches them about different textures and structural integrity.
Educational Connections:
- Fine Motor Skills and Dexterity: Maneuvering the loops and the hook requires precision, strengthening the small muscles in the hands and fingers.
- Spatial Reasoning: Children learn to visualize how threads interlock and create a fabric, understanding concepts of over, under, front, and back.
- Math and Logic: Weaving inherently involves counting, sequencing, and pattern recognition. Creating specific designs requires logical thinking and planning.
- Problem-Solving and Resilience: Loops might be skipped, or patterns might go awry. Learning to identify mistakes, backtrack, and correct them builds patience and problem-solving skills, teaching children that "mistakes" are simply opportunities to learn.
- Patience and Focus: Weaving is a rhythmic, repetitive activity that encourages sustained attention and a sense of calm. It teaches children the satisfaction of slow, deliberate work.
- Tactile Learning: The feel of the fabric loops, the tension of the weave, and the emerging texture of the pot holder provide a rich sensory experience.
For children fascinated by the structure and patterns of the world, our culinary STEM kits offer similar hands-on discovery. They can explore astronomy by creating their own edible solar system with our Galaxy Donut Kit, where the patterns of the universe come to life through delicious treats! It's another fantastic way we make learning tangible and exciting.
Beyond the Basics: Innovative Potholder Craft Ideas
While handprint painting and loom weaving are classic choices, the world of pot holder crafts is vast and full of creative potential. By thinking a little outside the box, you can engage children in more advanced techniques and introduce them to new materials, all while fostering their artistic and practical skills.
1. No-Sew Fabric Potholders: Layering and Knotting
This method is fantastic for younger children who might not have the dexterity for weaving or painting, and it’s a wonderful way to introduce concepts of texture and layering.
Materials:
- Fabric Squares: Pre-cut 5-6 inch squares of various cotton fabrics (flannel, old t-shirts, dish towels work great). You'll need several layers for thickness.
- Scissors: Child-safe scissors.
- Ruler and Fabric Marker (Optional): For marking cutting lines.
Instructions:
- Layer the Fabric: Stack 4-6 fabric squares neatly on top of each other. The more layers, the thicker and more protective the pot holder will be.
- Cut the Fringe: Along all four edges of the stacked fabric, make cuts about half an inch deep and half an inch apart, creating a fringe. Ensure the cuts go through all layers.
- Knotting: Take two corresponding fringe strips from the top layer and two from the bottom layer and tie them together in a simple knot. Work your way around the entire pot holder, knotting all the fringe strips. This will bind the layers together.
- Embellishments: Older children can braid some of the fringe strips before knotting for a decorative edge.
Educational Angle: Introduces basic textile construction, understanding layers for insulation, and repetitive actions for fine motor development.
2. Felt Applique Potholders: Designing with Shapes
Felt is a forgiving fabric that doesn't fray, making it perfect for cutting shapes and applying them without complex stitching. This encourages design thinking and storytelling.
Materials:
- Plain Felt Pot Holders: These can be purchased pre-made.
- Various Colored Felt Scraps: For cutting shapes.
- Fabric Glue or Hot Glue Gun (Adult Use Only): For adhering felt shapes.
- Scissors: Child-safe.
- Templates (Optional): Cookie cutters, stencils for shapes.
Instructions:
- Design Concept: Encourage your child to think of a theme (animals, flowers, abstract patterns, initials) for their pot holder.
- Cut Shapes: Using scissors, help your child cut out shapes from the felt scraps. For younger kids, pre-cut shapes work well. Older kids can practice freehand cutting.
- Arrange and Glue: Let your child arrange the felt shapes on the plain felt pot holder until they are happy with the design.
- Secure: Use fabric glue to carefully attach the shapes. If using a hot glue gun, an adult should do the gluing while the child directs placement.
- Dry: Allow ample drying time for the glue.
Educational Angle: Promotes design principles (composition, color theory), imaginative play, scissor skills, and understanding shapes.
3. Recycled Material Potholders: Sustainability in Action
This is a fantastic way to teach children about recycling, upcycling, and sustainability while creating something useful. Old denim jeans, t-shirts, or even thick towels can be repurposed.
Materials:
- Sturdy Fabric Scraps: Old jeans, t-shirts, bath towels, denim, canvas (ensure they are clean).
- Fabric for Lining/Batting: Old blankets, quilt batting, or felt for insulation.
- Sewing Machine or Fabric Glue/Hand-Sewing Kit (for older kids/adults):
- Scissors, Pins, Iron (adult use).
Instructions (Simplified for child involvement):
- Select & Cut: Help your child select sturdy fabric scraps. Cut two squares (approx. 8x8 inches) for the front and back, and one slightly smaller square for the batting/lining.
- Layer: Place the batting in between the two main fabric squares.
- Design (Child's Role): Let your child decorate the top fabric square before assembly. They can use fabric markers, fabric paint (as described in the handprint section), or even small fabric scraps glued on for an "upcycled collage" effect.
-
Adult Assembly: An adult will then machine-sew or hand-sew the layers together, adding a binding around the edges or turning it right-side out after sewing, and potentially adding a hanging loop.
- Quilting for Insulation: For a truly insulated pot holder, the layers can be "quilted" by sewing straight lines across them, which prevents the batting from shifting. This is a great way to introduce basic quilting patterns to older children (under adult supervision for the sewing machine).
Educational Angle: Teaches environmental awareness, resourcefulness, basic material science (insulation properties), and encourages creative problem-solving with available resources.
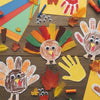
Even beloved characters can make learning fun and encourage imaginative play, like when kids make Peppa Pig Muddy Puddle Cookie Pies. These themed kits from I'm the Chef Too! bring stories to life in the kitchen, proving that education can be engaging and delicious!
The "Edutainment" Factor: Connecting Potholder Crafts to STEM & Life Skills
At I'm the Chef Too!, we firmly believe that learning is an adventure, and that the kitchen is a fantastic laboratory for "edutainment" – where education and entertainment deliciously intertwine. Pot holder crafts, while seemingly simple, are brimming with opportunities to introduce foundational STEM (Science, Technology, Engineering, Math) concepts and crucial life skills in a playful, tangible way. This hands-on approach sparks curiosity and creativity, encouraging children to think like scientists, engineers, and artists.
Science in the Craft Room:
- Material Science: Discussing why certain fabrics (like cotton or wool) are good for pot holders (insulation, heat resistance) introduces basic material properties. How does the weave of fabric affect its strength and heat retention?
- Color Theory: Mixing fabric paints to create new shades or arranging loom loops to create a harmonious color palette delves into the science of light and color. What happens when red and yellow mix?
- Chemical Reactions (Optional - Natural Dyeing): If you venture into dyeing your own loom loops with natural dyes (like onion skins or turmeric), you're exploring basic chemistry and understanding how substances interact to change color.
Technology & Engineering Principles:
- Simple Machines (The Loom): The pot holder loom itself is a simple technology. How does its design (pegs, frame) allow for the creation of fabric? It's a precursor to understanding more complex textile machinery.
- Design Thinking: Before even starting, children envision what their pot holder will look like. They plan colors, patterns, and arrangements, which is a fundamental step in the engineering design process. How can they make it sturdy? How can they make it look appealing?
- Structural Integrity: When weaving, children instinctively learn about tension and interlocking structures. Why does going "over, under, over, under" create a strong fabric, while simply layering loops doesn't? This is basic engineering in action.
Math in Every Loop and Stroke:
- Counting and Number Sense: Whether counting loops for a loom or pegs around the frame, or even fingers for a handprint, counting is an integral part of the process.
- Patterns and Sequencing: Weaving (over/under), arranging handprints, or creating felt designs all involve identifying, replicating, and creating patterns. This builds foundational algebraic thinking.
- Geometry: Understanding shapes (squares, rectangles), symmetry, and spatial relationships (where to place a handprint, how to arrange shapes) introduces basic geometric concepts.
- Measurement (Implicit): Estimating how much paint to use, or how many layers of fabric are needed for thickness, introduces informal measurement.
Arts & Creativity:
- Self-Expression: Every pot holder crafted by a child is a unique piece of art, a reflection of their personality and imagination.
- Aesthetics: Children make choices about colors, textures, and arrangement, developing their sense of aesthetics and design.
- Fine Arts Skills: Painting, drawing (for details), and even the sculptural aspect of weaving contribute to a child's artistic development.
Essential Life Skills:
- Following Instructions: Carefully reading or listening to steps is crucial for success.
- Patience and Persistence: Some steps, like weaving or waiting for paint to dry, require patience. Overcoming challenges (e.g., a skipped loop) builds persistence and resilience.
- Problem-Solving: What if the paint is too thin? What if a loop breaks? Children learn to adapt and find solutions.
- Resourcefulness and Upcycling: Using old clothes for fabric pot holders teaches the value of repurposing and reduces waste.
- Generosity and Gifting: Creating a pot holder as a gift teaches the joy of giving and the value of handmade presents.
- Kitchen Safety (Implicit): While crafting the pot holder, the conversation can naturally shift to why pot holders are important (protecting hands from heat), subtly reinforcing kitchen safety awareness.
Our kits at I'm the Chef Too! are designed to offer these kinds of multi-faceted learning experiences. From understanding chemical reactions to exploring different cultures through food, we aim to make every activity an exciting journey of discovery. Join The Chef's Club and embark on a new adventure delivered to your door every month with free shipping in the US!
Fostering Family Bonds Through Creative Kitchen Adventures
Beyond the incredible educational benefits, pot holder crafts offer something truly invaluable in our busy lives: an opportunity for genuine family bonding. In a world where distractions are plentiful, setting aside time for a shared, hands-on activity can create powerful, lasting memories and strengthen connections between family members.
At I'm the Chef Too!, facilitating family bonding is at the core of our mission. We believe that shared experiences in the kitchen and around creative projects are incredibly enriching. Crafting a pot holder together embodies this philosophy perfectly. It’s not just about the finished product; it’s about the laughter, the conversations, the problem-solving, and the quiet moments of concentration shared side-by-side.
Creating a Conducive Environment:
- Designate a "Creative Zone": Set up a dedicated space, even if it's just the kitchen table covered with newspaper. This signals that it's time for a special activity and helps minimize cleanup stress.
- Gather Supplies Together: Involving children in the preparation, from gathering loops to laying out paints, builds anticipation and gives them ownership of the project.
- Embrace the Process, Not Just the Product: Encourage experimentation and celebrate efforts, even if the "perfect" pot holder isn't achieved. The joy is in the making!
- Engage in Conversation: Use the crafting time to talk about their day, what they're learning, or even tell stories. The hands-on nature of the craft allows for easy, natural conversation without the pressure of direct eye contact.
- Share Roles: Let children lead the creative decisions (color choices, patterns), while adults assist with trickier steps (like heat-setting paint or binding off a loom). This teaches teamwork and builds confidence.
Implicit Understanding of Adult Supervision and Safety:
While pot holder crafts are generally safe, adult supervision is always key. This means:
- Non-Toxic Materials: Ensuring paints and glues are child-safe.
- Safe Tool Use: Supervising scissor use, and an adult handling hot glue guns or irons for heat-setting.
- Age Appropriateness: Choosing crafts that match your child's developmental stage and skill level. For instance, very young children might enjoy simple handprinting, while older kids can tackle weaving patterns or more intricate felt designs.
- Cleanup: Teaching children to participate in cleaning up after a craft fosters responsibility and respect for materials and their workspace.
These shared creative moments are precious. They’re an opportunity to unplug, reconnect, and create something beautiful and functional together. These aren't just pot holders; they're tangible memories of shared time, patience, and love.
Looking for even more ways to bring your family together with educational fun that tastes good? Our unique kits, developed by mothers and educators, offer adventures that blend delicious treats with amazing lessons. Browse our complete collection of one-time kits to find the perfect theme for your next family bonding experience!
Conclusion
Pot holder crafts for kids are more than just a simple activity; they are a gateway to a world of creativity, learning, and connection. From the heartwarming sentiment of a handprint keepsake to the satisfying rhythm of a woven masterpiece, these projects offer a rich tapestry of experiences. They nurture fine motor skills, ignite curiosity about patterns and materials, and subtly introduce fundamental STEM concepts, all while providing a much-needed screen-free escape.
We've explored how these crafts foster self-expression, build problem-solving abilities, and instill patience, culminating in a functional, cherished item. More importantly, we've seen how they create invaluable opportunities for family bonding, transforming ordinary afternoons into extraordinary memories. At I'm the Chef Too!, we believe that the best learning happens when it's hands-on, engaging, and sparks genuine joy. Pot holder crafts exemplify our commitment to "edutainment," demonstrating that complex subjects can be taught through tangible, delightful adventures.
So, gather your materials, clear your workspace, and embark on a crafting journey with your children. You’re not just making a pot holder; you’re weaving in valuable lessons, painting confidence, and molding precious moments that will last a lifetime. Ready to keep the adventure going with even more educational fun delivered right to your door? Join The Chef's Club today and enjoy free shipping in the US on every monthly STEM cooking kit! Give the gift of learning that lasts all year with our flexible 3, 6, and 12-month pre-paid plans, perfect for sparking ongoing curiosity and creativity.
FAQ Section
Q1: What age group are pot holder crafts best for? A1: Pot holder crafts are incredibly versatile!
- Toddlers (1-3 years): Simple handprint or fingerprint designs with adult guidance are perfect for sensory exploration and fine motor development.
- Preschoolers (3-5 years): Handprint painting, simple felt shape gluing, and basic "over-under" loom weaving (with assistance) are great for developing dexterity and following instructions.
- School-Aged Kids (6+ years): They can independently tackle loom weaving (including more complex patterns), more detailed fabric painting, and even simple no-sew or applique designs. Older children can also participate in more intricate steps like binding off looms or planning multi-step projects.
Q2: What kind of paint should I use for handprint pot holders? A2: Always use fabric paint for handprint pot holders. Regular acrylic paint can crack, flake, or wash off the fabric, especially after heating or washing. Fabric paint is designed to adhere permanently to cloth and withstand use. Ensure it's non-toxic and child-safe. Remember to follow the specific drying and heat-setting instructions on the fabric paint bottle for best results.
Q3: How do I clean handmade pot holders? A3: To prolong the life of your child's handmade pot holders, hand-washing in cool water and air-drying is highly recommended. For painted pot holders, ensure the fabric paint has been properly cured (air-dried for the recommended time and heat-set with an iron if specified by the paint manufacturer) before the first wash. Avoid harsh scrubbing or machine drying, which can damage the design or the fabric.
Q4: Are pot holder looms easy for kids to use? A4: Yes, pot holder looms are generally very easy for kids to learn, especially with a little adult guidance. The basic "over and under" weaving technique is simple to grasp. It helps to demonstrate a few rows yourself, then let your child take over. It's an excellent activity for developing fine motor skills, patience, and pattern recognition. The immediate, tangible result of a usable item is very motivating for children.
Q5: What are the main educational benefits of pot holder crafts? A5: Pot holder crafts offer a wealth of educational benefits, aligning perfectly with I'm the Chef Too!'s "edutainment" philosophy:
- Fine Motor Skills: Crucial for writing, drawing, and daily tasks.
- Hand-Eye Coordination: Synchronizing what the eyes see with what the hands do.
- Problem-Solving: Figuring out patterns, correcting mistakes, and adapting designs.
- Creativity and Self-Expression: Choosing colors, designing patterns, and personalizing their creations.
- Patience and Persistence: Completing multi-step projects and waiting for drying times.
- Basic STEM Concepts: Introducing principles of material science, simple engineering (loom mechanics), math (counting, patterns, geometry), and art (color theory, design).
- Life Skills: Following instructions, cleaning up, understanding utility, and the joy of gifting.
Q6: Can we use old clothes to make pot holders? A6: Absolutely! Repurposing old clothes like jeans, t-shirts, or even thick towels is a fantastic way to make pot holders. This not only makes the craft more sustainable but also teaches children about upcycling and resourcefulness. Just ensure the fabric is clean and that you choose materials with some thickness or layer them up to provide adequate heat protection.
Q7: How can I make pot holder crafts even more engaging for my child? A7: To boost engagement:
- Let them choose: Allow your child to select colors, patterns, and themes. Ownership is a huge motivator.
- Tell a story: Connect the craft to a story or a theme they love (e.g., making a "galaxy" pot holder while discussing planets, just like our Galaxy Donut Kit).
- Make it a gift: Knowing the pot holder is for someone special (Grandma, a teacher) adds purpose and a sense of generosity.
- Work together: Collaborate on the project, with different family members taking on different steps.
- Display their work: Use the pot holders! Seeing their creation in action provides immense pride and satisfaction.
- Connect to other activities: Pair it with a cooking session where they can use their newly made pot holder! For even more blend of food and STEM, remember you can always browse our complete collection of one-time kits for inspiration.