Craft a Cardboard Pirate Ship: A Swashbuckling Adventure for Kids

Table of Contents
- Introduction
- Why a Pirate Ship Craft? Beyond Just Play
- Choosing Your Vessel: Types of Pirate Ship Crafts
- The Ultimate Cardboard Pirate Ship: A Step-by-Step Voyage
- Simpler Sails: Other Pirate Ship Craft Ideas
- Beyond the Build: Extending the Pirate Adventure
- Safety First, Matey!
- I'm the Chef Too! and the Spirit of Adventure
- Conclusion
- FAQ Section
Ahoy, mateys! Have you ever seen your child transform a simple cardboard box into a rocket ship, a secret fort, or a magical portal? There's an undeniable magic in giving children the tools and freedom to create, especially when it involves something as adventurous as a pirate ship. Imagine the thrill in their eyes as they embark on a grand voyage, commanding their very own vessel across the living room seas, searching for hidden treasure, or battling imaginary sea monsters. This isn't just about making a toy; it's about building a world, fostering incredible skills, and creating memories that sparkle brighter than any buried gold.
At I'm the Chef Too!, we wholeheartedly believe in the power of hands-on "edutainment" – where learning feels like an exciting game, and complex ideas become digestible through fun, tangible experiences. That's why we're so passionate about projects like crafting a pirate ship: it’s a perfect example of blending creativity, basic engineering, and imaginative play, all while keeping screens at bay. In this comprehensive guide, we'll weigh anchor and set sail on an epic crafting journey, exploring everything from the simplest paper ships to the most magnificent cardboard galleons. We'll dive deep into materials, step-by-step construction, and how to extend the adventure long after the glue has dried. Get ready to spark curiosity, build confidence, and share some truly joyful family moments as we show you how to create the ultimate pirate ship craft for kids!
Introduction
Picture this: A quiet Saturday morning, a stack of ordinary cardboard boxes, and a spark of inspiration. Before you know it, your living room has transformed into a bustling shipyard, filled with the delightful sounds of cutting, taping, and enthusiastic planning. This isn't just a craft project; it's an invitation to imagination, a challenge to problem-solve, and a fantastic opportunity for family bonding. The joy of creating something substantial, something they can truly play with, is unparalleled for children. And when that creation is a mighty pirate ship, ready to brave the imaginary high seas, the adventure truly begins!
Our mission at I'm the Chef Too! is to bring these kinds of enriching, screen-free experiences to families everywhere. We understand that parents and educators are constantly seeking ways to engage children in meaningful learning that goes beyond textbooks and screens. A pirate ship craft for kids perfectly encapsulates this philosophy, combining artistic expression with foundational STEM principles and endless storytelling possibilities. Throughout this post, we’ll guide you through various methods to construct a magnificent pirate ship, from simple paper versions to impressive cardboard behemoths, ensuring that no matter your skill level or available materials, you can embark on this creative voyage. We’ll cover the developmental benefits, the materials you’ll need, detailed instructions, and ideas for extending the play. By the end, you’ll be fully equipped to help your little buccaneers build their dream vessel, foster critical skills, and unleash their inner explorer!
Why a Pirate Ship Craft? Beyond Just Play
Crafting a pirate ship is far more than just a fun way to pass an afternoon. It’s a holistic learning experience that taps into multiple developmental areas, offering a rich blend of creativity, cognitive growth, and physical skill development. At I'm the Chef Too!, we pride ourselves on crafting experiences that are not only entertaining but genuinely educational, and a pirate ship project aligns perfectly with our "edutainment" ethos.
Sparking Imagination and Creativity: The most obvious benefit of a pirate ship craft is its incredible potential to ignite imagination. Once built, the ship becomes a prop for countless adventures. Children naturally lean into imaginative play, and having a tangible, self-made object enhances this deeply. They become captains, navigating treacherous waters, discovering new lands, and outsmarting rival crews. This kind of open-ended play is crucial for developing narrative skills, understanding social roles, and expressing emotions in a safe, creative space. It encourages them to think beyond the obvious, transforming simple materials into a world of possibility.
Developing Fine Motor Skills and Hand-Eye Coordination: From holding scissors to carefully applying glue, taping cardboard seams, or painting intricate details like a skull and crossbones, every step in building a pirate ship engages and refines fine motor skills. These are the small, precise movements of hands and fingers that are essential for tasks like writing, drawing, and even self-care. The challenge of cutting along lines, poking holes for masts, or weaving string for sails demands concentration and coordination, strengthening those tiny hand muscles and improving dexterity.
Fostering Problem-Solving and Engineering Principles: A pirate ship craft, especially one made from cardboard, is a fantastic introduction to basic engineering. Children encounter real-world problems: How do we make the sides stand up? How will the mast stay upright? Where should the deck go to be stable? They learn about structure, stability, and how different materials can be joined together. They experiment with different solutions, and even if their first attempt wobbles a bit, they gain valuable insights into design and construction. This hands-on problem-solving teaches resilience and critical thinking in a way that is immediately applicable and visible. This is exactly the kind of tangible learning experience we champion at I'm the Chef Too!, showing how complex subjects can be taught through practical, delicious, and engaging adventures.
Introducing Early STEM Concepts: While they might not realize it, kids building a pirate ship are engaging with science, technology, engineering, and math (STEM) principles.
- Engineering: The entire construction process is an exercise in engineering, from planning the structure to understanding load-bearing points and ensuring stability.
- Physics: If you take the ship to a kiddie pool or bathtub (depending on materials and waterproofing!), they can explore concepts like buoyancy, flotation, and resistance.
- Math: Measuring cardboard pieces, estimating dimensions, understanding symmetry, and counting pieces all involve basic mathematical concepts.
- Design: Choosing colors, adding decorations, and arranging elements teaches basic design principles. These connections are often implicit but incredibly powerful, laying a foundation for future learning.
Promoting Screen-Free Engagement and Family Bonding: In an increasingly digital world, finding meaningful screen-free activities is paramount. A pirate ship craft provides an engaging alternative that encourages direct interaction, communication, and collaboration. It’s a wonderful opportunity for parents, caregivers, and children to work together, sharing ideas, laughter, and the satisfaction of a job well done. This shared experience creates lasting memories and strengthens family ties, which is a core value of I'm the Chef Too!. We believe in creating moments where families can connect and learn together, away from digital distractions.
Building Confidence and Self-Esteem: There's immense pride in saying, "I made this!" Completing a project like a pirate ship gives children a tangible sense of accomplishment. It shows them that with effort and perseverance, they can bring their ideas to life. This boost in confidence empowers them to take on new challenges and believe in their own abilities, reinforcing a love for learning and discovery.
Ready to embark on more exciting, skill-building adventures that blend learning with delicious fun? Don't let the adventure stop here! Join The Chef's Club and receive a brand new "edutainment" experience delivered right to your door every month. Each box is packed with pre-measured dry ingredients, specialty supplies, and a unique STEM-based cooking project designed to spark curiosity and creativity. Join The Chef's Club today and enjoy free shipping on every box!
Choosing Your Vessel: Types of Pirate Ship Crafts
The beauty of a pirate ship craft lies in its versatility. You don't need exotic materials or advanced skills to create a fantastic vessel. Often, the best crafts emerge from what you already have lying around the house. At I'm the Chef Too!, we champion this resourceful approach, encouraging families to transform everyday items into tools for learning and fun. Let's explore some popular types of pirate ship crafts, ranging from simple to more elaborate, ensuring there's a perfect project for every age and attention span.
The Grand Cardboard Box Galleon
This is often the dream pirate ship craft for kids: a large, sturdy vessel that can be climbed into (or at least used with larger action figures). Cardboard box ships offer the most immersive play experience and the greatest opportunity for detailed construction and decoration.
Why it's great:
- Immersive Play: Large enough for kids to play inside or beside, fostering epic role-playing adventures.
- Durability: With some reinforcement (like tape or paper mache), these ships can last for years of imaginative voyages.
- Creative Canvas: Ample space for painting, adding details like portholes, anchors, and pirate flags.
- Engineering Challenge: Offers the most opportunities for understanding structural integrity, joining materials, and problem-solving.
Ideal for: Older preschoolers (with significant adult help) to early elementary schoolers.
Materials typically include: Large cardboard boxes (delivery boxes are perfect!), masking tape, scissors/craft knife (adults only), paint, glue, sticks/dowels for masts, fabric scraps for sails.
The Mighty Popsicle Stick Sloop
For a slightly smaller, yet still incredibly detailed and charming pirate ship, popsicle sticks are an excellent choice. They offer a uniform building block that’s easy for little hands to manage and glue.
Why it's great:
- Accessible Materials: Popsicle sticks are inexpensive and readily available.
- Fine Motor Practice: Gluing individual sticks together is excellent for precision and patience.
- Customizable: Can be built in various sizes and shapes, allowing for individual creativity.
- Display Worthy: The finished product often looks quite impressive and can be a great addition to a child's room.
Ideal for: Early elementary schoolers who have developed better glue control and can work with smaller components.
Materials typically include: Popsicle sticks (lots!), strong craft glue, colored cardstock or construction paper, scissors, a thin stick or skewer for the mast, a printable template (optional, but helpful for structure).
The Quick Paper Plate Brigantine
If you're looking for a quick, low-fuss craft that still delivers on the pirate theme, paper plates are your secret weapon. These are fantastic for younger children or for a spontaneous crafting session.
Why it's great:
- Simplicity: Very few steps, making it perfect for toddlers and preschoolers.
- Instant Gratification: Kids get a completed ship quickly, boosting their enthusiasm.
- Safe for Little Hands: Minimal cutting, often just ripping or pre-cut pieces.
- Readily Available: Most homes have paper plates.
Ideal for: Toddlers and preschoolers (with adult assistance for cutting).
Materials typically include: Paper plates, colored paper, glue stick, markers, a small stick or paper straw for the mast, a sticker for the flag.
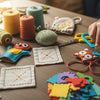
Miniature Ships: Cork Boats and Small Cardboard Vessels
Sometimes, the grandest adventures come in the smallest packages. Miniature pirate ships are perfect for pairing with action figures, LEGO characters, or even making a whole fleet for a water table adventure.
Why it's great:
- Fast to Make: Often takes minutes to assemble.
- Uses Up Scraps: Great for repurposing wine corks, toilet paper rolls, or small cardboard cut-offs.
- Great for Water Play: Many miniature versions can actually float, adding another dimension to play (though supervision is always key).
- Encourages Multi-Craft Play: Can be combined with other small crafts like paper tube pirates or treasure chests.
Ideal for: All ages, depending on complexity, often a fun supplementary craft.
Materials typically include: Wine corks, toothpicks, small paper squares for sails, elastic bands; or toilet paper rolls, small cardboard pieces, masking tape, markers.
Emphasizing Recycled Materials
At I'm the Chef Too!, we encourage sustainability and resourcefulness. Many of the best pirate ship crafts lean heavily on recycled materials. This not only teaches children about repurposing but also encourages them to see the potential in everyday objects. An empty cereal box isn't trash; it's the perfect canvas for a ship's hull! This approach fosters creativity within constraints and helps develop a problem-solving mindset using available resources.
Looking for even more ways to ignite your child's creativity with unique, hands-on projects? While a pirate ship craft is an amazing start, our diverse selection of one-time kits offers adventures across science, art, and cooking. Browse our full library of adventure kits available for a single purchase in our shop to find the perfect theme for your little learner! Explore our full collection of one-time kits here!
The Ultimate Cardboard Pirate Ship: A Step-by-Step Voyage
Let's dive into the most ambitious and rewarding pirate ship craft for kids: the magnificent cardboard galleon! This project requires a bit more time and adult involvement, but the payoff in imaginative play and skill development is immense. We'll draw inspiration from robust designs, ensuring a sturdy ship ready for countless adventures.
A Note on Adult Supervision: Throughout this entire process, especially when using scissors, craft knives, or hot glue, adult supervision is paramount. This isn't just about safety; it's about sharing the experience, guiding your child, and celebrating their efforts together.
Gathering Your Treasure (Materials)
Before you begin, gather all your supplies. Think of it like a pirate gathering provisions for a long voyage! The beauty here is that many items can be found around your home.
- Cardboard: This is your ship's foundation. Aim for large, sturdy delivery boxes. The bigger, the better for an immersive play experience! You'll need enough to cut out the base, sides, back, and deck.
- Masking Tape: Your primary fastening tool. It's strong, easy to work with, and takes paint well.
- Scissors/Craft Knife: (Adult use only for the craft knife, careful supervision for scissors). Sturdy scissors are essential for cardboard.
- Newspaper & Paper Mache Paste (Optional but Recommended for Durability): To make paper mache paste, simply mix 2 parts flour to 3 parts water until smooth. A pinch of salt can help prevent mold. This adds incredible strength and a smooth finish.
- Paint: Acrylic paints work well. Let your child choose the colors! Blues, browns, blacks, and whites are classic pirate colors.
- Paintbrushes: Various sizes for broad strokes and fine details.
- Glue: Strong craft glue for attaching smaller details and sails.
- Sticks/Dowels: Two sturdy sticks (e.g., from the yard, old broom handles, or craft dowels) for your masts.
- Fabric Scraps: An old black T-shirt, felt, or any durable fabric for the sails and flag.
- Varnish/Mod Podge (Optional): To seal and protect the paint, especially if the ship will see heavy play.
- Pencil/Marker: For drawing outlines.
- Ruler/Measuring Tape: For more precise cuts.
Designing Your Dream Ship: Planning and Basic Shapes
Every great ship starts with a plan. You don't need blueprints, just a rough idea of your ship's components.
- Envision the Shape: Most pirate ships have a wider base, tapering sides, a distinct bow (front) and stern (back), and at least one deck.
-
Sketch it Out: On your cardboard, lightly sketch the basic components:
- The Bottom: A long, somewhat oval or rectangular shape with slightly pointed ends for the bow and stern.
- Two Side Panels: These will mirror each other, rising from the base. They'll have a slight curve upwards towards the front and back to give the ship its classic shape.
- The Back (Stern) Panel: A shorter, curved piece that will close off the back of the ship.
- The Deck: A piece that fits inside the top of the hull.
- Internal Cross Sections (Optional but Recommended for Stability): If you want a really sturdy ship, cut out a few vertical cardboard pieces that will slot into notches in the base and sides, acting as internal ribs.
Tip: It’s often easier to cut the side panels first, then tape them together with the back panel, and then measure and cut the base and deck to fit snugly within this framework. Don't be afraid to trim and adjust!
Assembling the Hull: Taping and Securing
This is where your ship starts to take shape!
- Cut Your Panels: Carefully cut out your cardboard shapes. Remember, adults should handle any craft knives.
- Attach the Sides and Back: Take your two side panels and your back panel. Using generous amounts of masking tape, firmly tape the sides to the back. Work from the inside and outside to ensure a strong joint.
- Create Portholes (Optional): Before attaching the base, you might want to cut out circular portholes or square windows into your side and back panels. A craft knife or strong nail scissors (if you have a dedicated pair for crafting) can help create neat circles.
- Secure the Base: Once the sides and back are joined, position them onto your base piece. Start by taping the long edges of the sides to the base. Then, carefully curve the front and back of the sides to meet the pointed ends of your base, taping securely. This can be a bit tricky, so take your time and use plenty of tape to create a strong seal.
Adding the Deck & Mast Mounts
The deck provides the main play area and adds significant structural integrity.
- Insert the Deck: Once your hull is largely complete, fit your pre-cut deck piece inside the top. It might need some trimming to fit perfectly. Tape it securely around all its edges to the side panels. The deck is often a point of weakness, so reinforcing it with extra tape or even some small cardboard supports underneath can be beneficial.
-
Prepare for Masts: For the masts, you’ll need stable mounts.
- Cardboard Discs Method: Cut out 6-12 cardboard discs (about 2-3 inches in diameter). Poke a hole through the center of each disc that your mast stick fits snugly into. Glue these discs together in stacks of 3 or 4, creating a thick, sturdy base. Once dry, glue these stacks firmly onto the deck where you want your masts to stand (typically one at the front/middle, one at the back). Add masking tape around the base of these mounts to secure them even further to the deck.
- Direct Hole Method: If your cardboard deck is very sturdy, you can carefully cut an X-shape into the deck, then push the mast stick through, securing it underneath with tape. The disc method provides more stability, however.
The Paper Mache Advantage (Optional but Recommended)
Paper mache might seem like an extra step, but it transforms a cardboard craft into a much more durable, smoother, and professional-looking piece. It’s particularly great for reinforcing joints and the deck.
- Prepare Your Paste: Our easy and low-cost paper mache recipe: mix 2 parts all-purpose flour with 3 parts water until you have a smooth, pancake-batter-like consistency. A tablespoon of salt can be added to deter mold, especially if you live in a humid environment.
- Tear Your Paper: Tear newspaper or other packing paper into small strips (about 1-2 inches wide and 4-6 inches long). Tearing, rather than cutting, creates softer edges that blend better.
-
Apply Layers: Dip a paper strip into the paste, run it between two fingers to remove excess, and lay it onto your cardboard ship. Smooth it down.
- Focus on Joints: Pay extra attention to all the seams and taped areas. These are the weakest points.
- Criss-Cross Layers: Apply layers in different directions (e.g., vertical, then horizontal) to maximize strength, similar to how plywood is made.
- Reinforce the Deck: Make sure to get several layers under the edges of the deck where it meets the sides to provide extra support.
- Dry Thoroughly: This is crucial! Let the paper mache dry completely, which can take 24-48 hours depending on humidity and thickness. Placing it in a well-ventilated area or even outdoors on a dry day helps.
Painting Your Colors: The Artist's Touch
Once the paper mache is fully dry and hard (or directly after construction if you skipped paper mache), it’s time to bring your ship to life with color!
- Base Coats: Let your child choose the main colors. Blue for the hull, brown for wood accents, black for detailing are popular choices. Apply broad, even strokes.
- Let Dry: Allow each layer of paint to dry before adding details.
-
Add Details: This is where the personality comes in!
- Skull and Crossbones: The iconic pirate symbol. You can draw it freehand, use a stencil, or even print a template, cut it out, trace it, and then paint it on.
- Anchors, Cannons, Wood Grain: Use black or dark brown paint to add these details.
- "Weathering": A bit of dry-brushing with a lighter color can make the ship look aged and seaworthy. Let your little artists truly express themselves! This freedom to create is a cornerstone of our philosophy at I'm the Chef Too!, where every project is an opportunity for unique expression.
Hoisting the Sails
No pirate ship is complete without its majestic sails!
-
Prepare Your Sails: Take your fabric scraps. For a classic look, a large rectangular piece for the main sail and a smaller triangular piece for a jib sail (at the front) work well.
- Hem (Optional): If you're using fabric that frays, you might quickly sew or use fabric glue to hem the edges.
- Decorate: Before attaching, let your child decorate the sails! A white felt skull and crossbones cut out and glued onto a black fabric sail looks fantastic. Markers or fabric paint can also be used.
-
Attach to Masts:
- Top Loop: For the main sail, create a loop at the top edge of the fabric by folding it over and gluing/sewing, then slide your mast stick through this loop.
- Mid-Sail Attachment: Poke small holes in the middle of the sail and thread string through, tying it securely around the mast. You can also glue the sail directly to the mast at various points.
- Insert Masts: Carefully insert your masts into their prepared mounts on the deck. A dab of strong glue in the mount holes can help secure them permanently.
Finishing Touches and Ongoing Adventures
- Varnish (Optional): If you used paper mache and acrylic paints, a coat of Mod Podge or clear varnish will protect the paint and make the ship even more durable and wipeable.
-
Add Accessories: Think about additional details!
- Crow's Nest: A small cardboard cup or toilet paper roll glued near the top of the main mast makes a great lookout.
- Ladder: A simple ladder made from small sticks and string can be draped over the side.
- Rope Elements: Add string or yarn around the ship for rigging, railings, or anchor lines.
- Flags: Besides the main sail, smaller flags can be added to other masts or along the railings.
- Play, Play, Play! The most important step! Let your children immediately immerse themselves in play.
This detailed guide should provide a solid foundation for crafting an amazing cardboard pirate ship. Remember, the goal isn't perfection, but the joy of the process and the boundless imagination it sparks.
Are you eager to keep the creative juices flowing with more unique, hands-on activities that combine learning with delicious outcomes? Our monthly Chef's Club subscription delivers a new adventure directly to your doorstep with free shipping in the US! Each kit is a complete experience designed by mothers and educators, providing all the pre-measured dry ingredients and specialty supplies needed for a fantastic "edutainment" journey. Give the gift of learning that lasts all year with a 12-month subscription to our STEM cooking adventures!
Simpler Sails: Other Pirate Ship Craft Ideas
While the cardboard galleon offers an epic build, sometimes you need a quicker, simpler project. These alternatives still provide plenty of pirate-themed fun and are fantastic for different age groups or when time is short. They perfectly embody our I'm the Chef Too! value of accessible, engaging activities for every family.
Popsicle Stick Pirate Ship
This craft is wonderfully accessible and allows for a lot of creativity with a uniform material.
Materials:
- Popsicle sticks (around 20-30 per ship)
- Strong craft glue (PVA glue works well)
- Colored cardstock or construction paper (for flag and details)
- Scissors
- A thin stick or bamboo skewer for the mast
- Markers or paint
Instructions:
- Build the Base: Lay 8-10 popsicle sticks side-by-side. Glue two more popsicle sticks horizontally across them, one near each end, to create a flat raft-like base. Let it dry completely.
- Add Sides (Optional): For a more boat-like shape, you can glue more popsicle sticks vertically around the edges of your base, creating low walls.
- Create the Mast: Take your thin stick or skewer. Cut out a rectangular flag from colored paper and draw a skull and crossbones or any pirate design. Glue the flag to the top of the mast stick.
- Attach the Mast: Glue the bottom of the mast stick firmly to the center of your popsicle stick base. You can reinforce this with a small blob of hot glue (adults only) or by gluing a small lump of modeling clay around the base.
- Decorate: Use markers or paint to add details like portholes, anchors, or a wooden texture to your ship. You can also cut out a small paper sail and glue it to the mast.
This simple craft is excellent for practicing precision gluing and allows kids to quickly create multiple ships for a fleet!
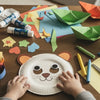
Paper Plate Pirate Ship
Perfect for younger children, this craft uses readily available materials and encourages immediate play.
Materials:
- Paper plate
- Colored construction paper (brown for the ship, black/white for flag)
- Scissors
- Glue stick
- Marker
- Paper straw or thin stick for the mast
Instructions:
- Cut the Plate: Fold a paper plate in half. Cut along the fold to create two semi-circles. You'll use one half for your ship.
- Shape the Ship: Take one semi-circle. Cut a small, shallow curve out of the straight edge of the semi-circle to create the boat's hull shape.
- Add the Deck: Cut a long, narrow strip of brown construction paper to fit across the top curved edge of your paper plate boat. This will be the "deck." Glue it in place.
- Create the Mast and Flag: Glue a paper straw or thin stick vertically onto the center of your paper plate boat. Cut out a small rectangle for a flag from black or white paper. Draw a skull and crossbones. Glue the flag to the top of the mast.
- Decorate: Use markers to add portholes, waves, or any other pirate-themed details to your ship.
This craft is quick, fun, and can be easily customized with different colors and designs.
Miniature Ships: Cork Boats and Small Cardboard Vessels
For action figures, LEGO people, or even bathtub adventures, these tiny ships are big on fun.
Cork Boats: Materials: 3-5 wine corks, rubber bands, toothpick, small paper square for a sail, waterproof glue (optional). Instructions: Line up 3 corks side-by-side. Wrap two rubber bands tightly around them, one near each end, to hold them together like a raft. For a mast, poke a toothpick into the middle cork. Cut a small triangle or rectangle from paper, draw a pirate flag, and poke it onto the toothpick. For more durability, you can use waterproof glue instead of rubber bands. These are fantastic for floating!
Toilet Paper Roll/Small Cardboard Ships: Materials: Toilet paper roll or small cardboard tube, small cardboard scraps, scissors, glue, markers, toothpick. Instructions: Cut a "U" shape out of one side of the toilet paper roll to create the hull opening. Use cardboard scraps to cut out a small "deck" to fit inside, and a small flag. Glue these on. Poke a toothpick into the top of the roll for a mast, add a paper sail. Decorate with markers. These are great for small figures.
These simpler crafts still offer rich opportunities for imaginative play and skill development, proving that you don't need to embark on a massive project to have a successful creative session. At I'm the Chef Too!, we believe in providing a wide range of "edutainment" options, because every child's learning journey is unique and every moment of creation is valuable.
Beyond the Build: Extending the Pirate Adventure
The magic of a pirate ship craft doesn’t end when the glue dries. In fact, that’s just the beginning! At I'm the Chef Too!, we emphasize that our kits are launching pads for ongoing exploration and creativity. A pirate ship provides a magnificent backdrop for continued learning, imaginative play, and family engagement. Here’s how you can extend the swashbuckling adventure:
Role-Playing & Storytelling: Captain of Their Own Destiny
Once the ship is built, encourage your child to become the captain, first mate, or even a mischievous parrot!
- Create Characters: Help them imagine who is on their crew. What are their names? What are their personalities?
- Develop Scenarios: Ask open-ended questions: "Where is your ship sailing today?" "What kind of treasure are you looking for?" "Are there any friendly dolphins or sneaky sharks in the water?"
- Props: Simple props like an eye patch, a bandana, a toy sword, or a cardboard telescope (a painted toilet paper roll!) can enhance the play.
- Problem-Solving Narratives: "Oh no, a storm is coming! How will your ship survive?" This encourages creative thinking and verbal expression.
Storytelling and role-playing are vital for language development, social-emotional learning, and understanding different perspectives.
Treasure Hunts: X Marks the Spot!
What's a pirate ship without a treasure hunt? This is a fantastic way to combine physical activity with cognitive skills.
- Craft a Map: Help your child draw a simple treasure map. It doesn't have to be intricate – a few landmarks (e.g., "under the couch," "behind the big chair") and an "X" mark the spot. You can even crumple the paper and stain it with tea bags for an authentic aged look!
- Create the Treasure: This can be anything! Chocolate coins, shiny pebbles, painted rocks, or even small toys. You can also make a simple treasure chest from an egg carton or a small cardboard box, decorating it with "gold" paint and gems.
- The Hunt: Hide the treasure and let your child follow the map from their ship. This teaches spatial reasoning, following directions, and map-reading skills.
Pirate-Themed Snacks: Edible Adventures
Connecting crafts with culinary adventures is what we do best at I'm the Chef Too! It’s a fantastic way to engage all senses and bring the theme to life in a delicious way.
- "Ocean Water" Punch: Mix blue Hawaiian Punch or Gatorade with lemon-lime soda for a bubbly, ocean-themed drink. Add gummy fish!
- "Gold Coin" Cookies: Make or buy round cookies and decorate them with yellow icing and edible glitter.
- "Pirate Ship" Sandwiches: Cut sandwiches into ship shapes using cookie cutters or a knife, adding a toothpick mast with a small paper flag.
- "Cannonball" Meatballs: Serve meatballs with a side of "seaweed" (green pasta) for a hearty pirate meal.
- Imagination in Every Bite: Even beloved characters can make learning fun and delicious! How about an adventure in the kitchen creating something truly delightful like our Peppa Pig Muddy Puddle Cookie Pies? It's a perfect way to combine imaginative play with a tasty treat, echoing the joy of creative discovery found in crafting a pirate ship.
These edible adventures don't just fill hungry tummies; they reinforce the theme, engage children in basic cooking skills, and provide another opportunity for family bonding.
Learning Opportunities: Ahoy, Knowledge!
A pirate theme is surprisingly rich with educational tangents.
- History: Briefly discuss real pirates (good for older kids), famous ships, or life at sea.
- Geography: Look at maps or a globe. Where did pirates sail? What are oceans and continents?
- Ocean Life: Research sea creatures that pirates might have encountered.
- Navigational Basics: Talk about compasses, stars for navigation, or different parts of a ship.
Creating a Pirate Environment
Extend the play by transforming a small corner of a room into a pirate cove.
- Themed Decor: Drape blankets or sheets to create a "ship's cabin." You could even add a pirate map play rug (as sometimes seen in children's decor) to define the play space.
- Sound Effects: Play ocean sounds or pirate-themed music during playtime.
- Lighting: Dim the lights for a "night voyage" or use a flashlight for a "search for treasure."
By integrating these extension activities, your pirate ship craft for kids becomes a launchpad for endless hours of imaginative play and multifaceted learning. It's this comprehensive approach to "edutainment" that sets I'm the Chef Too! apart, creating experiences that nurture curiosity, creativity, and connection.
Our mission at I'm the Chef Too! is to inspire children through hands-on learning that blends food, STEM, and the arts. From crafting mighty pirate ships to whipping up delicious, educational treats, every activity is designed to spark curiosity, build confidence, and bring families closer together. If you've loved the idea of a comprehensive, engaging craft experience, imagine receiving a new, exciting "edutainment" kit delivered to your door every month! We offer flexible 3, 6, and 12-month pre-paid plans, perfect for gifting or ongoing enrichment. Join The Chef's Club today and embark on a continuous journey of discovery with free shipping on every box!
Safety First, Matey!
While crafting a pirate ship is a wonderfully engaging and creative activity, safety should always be your top priority. At I'm the Chef Too!, we believe in fostering a love for learning in a secure and supportive environment, and that includes our crafting adventures.
Here are some essential safety guidelines to keep in mind:
- Adult Supervision is Non-Negotiable: For any craft project involving cutting tools, glue, or paint, an adult must be present and actively supervising. This is especially true when working with younger children.
-
Tool Handling:
- Scissors: Teach children how to hold and use scissors correctly. Emphasize cutting away from their body and others. For cardboard, heavy-duty scissors or a craft knife (strictly for adult use only) might be necessary.
- Craft Knives: Absolutely only for adult use. Keep them out of reach of children. When using, always cut on a protected surface and away from your body.
- Hot Glue Guns: If using a hot glue gun for quick, strong bonds, it must be operated by an adult due to the risk of burns.
- Non-Toxic Materials: Always opt for non-toxic paints, glues, and markers, especially since children often touch their faces or put their hands in their mouths. Check labels carefully.
- Ventilation: If using spray paints, varnishes, or strong adhesives, ensure the crafting area is well-ventilated, preferably outdoors or in a garage with open windows.
- Workspace: Set up a clean, organized workspace. Cover tables with newspaper or a plastic tablecloth to protect surfaces from paint and glue. This also makes cleanup easier.
- Sharp Edges: After cutting cardboard, check for any particularly sharp or jagged edges. You can sand them down with sandpaper or cover them with masking tape to prevent scrapes.
- Small Parts: If your pirate ship craft includes very small parts (like beads for decoration or tiny embellishments), be mindful of choking hazards for younger children (under 3 years old). Ensure these are securely attached or omitted if necessary.
- Drying Time: Emphasize patience during drying times. Wet paint or glue can be messy and less durable if not allowed to set properly.
- Post-Craft Safety: Once the ship is built, ensure there are no loose pieces that could fall off and become a hazard during play. If the ship is large enough for a child to get inside, make sure there are plenty of openings for air and easy exit.
By following these simple safety precautions, you can ensure that building a pirate ship is a safe, enjoyable, and enriching experience for everyone involved. Your child can focus on the fun of creation, and you can enjoy the magic of watching their imagination set sail, knowing they're in a secure environment.
I'm the Chef Too! and the Spirit of Adventure
At I'm the Chef Too!, we believe that learning should be an adventure—a hands-on, multi-sensory journey that ignites curiosity and creativity in every child. Our mission is to seamlessly blend food, STEM, and the arts into one-of-a-kind "edutainment" experiences that go far beyond traditional learning methods. Crafting a pirate ship for kids is a perfect example of the kind of engaging, screen-free activity that resonates deeply with our core philosophy.
Imagine the wonder as a child learns about structural engineering by taping cardboard together to form a hull, or about art and design by painting a majestic pirate flag. These tangible experiences transform abstract concepts into something real, something they can touch, manipulate, and play with. This is precisely our unique approach: teaching complex subjects through delicious cooking adventures and creative projects, all developed by dedicated mothers and educators who understand how children truly learn.
We are committed to sparking that innate curiosity in children, fostering a love for discovery that extends into all areas of their lives. Our kits, much like the comprehensive pirate ship project we’ve explored, are designed to encourage critical thinking, problem-solving, and imaginative play. They provide a wonderful opportunity for family bonding, creating shared memories and laughter around a common, exciting goal. We never promise to turn your child into a top scientist or a master chef overnight. Instead, we focus on the incredible benefits of the process: building confidence, developing key skills, encouraging perseverance, and cultivating a joyful, lifelong love for learning.
Every I'm the Chef Too! kit is an invitation to explore, create, and connect, providing a meaningful alternative to passive screen time. We ensure that our projects are not only fun but also grounded in educational principles, offering practical, valuable advice and realistic expectations for every family. We're here to support you in providing enriching experiences that nurture your child's natural talents and passions.
Conclusion
From the initial spark of an idea to the final hoist of the Jolly Roger, crafting a pirate ship for kids is an extraordinary journey that transcends a simple craft project. It’s an immersive experience that weaves together imagination, critical thinking, fine motor skill development, and fundamental STEM concepts. Whether you embark on the grand cardboard galleon or opt for a simpler popsicle stick sloop, the process is rich with opportunities for learning, creativity, and invaluable family bonding. As the "captain" of their own vessel, your child gains confidence, develops problem-solving abilities, and creates cherished memories that will last far longer than any fleeting digital game.
At I'm the Chef Too!, we believe in the transformative power of hands-on "edutainment"—where every activity is an adventure, and every creation is a lesson. We are dedicated to providing screen-free alternatives that spark curiosity, foster creativity, and bring families together around shared, tangible experiences. Just as your child learns about design and structure while building their pirate ship, our unique cooking STEM kits teach complex subjects through engaging, delicious adventures.
Don't let the spirit of adventure and discovery end here. Imagine a world of exciting, educational experiences delivered right to your home, ready to ignite your child's passion for learning month after month.
Ready for a new adventure every month? Join The Chef's Club and enjoy free shipping on every box. Our subscriptions offer flexible 3, 6, and 12-month pre-paid plans, perfect for continuing the journey of hands-on learning and family fun. Join The Chef's Club today and let the delicious "edutainment" begin!
FAQ Section
Q1: What's the best age range for a pirate ship craft? A1: Pirate ship crafts can be adapted for almost any age!
- Toddlers (1-3 years): Simple paper plate or cork boats with pre-cut shapes and lots of glue stick action (with adult help).
- Preschoolers (3-5 years): Popsicle stick or smaller cardboard ships, focusing on basic assembly, painting, and imaginative play (with significant adult assistance for cutting and complex gluing).
- Early Elementary (6-8 years): Can tackle more detailed cardboard box ships with adult guidance for cutting and tricky assembly points. They can take on more responsibility for painting and decorating.
- Older Kids (9+ years): Can largely work independently on complex cardboard designs, adding intricate details, and even planning their own blueprints.
Q2: How long does it take to make a cardboard pirate ship? A2: This varies greatly depending on the complexity and whether you use paper mache.
- Simple Cardboard Ship (no paper mache): 2-4 hours, including drying time for paint.
- Detailed Cardboard Ship (with paper mache): The active building time might be 3-5 hours, but you'll need to account for significant drying time for the paper mache (24-48 hours) and then for paint layers. It's often a multi-day project, which can be part of the fun!
Q3: Can I make the pirate ship float? A3: Most cardboard or paper-based pirate ships are not designed to float, as water will quickly degrade the materials.
- Small, buoyant crafts: Cork boats or ships made with waterproofed plastic containers can float! For a DIY approach, you can try sealing cardboard ships with multiple layers of waterproof varnish or Mod Podge, but consistent waterproofing can be challenging.
- Test it in a small basin: If you want to try, always test it in a small bowl of water first, not a bathtub, to minimize mess if it sinks.
Q4: What if I don't have large cardboard boxes? A4: No problem! Get creative with smaller materials:
- Cereal boxes or shoeboxes: Perfect for medium-sized ships for action figures.
- Toilet paper rolls/paper towel rolls: Excellent for miniature ships.
- Popsicle sticks or craft foam: Can be pieced together to form a ship.
- Paper plates: Quick and easy option for younger kids. Remember, the adventure is in the creating, not just the size of the ship!
Q5: How can I make the ship more durable for play? A5: Several strategies can increase durability:
- Masking Tape Reinforcement: Use generous amounts of masking tape on all seams and joints, both inside and out.
- Paper Mache: This is the ultimate durability booster. Multiple layers of paper mache significantly strengthen cardboard and provide a smoother, harder surface.
- Varnish/Sealant: After painting, apply a clear, non-toxic varnish, Mod Podge, or even a couple of coats of PVA glue (mixed with a little water) to seal and protect the paint and cardboard.
- Internal Supports: Add cardboard cross-sections or braces inside a large cardboard ship to prevent it from collapsing.
Q6: What other pirate-themed crafts can we do? A6: The pirate theme is full of possibilities!
- Treasure Chests: Decorate shoe boxes or egg cartons.
- Eye Patches: Cut from felt or cardboard and attach with elastic.
- Telescopes: Decorate toilet paper rolls.
- Pirate Hats: Made from paper or felt.
- Treasure Maps: Draw and "age" paper with tea bags.
- Pirate Characters: Make stick puppets, finger puppets, or toilet paper roll figures. These can enhance the imaginative play with your newly crafted pirate ship!
Q7: How can I connect this craft to learning? A7: This craft is naturally educational!
- STEM: Discuss engineering concepts (structure, stability), physics (buoyancy if it floats), and math (measuring, symmetry).
- Art: Explore color theory, design, and drawing.
- Language Arts: Encourage storytelling, creating characters, and inventing pirate dialogue.
- History/Geography: Look at maps, discuss famous pirates, or learn about ocean exploration. At I'm the Chef Too!, we infuse all our "edutainment" experiences with these kinds of integrated learning opportunities, making education fun and engaging.
Q8: I'm feeling overwhelmed by the detailed instructions. Is there an easier way to get started with creative learning? A8: Absolutely! We understand that elaborate DIY projects can be time-consuming. That's why I'm the Chef Too! offers a fantastic solution. Our kits provide a complete, curated "edutainment" experience, delivering everything you need—from pre-measured dry ingredients to specialty supplies—directly to your door. You get all the benefits of hands-on learning, STEM exploration, and family bonding without the hassle of gathering materials or extensive planning. Browse our complete collection of one-time kits for a wide variety of themes, or dive into continuous discovery by joining The Chef's Club for monthly adventures!