Cozy & Creative: Simple Fall Craft Ideas for Kids

Table of Contents
- Introduction
- Embracing Nature's Palette: Leaf & Pinecone Crafts
- Harvest Wonders: Apple, Pumpkin & Corn Crafts
- Friendly Critters of the Forest: Owl, Fox & Scarecrow Crafts
- Sensory Explorations & Edible Adventures
- Crafting with a Learning Twist: STEM & Literacy Focused Fun
- Bringing the I'm the Chef Too! Philosophy Home
- Conclusion
- FAQ Section
As the temperatures begin their gentle descent, and the world outside transforms into a magnificent canvas of crimson, gold, and amber, there’s an undeniable magic that fills the air. Fall isn't just a season; it's an invitation – an invitation to slow down, to gather, and to create. For families, it’s a golden opportunity to trade screen time for shared moments of wonder, to bring the vibrant hues of autumn indoors, and to ignite the spark of imagination in young minds. This blog post is your comprehensive guide to unlocking that seasonal magic, offering a treasure trove of simple, engaging, and educational fall craft ideas for kids of all ages. We'll delve into activities that not only celebrate the beauty of autumn but also gently introduce foundational STEM and artistic concepts, all while nurturing precious family bonding. By embracing the natural inspirations of this beautiful season, we can transform ordinary afternoons into extraordinary "edutainment" adventures, fostering curiosity, building confidence, and creating cherished memories, much like the hands-on learning experiences we champion every day at I'm the Chef Too!.
Introduction
Do you remember the sheer delight of collecting vibrant fall leaves, the thrill of carving a pumpkin, or the cozy satisfaction of creating something beautiful with your own hands as a child? These aren't just fond memories; they are the building blocks of creativity, problem-solving, and connection. In an increasingly digital world, providing children with tangible, hands-on experiences is more vital than ever. Fall, with its rich textures, colors, and abundance of natural materials, offers the perfect backdrop for such explorations. From the crunchy leaves underfoot to the plump pumpkins in the patch, nature itself becomes our art supply store. Here at I'm the Chef Too!, our mission is to blend food, STEM, and the arts into one-of-a-kind "edutainment" experiences, proving that learning can be incredibly fun, especially when it's delicious! This spirit of joyful discovery is at the heart of every craft idea we’re about to share. We believe that simple fall crafts aren't just about making a pretty object; they're about the process of discovery, the development of fine motor skills, the introduction to scientific principles, and the invaluable moments of connection between parent and child. Get ready to gather your little ones, embrace the season, and transform your home into a hub of autumnal creativity!
Embracing Nature's Palette: Leaf & Pinecone Crafts
Fall offers an unparalleled artistic bounty directly from nature's floor. A simple walk in the park or backyard can yield a treasure trove of crafting materials, making these activities incredibly accessible and wonderfully sustainable.
Nature's Masterpiece: Leaf Rubbings and Impressions
Leaf rubbings are a timeless classic for a reason – they're simple, magical, and offer a fantastic introduction to the concept of texture and patterns.
The "Why": This activity is a fantastic way to engage children's senses, particularly touch and sight. It helps them observe the intricate vein patterns of different leaves, a subtle lesson in botany and natural design. It also refines fine motor skills as they hold crayons and peel paper.
Materials:
- A variety of freshly fallen leaves (choose those with pronounced veins).
- Thin paper (printer paper or drawing paper works best).
- Crayons (peeled of their paper wrappers).
- A flat, hard surface.
Instructions:
- Gather Leaves: Head outdoors for a nature walk. Encourage your child to find leaves of different shapes, sizes, and textures. Talk about the colors they see.
- Arrange: Place a leaf vein-side up on a hard surface. Cover it with a piece of paper.
- Rub: Take a peeled crayon and, holding it flat on its side, gently rub it back and forth over the paper where the leaf is underneath.
- Reveal: As you rub, the intricate details of the leaf will magically appear on the paper.
Variations & Extensions:
- Leaf Impressions with Clay or Salt Dough: Press leaves into soft clay or homemade salt dough to create lasting impressions. Once dry, these can be painted.
- Wax Paper Leaf Press: Arrange colorful leaves between two sheets of wax paper and have an adult gently iron them (on a low setting, with a cloth barrier) to create beautiful sun catchers. This introduces the concept of heat and adhesion.
- Leaf Stamping: Paint one side of a leaf with washable paint and press it onto paper. This creates a bolder, often more abstract, impression.
Tips for Success:
- Use fresh, pliable leaves for the best rubbings. Dry, brittle leaves tend to crumble.
- Remind kids to rub gently but firmly.
- Encourage discussion: "What do you notice about the lines on this leaf?" or "How does this leaf feel compared to that one?"
Kaleidoscope of Colors: Leaf Collages and Sun Catchers
Transform collected leaves into vibrant art pieces that play with light and color.
The "Why": These crafts enhance creativity, color recognition, and composition skills. The sun catcher variation introduces simple concepts of light transmission and transparency. Arranging small pieces also hones fine motor control and spatial reasoning.
Materials:
- Assorted fall leaves.
- Construction paper or clear contact paper (for sun catchers).
- Child-safe glue.
- Scissors (optional, for older kids).
- Yarn or string (for hanging).
Instructions (Leaf Collage):
- Collect & Sort: Gather a variety of leaves. Encourage kids to sort them by color, size, or shape.
- Design: On a piece of construction paper, have your child arrange the leaves into a design – maybe an animal, a tree, or an abstract pattern.
- Glue: Once satisfied with the arrangement, glue the leaves securely onto the paper.
Instructions (Contact Paper Sun Catcher):
- Prepare: Cut two pieces of clear contact paper to your desired sun catcher size. Peel the backing off one piece and lay it sticky-side up on a flat surface.
- Arrange: Have your child arrange leaves (and maybe small twigs or flower petals) on the sticky surface.
- Seal: Carefully place the second piece of contact paper, sticky-side down, over the first, sandwiching the leaves. Press down firmly to remove air bubbles.
- Trim & Hang: Trim any excess contact paper, punch a hole at the top, and thread with yarn to hang in a window.
Variations & Extensions:
- Leaf Lanterns: Glue leaves onto the outside of a clean glass jar. Once dry, place a battery-operated tea light inside for a soft, glowing lantern.
- Mandala Leaves: Arrange leaves in a circular, symmetrical pattern, exploring balance and design.
Tips for Success:
- Using contact paper reduces mess and is great for younger toddlers who are still developing fine motor skills with glue.
- Talk about the colors: "What colors do you see in the leaves? How do they blend together?"
Imaginative Wonders: Painted Leaves and Leaf People
Leaves aren't just for rubbings; they can be transformed into characters and vibrant artworks with a lick of paint.
The "Why": This activity encourages imaginative play, storytelling, and free artistic expression. Painting on a textured surface like a leaf presents a unique sensory experience and challenge for fine motor control.
Materials:
- Sturdy, flat fall leaves.
- Washable paints.
- Small paintbrushes.
- Googly eyes, small craft pompoms, pipe cleaners, markers (optional, for leaf people).
- Glue.
Instructions (Painted Leaves):
- Clean & Dry: Gently wipe leaves clean and ensure they are dry.
- Paint: Provide paints and brushes and let your child freely paint patterns, colors, or designs directly onto the leaves.
- Display: Once dry, these colorful leaves can be strung together, arranged in a bowl, or glued onto a larger piece of paper to create a vibrant collage.
Instructions (Leaf People/Creatures):
- Select: Choose leaves that might suggest a body, head, or wings.
- Decorate: Use paints to add faces or patterns. Glue on googly eyes for personality. Attach pipe cleaners for arms/legs or small pompoms for hair.
- Storytelling: Encourage your child to invent stories about their leaf creations.
Tips for Success:
- Thicker, slightly stiffer leaves (like oak or maple) work well for painting.
- Lay newspaper or a craft mat down for easy cleanup.
- Ask open-ended questions like, "What kind of character do you think this leaf wants to be?"
Forest Finds: Pinecone Animals and Ornaments
Pinecones, with their unique, textured structure, are fantastic natural building blocks for fall crafts.
The "Why": Working with pinecones helps develop fine motor skills as children manipulate small components like glue, felt, or googly eyes. It also encourages observation of natural shapes and imaginative transformation.
Materials:
- Clean, dry pinecones of various sizes.
- Craft glue (a hot glue gun, used by an adult, can speed up assembly).
- Felt scraps, googly eyes, pipe cleaners, small pompoms, yarn.
- Glitter, paint (optional).
- Ribbon or string (for ornaments).
Instructions (Pinecone Animals):
- Identify: Look at the pinecone with your child and ask, "What animal does this pinecone remind you of?" (e.g., an owl, a hedgehog, a squirrel).
- Assemble: Using glue, attach felt ears, googly eyes, and pipe cleaner limbs to bring the animal to life. For a pinecone owl, glue felt "wings" to the sides and a small felt "face" with googly eyes to the front.
- Personalize: Add details like a tiny felt nose or yarn "hair."
Instructions (Pinecone Ornaments):
- Decorate: Children can paint the tips of the pinecone scales with glitter glue or small dabs of paint for a festive look.
- Attach Hanger: Once dry, loop a piece of ribbon or string around the top scales of the pinecone and secure with a knot or a dab of glue to create a hanger.
Tips for Success:
- Ensure pinecones are free of bugs and dirt; you can bake them on a low temperature (around 200°F for 30 minutes) to open them up and sterilize them (adult supervision essential).
- Use a strong craft glue that dries clear.
- This is a great opportunity to discuss forest habitats and the animals that live there.
Harvest Wonders: Apple, Pumpkin & Corn Crafts
The bounty of the harvest season provides another rich source of inspiration. Apples, pumpkins, and corn aren't just delicious; they are also fantastic canvases and tools for creative expression.
Sweet & Simple: Apple Stamping and Fingerprint Apples
Apples are synonymous with fall, and they make surprisingly versatile art tools!
The "Why": Apple stamping introduces pattern recognition, geometry (when cutting apples in different ways), and process art. Fingerprint apples are excellent for developing fine motor control and hand-eye coordination. Both activities promote color mixing and sensory exploration.
Materials:
- Apples (firm, slightly overripe ones are perfect for stamping).
- Washable paints (red, green, yellow, brown).
- Paper.
- Knife (for adult use only).
- Small paper plates or trays for paint.
Instructions (Apple Stamping):
- Prepare Apples: An adult should carefully cut apples in half vertically and horizontally to create different stamping shapes. You can even cut out a star shape in the center of the apple by cutting it horizontally through the core.
- Paint & Stamp: Pour small puddles of paint onto plates. Have your child dip the cut apple surface into the paint and then press it firmly onto paper.
- Add Details: Once the apple prints dry, kids can use markers to add stems, leaves, or even little "worms" to their apples.
Instructions (Fingerprint Apple Trees):
- Draw Tree: Draw a simple tree trunk and branches on a piece of paper using a brown marker.
- Fingerprint "Apples": Dip your child's fingertip into red, green, or yellow paint and have them press their finger onto the tree branches to create "apples."
- Leaf Prints: Use a green thumbprint to add leaves around the apples.
Variations & Extensions:
- Apple Garland: Stamp apples onto cardstock, cut them out, and string them together for a festive garland.
- Name Building: Stamp a series of apples and write a letter of your child's name on each, then arrange them in order.
Tips for Success:
- Use firm apples for stamping to get clear prints.
- Discuss the parts of the apple: "What part of the apple are we stamping with? Where do the seeds go?"
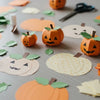
Festive Flair: Pumpkin Decorating (No-Carve!)
Carving pumpkins is a cherished tradition, but for younger children, or when time is short, no-carve decorating offers endless creative possibilities and safety.
The "Why": This activity fosters creativity, color recognition, and the development of fine motor skills through painting, gluing, and applying various decorations. It also allows for free artistic expression without the challenges of sharp tools.
Materials:
- Small to medium-sized pumpkins or gourds.
- Washable paints, paintbrushes.
- Googly eyes, glitter, craft glue, pompoms, yarn, felt shapes, stickers.
- Newspaper or craft mat for easy cleanup.
Instructions:
- Clean Pumpkins: Gently wipe your pumpkins clean and dry them thoroughly.
- Paint Base (Optional): Kids can paint the entire pumpkin a base color, or create stripes, polka dots, or abstract designs. Let dry completely.
- Decorate: Once dry, provide a variety of embellishments. Kids can glue on googly eyes to create a funny monster, yarn "hair," felt shapes for a friendly face, or sprinkle glitter for a sparkly pumpkin.
- Display: Place your decorated pumpkins around the house for festive fall decor.
Variations & Extensions:
- Washi Tape Pumpkins: Provide various patterns of washi tape for kids to stick onto pumpkins, creating stripes, plaids, or geometric designs. This is great for fine motor skills and requires no drying time!
- "Mummy" Pumpkins: Wrap pumpkins with white gauze or toilet paper, securing with glue, and then add googly eyes.
- Nature Pumpkins: Glue small leaves, acorns, or twigs collected from a nature walk onto the pumpkin for a rustic look.
Tips for Success:
- Use acrylic paints for better coverage and durability on pumpkins, but ensure they are washable if working with younger kids.
- For younger children, start with stickers or large foam shapes that are easy to handle.
- Remember, there's no right or wrong way to decorate! Encourage personal expression.
Textured Art: Corn Painting & Printing
Corn, especially Indian corn with its vibrant kernels, offers a unique sensory and artistic experience.
The "Why": This activity provides a wonderful sensory experience, exploring the texture of corn as a painting tool. It also introduces the concept of printing and allows for abstract artistic expression and color exploration.
Materials:
- Ears of corn (fresh corn on the cob or dried Indian corn).
- Washable paints.
- Large sheets of paper or cardboard.
- Small paper plates or trays for paint.
- Forks or skewers (for adult use, to hold corn if desired).
Instructions (Corn Rolling/Printing):
- Prepare Corn: If using fresh corn, you can leave it on the cob. If using dried Indian corn, an adult might insert a fork or skewer into the end for a handle.
- Apply Paint: Roll the corn through shallow trays of paint, or have your child use a paintbrush to apply paint directly onto the kernels.
- Roll & Print: Roll the painted corn across the paper to create interesting textures and patterns. Kids can press the corn down for individual "stamps" or roll it to create continuous lines.
Variations & Extensions:
- Q-Tip Corn: Draw an outline of an ear of corn on paper. Have kids dip Q-tips into different colored paints and dot them onto the corn outline to represent kernels. This is fantastic for fine motor development.
- Corn Husk Dolls: If you have dried corn husks, an adult can help tie them into simple doll shapes, which children can then decorate with yarn, markers, and fabric scraps.
Tips for Success:
- Use a variety of paint colors to show how they blend and mix as the corn rolls.
- Lay out plenty of newspaper as this can be a wonderfully messy, sensory experience!
Building with Paper: 3D Paper Pumpkins/Apples
These crafts move beyond flat drawings, introducing children to three-dimensional design and spatial reasoning.
The "Why": This activity develops fine motor skills through cutting, gluing, and assembling. It also introduces basic geometric concepts and spatial reasoning as children transform flat paper into a 3D object. It's a great way to practice following multi-step instructions.
Materials:
- Orange, red, or green construction paper.
- Green and brown construction paper (for stems/leaves).
- Scissors.
- Glue stick or liquid glue.
- Stapler (optional, for adult use).
Instructions (3D Paper Pumpkin):
- Cut Strips: Cut several strips of orange construction paper, all the same width (e.g., 1 inch) and length (e.g., 8-10 inches).
- Assemble Base: Take two strips and cross them in the middle, gluing or stapling them together. Continue adding strips in a starburst pattern, securing them at the center.
- Form Pumpkin: Gently bring the ends of all the strips together at the top, forming a spherical shape. Glue or staple them together.
- Add Details: Cut a small brown rectangle for a stem and a green leaf shape. Glue them to the top of the pumpkin.
Variations & Extensions:
- Paper Loop Sunflower: Similar to the pumpkin, create loops of yellow paper for petals, attaching them around a brown paper circle. Add black beans or sunflower seeds to the center.
- Paper Accordion Apples: Cut two apple shapes from red paper. Fold a green strip of paper into an accordion. Glue one end of the accordion to the back of one apple, the other end to the back of the second apple. When pulled apart, the accordion creates a 3D effect.
Tips for Success:
- Pre-cutting strips for younger children can help them focus on the assembly.
- A stapler (used by an adult) makes assembly quicker and more secure.
- Encourage counting the strips and talking about the shapes formed.
Friendly Critters of the Forest: Owl, Fox & Scarecrow Crafts
The woodland animals and iconic figures of fall offer delightful subjects for crafting, allowing children to create their own charming characters.
Recycled Fun: Toilet Paper Roll Scarecrows
Repurposing everyday items like toilet paper rolls is a fantastic way to teach kids about sustainability and creative problem-solving.
The "Why": This craft encourages imaginative play and character design. It's excellent for fine motor skills as children cut, glue, and decorate small components. Using recycled materials also subtly introduces environmental awareness.
Materials:
- Empty toilet paper rolls.
- Construction paper scraps (various colors).
- Markers.
- Craft glue.
- Yarn or raffia (for "hay").
- Googly eyes (optional).
- Small buttons or fabric scraps (optional).
Instructions:
- Paint Roll (Optional): Paint the toilet paper roll brown or a skin tone for the scarecrow's face. Let it dry.
- Make Clothes: Cut strips of colorful construction paper for overalls or shirts and glue them around the roll.
- Add Face & Hair: Draw a friendly face with markers, or glue on googly eyes and a triangle nose. Glue small pieces of yarn or raffia to the top and sides for "hay" hair.
- Create Hat: Cut a circle and a smaller trapezoid from construction paper to form a hat, then glue it onto the scarecrow's head.
Variations & Extensions:
- Toilet Paper Roll Animals: Use the same technique to create owls, foxes, or even bats for Halloween.
- Scarecrow Puppets: Attach a craft stick to the back of the finished scarecrow for a simple puppet show.
Tips for Success:
- Keep a stash of toilet paper rolls on hand for spontaneous crafting!
- Encourage children to personalize their scarecrow's outfit and expression.
Nature's Characters: Leaf Foxes & Owls
Combining natural elements with crafted details brings these woodland creatures to life in a unique way.
The "Why": This activity blends nature exploration with imaginative design. It promotes fine motor skills through cutting and gluing small pieces and encourages observation of natural shapes that can be transformed.
Materials:
- Sturdy fall leaves (especially broad, flat ones like maple or oak).
- Construction paper scraps (orange, brown, white, black).
- Googly eyes.
- Craft glue.
- Scissors.
Instructions (Leaf Fox):
- Select Leaf: Choose a leaf that can serve as the fox's body.
- Cut Features: From orange paper, cut out a head shape, two triangular ears, and a bushy tail. From white paper, cut a small triangle for the inner ear and a small oval for the snout. From black paper, cut a tiny nose.
- Assemble: Glue the head, ears, and tail to the leaf body. Add the white inner ear and snout, then the black nose. Finally, glue on googly eyes.
Instructions (Leaf Owl):
- Select Leaf: Choose a broad leaf for the owl's body.
- Cut Features: From brown or tan paper, cut out two circles for eyes (or use googly eyes). From orange or yellow paper, cut a small triangle for the beak and two small wing shapes.
- Assemble: Glue the eyes onto the leaf. Add the beak. Glue the wings to the sides of the leaf body.
Tips for Success:
- Use leaves that are still somewhat pliable, not crumbly dry.
- A glue stick works well for paper-to-paper, but liquid craft glue is better for attaching paper to leaves or googly eyes.
Sensory Delights: Puffy Paint Owls
Creating your own puffy paint adds an exciting sensory dimension to traditional crafting.
The "Why": Puffy paint crafts are incredibly sensory, offering a unique tactile experience as the paint dries with a raised, squishy texture. This activity introduces basic chemistry (how ingredients combine) and fosters creativity through color mixing and design.
Materials:
- Equal parts shaving cream (foam, not gel) and white glue.
- Food coloring or liquid watercolors.
- Paper or cardboard (thicker paper prevents warping).
- Small bowls and spoons for mixing.
- Paintbrushes or craft sticks.
- Googly eyes, small twigs, felt scraps (optional, for owl details).
Instructions:
- Make Puffy Paint: In a bowl, combine equal parts shaving cream and white glue. Add a few drops of food coloring and mix gently until combined. Create different colors in separate bowls.
- Draw Owl Outline: On your paper, draw a simple outline of an owl.
- Paint: Have your child spoon or brush the puffy paint onto the owl outline, creating a thick, textured layer.
- Add Details: While the paint is still wet, add googly eyes, a small twig for a branch, or felt shapes for wings.
- Dry: Allow the puffy paint to air dry for several hours (or overnight). It will harden and retain its puffy texture.
Tips for Success:
- Ensure the shaving cream is foam, not gel, for the best puffy effect.
- Don't overmix the paint; a slightly airy texture is good.
- Puffy paint is best made in small batches just before use.
- This is a wonderful way to explore textures and engage multiple senses in an art project.
Sensory Explorations & Edible Adventures
At I'm the Chef Too!, we truly believe in the power of sensory engagement and the magic of edible education. Many simple fall crafts naturally lend themselves to these principles, transforming learning into an immersive, multi-sensory experience.
Tactile Fun: Fall Playdough & Salt Dough Creations
Playdough and salt dough offer boundless opportunities for sensory exploration, fine motor development, and creative play.
The "Why": These activities are paramount for developing fine motor skills, hand strength, and bilateral coordination. They also provide a calming sensory experience and encourage imaginative role-playing. When making the dough from scratch, it's a simple introduction to following recipes and basic chemistry.
Materials (Homemade Playdough):
- 1 cup flour
- 1/2 cup salt
- 2 tsp cream of tartar
- 1 cup water
- 1 tbsp vegetable oil
- Food coloring (fall colors: red, orange, yellow, brown)
- Fall-themed cookie cutters, plastic leaves, small twigs, cinnamon sticks, cloves (optional, for scent/texture).
Instructions (No-Cook Playdough):
- Mix Dry: In a large bowl, combine flour, salt, and cream of tartar.
- Mix Wet: In a separate bowl, whisk together water, oil, and food coloring.
- Combine: Pour the wet ingredients into the dry ingredients. Stir until a shaggy dough forms, then knead until smooth.
- Play: Provide the fall-scented dough with cookie cutters, plastic leaves, or even natural elements like small twigs and cinnamon sticks for an enhanced sensory experience.
Materials (Salt Dough):
- 2 cups flour
- 1 cup salt
- 1 cup water
- Fall-themed cookie cutters, leaves, twigs, stamps.
- Paints, glitter, clear sealant (optional, for decorating).
Instructions (Salt Dough Ornaments):
- Mix Dough: In a large bowl, combine flour and salt. Gradually add water, mixing until a stiff dough forms. Knead for 5-10 minutes until smooth and pliable.
- Roll & Cut: Roll out the dough to about 1/4 inch thickness. Use fall-themed cookie cutters (leaves, pumpkins, acorns) or press real leaves into the dough to make impressions. Make a small hole at the top for hanging.
- Bake: Place ornaments on a baking sheet lined with parchment paper. Bake at 250°F (120°C) for 1-3 hours, or until completely hard. Baking time varies based on thickness.
- Decorate: Once cooled, children can paint, glitter, or seal their ornaments.
Tips for Success:
- Add a few drops of fall essential oils (like cinnamon or orange) to playdough for an extra sensory boost.
- Salt dough is fantastic for creating lasting keepsakes.
- Remember, salt dough is not edible due to the high salt content!
Crafting with Texture: Noodle & Pasta Crafts
Ordinary dry pasta can become extraordinary art supplies, adding fascinating textures and shapes to fall-themed creations.
The "Why": Pasta crafts develop fine motor skills (picking up, gluing small pieces) and hand-eye coordination. They encourage pattern recognition, sorting, and creativity, especially when combined with painting. It’s a wonderful way to explore different textures.
Materials:
- Various dry pasta shapes (wagon wheels, penne, rotini, elbow macaroni, spirals).
- Washable paints and paintbrushes (or ziplock bags for shaking paint).
- Craft glue.
- Cardboard or sturdy paper (for the base).
- Markers.
Instructions (Noodle Pumpkin/Sunflower):
- Color Pasta: Place pasta in ziplock bags with a few drops of washable paint. Shake gently until coated. Spread painted pasta on parchment paper to dry completely. (Alternatively, paint pasta by hand).
- Draw Outline: On cardboard or paper, draw a large pumpkin or sunflower outline.
- Glue Pasta: Apply glue to sections of the outline and have your child carefully place the dried, colored pasta to fill in the shape. Use wagon wheels for pumpkin texture, or yellow spirals for sunflower petals.
- Add Details: Use markers to draw stems, leaves, or a face on the pumpkin. Add black beans or small pasta for sunflower seeds in the center.
Variations & Extensions:
- Pasta Fall Wreath: Glue painted pasta onto a paper plate with the center cut out to create a textured fall wreath.
- Pasta Leaf Collage: Draw a large leaf outline and fill it with different shapes of pasta, creating a textural mosaic.
Tips for Success:
- Pre-paint pasta the day before to ensure it's completely dry before gluing.
- Use a variety of pasta shapes to add visual interest and different textures.
- This is a great activity for developing a pincer grasp when picking up small pasta pieces.
Exploring Absorbency: Coffee Filter Fall Leaves
Simple coffee filters transform into beautiful, vibrant leaves through the magic of water and color.
The "Why": This craft is a fantastic introduction to the concept of absorbency and color blending (chromatography). It encourages creativity in color choice and provides a gentle way to practice fine motor skills by scribbling and spraying.
Materials:
- White basket-style coffee filters.
- Washable markers (fall colors).
- Spray bottle filled with water.
- Plastic art trays or newspaper (for mess containment).
- Scissors.
- Pencil (optional, for tracing leaf template).
Instructions:
- Scribble: Flatten coffee filters. Have your child scribble all over the filters with fall-colored markers. Encourage them to use multiple colors on each filter.
- Spray: Place the scribbled filters on a tray. Use a spray bottle to gently mist the filters with water. Watch as the colors bleed and blend together!
- Dry: Let the filters dry completely. The colors will intensify and merge.
- Cut: Once dry, an adult can cut the filters into leaf shapes (either freehand or by tracing a template).
Variations & Extensions:
- Coffee Filter Flowers: Cut filters into flower shapes after coloring and drying. Stack a few and secure with a pipe cleaner stem.
- Coffee Filter Butterflies: Pinch a colored filter in the middle and secure with a pipe cleaner to create a butterfly.
Tips for Success:
- Don't overspray the filters; a light mist is usually enough to get the colors to blend.
- Experiment with different color combinations.
- These make beautiful sun catchers or garland decorations.
Delicious Discoveries: Simple Edible Crafts
At I'm the Chef Too!, we wholeheartedly believe that the kitchen is a fantastic classroom, offering the perfect blend of STEM, creativity, and delicious rewards. Integrating simple edible crafts into your fall activities can elevate the fun and learning. While we often provide pre-measured ingredients and specialty supplies in our own kits, you can easily replicate the joy with everyday pantry staples. For example, exploring the world of baking and decorating with a fall theme can be incredibly rewarding. Imagine the delight of creating Peppa Pig Muddy Puddle Cookie Pies with your little ones – a truly engaging way to connect with beloved characters while learning to follow a recipe and develop fine motor skills through decorating.
The "Why": Edible crafts teach foundational math concepts (measuring), chemistry (how ingredients react), and fine motor skills (stirring, decorating). They also introduce the joy of cooking, encourage healthy eating habits, and offer immediate gratification with a tasty treat. The connection between creating and consuming fosters a unique sense of accomplishment.
Materials (Simple Cookie Decorating):
- Pre-baked fall-shaped cookies (pumpkin, leaf, apple shapes).
- Icing (store-bought or simple powdered sugar icing).
- Food coloring.
- Fall-themed sprinkles, candy corn, mini chocolate chips.
Instructions (Cookie Decorating):
- Mix Colors: Divide icing into small bowls and add different food colorings to create fall hues.
- Decorate: Provide children with spoons or small spatulas to spread icing on cookies. Then, let them go wild with sprinkles and candies.
- Enjoy: Once decorated (and optionally set), enjoy your delicious creations!
Variations & Extensions:
- Apple Slice "Donuts": Slice apples into rounds, remove the core, and spread with cream cheese, yogurt, or nut butter. Decorate with granola, sprinkles, or fruit.
- Pumpkin Patch Pudding Cups: Layer crushed cookies (for "dirt"), pudding (for "mud"), and a few candy pumpkins or gummy worms in a clear cup for an instant, edible fall scene.
Tips for Success:
- Always practice food safety and hygiene, especially with kids in the kitchen.
- Focus on the process and fun, not perfection.
- The kitchen is a fantastic place for family bonding and shared experiences. And if you're looking for more structured, delicious learning, remember that The Chef's Club delivers a new adventure every month, complete with pre-measured ingredients and specialty supplies, right to your door with free shipping in the US!
The Science of Squish: Puffy Paint Revisited
While we've explored puffy paint for owls, the sensory and scientific aspects deserve a closer look as a standalone exploration.
The "Why": Puffy paint is a fantastic sensory medium that introduces basic chemistry concepts. Kids learn that mixing specific ingredients creates a new substance with unique properties. The tactile experience of painting and then touching the dried, raised surface is incredibly engaging for sensory development. It's a wonderful way to explore textures, color mixing, and cause-and-effect in a hands-on art project.
Materials:
- Equal parts shaving cream (foam, not gel) and white glue.
- Food coloring or liquid watercolors.
- Paper or cardboard (thicker paper works best).
- Small bowls and spoons for mixing.
- Paintbrushes or craft sticks.
Instructions:
- Mix: In a bowl, combine equal parts shaving cream and white glue.
- Color: Add a few drops of food coloring to create vibrant fall hues like orange, red, yellow, or brown. Mix gently until the color is consistent.
- Paint: Use paintbrushes or craft sticks to apply the puffy paint onto paper, creating fall scenes like trees, pumpkins, or abstract designs. Encourage thick layers for maximum puffiness.
- Dry: Allow the creation to air dry completely for several hours or overnight. The paint will dry to a raised, squishy texture.
Tips for Success:
- Use a sturdy surface like cardstock or cardboard to prevent warping as the paint dries.
- Experiment with different color combinations and layering techniques.
- Discuss the transformation: "What happened when we mixed these ingredients? How does it feel now that it's dry?"
Crafting with a Learning Twist: STEM & Literacy Focused Fun
Beyond the immediate joy of creation, many simple fall crafts offer incredible opportunities to weave in valuable STEM (Science, Technology, Engineering, and Math) and literacy skills. This is at the core of what we do at I'm the Chef Too! – making learning tangible, exciting, and delicious.
A-B-C Autumn: Alphabet Pumpkins & Name Trees
Integrating letters into crafts helps reinforce early literacy skills in a fun, hands-on manner.
The "Why": These crafts are excellent for letter recognition, early spelling, and name building. They also enhance fine motor skills (writing, coloring, cutting, gluing) and hand-eye coordination. It’s a personalized approach to learning that makes abstract concepts more concrete.
Materials (Alphabet Pumpkins):
- Cardstock paper.
- Orange, green, and brown washable paint.
- Markers.
- Craft pompoms or cotton balls.
- Clothespins.
Instructions (Alphabet Pumpkins):
- Draw Pumpkins: Draw a vine with several pumpkins on a piece of cardstock. Inside each pumpkin, write a letter of the alphabet (focus on letters your child is learning, or their name letters).
- "Pumpkin Painters": Attach a craft pompom or cotton ball to a clothespin to create a mini "paint brush."
- Match & Paint: Call out a letter and have your child dip their pompom into orange paint and "dot" or paint the inside of the corresponding pumpkin. Continue until all letters are covered.
Materials (Apple Tree Name Craft):
- Construction paper (brown for trunk, green for leaves, red for apples).
- Scissors.
- Glue stick.
- Marker.
- Large white paper (for background).
Instructions (Apple Tree Name Craft):
- Cut Tree Parts: An adult or older child can cut out a tree trunk and a leafy canopy from brown and green construction paper. Cut out several small red apple shapes.
- Write Name: Write one letter of your child's name on each red apple.
- Assemble Tree: Glue the tree trunk and canopy onto the large white paper.
- Build Name: Have your child arrange and glue the apple letters onto the tree in the correct order to spell their name.
Tips for Success:
- Start with fewer letters for younger children.
- Encourage kids to say the letter sound as they paint or place it.
- These crafts make great personalized room decorations.
Artistic Development: Fork Printed Trees & Yarn Trees
Process art, where the focus is on the journey rather than just the outcome, is invaluable for creative development. These crafts also hone fine motor skills.
The "Why": Fork printed trees are a fantastic way to introduce process art and experiment with different painting tools. Yarn trees develop fine motor skills (cutting, wrapping, gluing) and hand-eye coordination. Both encourage color exploration and creative expression.
Materials (Fork Printed Trees):
- Cardstock paper.
- Brown marker.
- Washable paints (fall colors: red, orange, yellow).
- Plastic forks.
- Paper plates or trays for paint.
Instructions (Fork Printed Trees):
- Draw Trunk: Draw a simple tree trunk and branches on a piece of cardstock paper with a brown marker.
- Paint with Forks: Pour small puddles of fall-colored paints onto plates. Have your child dip the tines of a plastic fork into the paint and then press or "print" it around the branches to create the look of fall leaves.
- Fallen Leaves: They can also print some paint at the bottom of the page to represent fallen leaves.
Materials (Fall Yarn Trees):
- Cardboard or heavy cardstock.
- Brown marker.
- Yarn scraps (fall colors).
- Craft glue.
- Scissors (child-safe).
Instructions (Fall Yarn Trees):
- Draw Tree: Draw a tree outline with a prominent trunk and branches on cardboard.
- Glue Yarn: Spread glue generously over the "leafy" areas of the tree outline.
- Apply Yarn: Have your child snip small pieces of yarn and stick them onto the glued areas, creating a textured, colorful canopy. They can also wrap yarn around the trunk.
Tips for Success:
- Emphasize that there's no "right" way for the prints or yarn to look – it's about exploring.
- This is a great opportunity to practice scissor skills with yarn for older kids.
Ingenuity & Sustainability: Recycled Crafts
Teaching children to see potential in everyday "trash" is a powerful lesson in engineering and environmental stewardship.
The "Why": Recycled crafts foster creativity, problem-solving, and critical thinking as children transform ordinary objects into something new. They also introduce concepts of reuse and sustainability, making complex ideas tangible. This type of engineering design challenge encourages kids to think like inventors.
Materials (Egg Carton Acorns):
- Empty cardboard egg cartons.
- Brown, green, and yellow paint.
- Small paintbrushes.
- Small twigs or pipe cleaners.
- Craft glue.
Instructions (Egg Carton Acorns):
- Cut Cups: An adult should cut individual cups from the egg carton.
- Paint: Have your child paint the inside of some cups brown (for the acorn body) and the outside of others green or yellow (for the acorn cap). Let dry.
- Assemble: Glue a green or yellow "cap" cup onto a brown "body" cup.
- Add Stem: Poke a small hole in the top of the cap and insert a tiny twig or a small piece of brown pipe cleaner for the stem, securing with glue.
Variations & Extensions:
- Cardboard Roll Binoculars: Use two toilet paper rolls, tape them together, and attach a string to create binoculars for a fall nature walk.
- Cereal Box Scarecrow: Decorate a flattened cereal box to create a large scarecrow figure, adding paper scraps, yarn, and markers.
Tips for Success:
- Always ensure recycled materials are clean before use.
- Encourage children to brainstorm other items they could recycle into crafts.
Unleashing Chemical Reactions: The Magic of Bubbles
Some of the most exciting learning experiences come from observing how things change and react. This is where the "science" in STEM really shines!
The "Why": Activities involving chemical reactions, even simple ones, introduce children to basic scientific principles like cause and effect, gas production, and observation. It sparks incredible curiosity and provides a memorable, hands-on experiment. It's a great example of how learning can be dynamic and surprising.
Materials (Baking Soda & Vinegar Bubbles/Eruptions):
- Baking soda.
- Vinegar.
- Food coloring (fall colors).
- Small containers (cups, jars, or even carved-out mini pumpkins).
- Dish soap (optional, for more bubbles).
- Droppers or small spoons.
- Tray or sensory bin (for containment).
Instructions (Mini Fall Eruptions):
- Set Up: Place a small amount of baking soda at the bottom of a few containers. Add a few drops of fall-colored food coloring to each. Optionally, add a drop of dish soap for extra foam.
- Add Vinegar: Provide a small cup of vinegar and a dropper or spoon. Have your child carefully add vinegar to the baking soda.
- Observe: Watch as the mixture fizzes, bubbles, and potentially "erupts" with vibrant colors!
Tips for Success:
- Do this activity outdoors or in a designated messy play area.
- Talk about what's happening: "What do you think is making the bubbles? What happens when these two things mix?"
- This simple science experiment beautifully complements the kind of exciting, hands-on learning found in our kits, like the Erupting Volcano Cakes Kit, where kids get to experience a delicious chemical reaction firsthand! We design these activities to make complex subjects approachable and fun.
Bringing the I'm the Chef Too! Philosophy Home
At I'm the Chef Too!, our core mission is to empower children through unique "edutainment" experiences that seamlessly blend food, STEM, and the arts. Every simple fall craft idea we've shared today echoes our values: sparking curiosity, fostering creativity, building essential skills, and creating invaluable family bonding moments, all away from screens. We are committed to making learning accessible and exciting, turning tangible, hands-on cooking and crafting adventures into powerful lessons. Our kits, developed by mothers and educators, reflect this philosophy, transforming abstract concepts into delicious realities.
We understand that carving out time for elaborate projects can be challenging in busy households. That's why we emphasize "simple" fall craft ideas, offering practical, valuable advice and realistic expectations. Our goal isn't to guarantee your child will become a top scientist overnight, but rather to foster a lifelong love for learning, build confidence through accomplishment, develop key skills like fine motor coordination and problem-solving, and most importantly, create joyful, lasting family memories. When we talk about safety in the kitchen or with craft materials, it's always with an implicit understanding that adult supervision is key, ensuring a safe and enriching experience for everyone.
If these delightful fall craft ideas have sparked your child’s imagination and made you hungry for more "edutainment," consider how I'm the Chef Too! can bring continuous learning adventures right to your home. We offer a vibrant array of options to keep the curiosity flowing:
- For ongoing inspiration and convenience: Ready for a new adventure every month? Join The Chef's Club and enjoy free shipping on every box. Our monthly subscription delivers a complete experience right to your door, with pre-measured dry ingredients and specialty supplies, making it effortless to dive into culinary STEM fun. Choose from flexible 3, 6, or 12-month pre-paid plans – perfect for gifting or long-term enrichment!
- Explore our diverse offerings: Not ready to subscribe? No problem! You can still experience the magic. Browse our complete collection of one-time kits to find the perfect theme for your little learner. From exploring geology with our Erupting Volcano Cakes to delving into astronomy with our Galaxy Donut Kit, there’s an adventure waiting for every curious mind.
- Looking for specific themed fun? If your child loves playful, character-driven activities that teach, they'll adore making their own Peppa Pig Muddy Puddle Cookie Pies, blending imaginative play with delicious baking. Or, for a truly explosive learning experience, our Erupting Volcano Cakes Kit brings the wonders of chemical reactions to your kitchen in the most exciting (and edible!) way!
Every I'm the Chef Too! kit is designed to provide a cohesive, engaging activity that makes learning fun and accessible. Just like with the simple fall crafts we've discussed, our goal is to inspire creativity, build skills, and strengthen family bonds through shared, hands-on experiences.
Conclusion
As the leaves finally fall and the days grow shorter, the beauty of autumn provides a profound inspiration for connection and creativity. We've journeyed through a delightful array of simple fall craft ideas for kids, from nature-inspired leaf rubbings to sensory-rich puffy paint creations and even edible adventures. Each activity, no matter how simple, is a powerful opportunity to foster curiosity, develop essential skills, and weave together unforgettable family moments. These aren't just crafts; they are catalysts for learning, conversation, and joy – tangible representations of the season's magic brought indoors.
At I'm the Chef Too!, this blend of education and entertainment, where every activity is a step towards discovery, is what we’re passionate about. We believe that the best learning happens when it's hands-on, engaging, and genuinely fun. So, embrace the crisp air, gather your little ones, and dive into the wonderful world of fall crafting.
And when you're ready to explore even more delicious and educational "edutainment" experiences without the hassle of gathering supplies, we invite you to join The Chef's Club. Give the gift of learning that lasts all year with a 12-month subscription to our STEM cooking adventures, delivered monthly with free shipping in the US. Spark curiosity, creativity, and countless smiles with I'm the Chef Too! today!
FAQ Section
Q1: What age group are these fall crafts suitable for? A1: Many of these crafts are adaptable for a wide range of ages! We've included ideas perfect for toddlers (e.g., tear art, simple stamping, fingerprint crafts), preschoolers (e.g., leaf collages, pumpkin decorating, playdough), and older school-aged children (e.g., detailed leaf rubbings, 3D paper crafts, more intricate pasta art, basic science experiments). Always remember that adult supervision is important for all ages, especially when using scissors, glue, or any cooking elements.
Q2: How can I make these crafts more educational? A2: Integrate learning by discussing the "why" behind each activity. For example:
- Science: Talk about leaf anatomy during rubbings, chemical reactions in puffy paint or baking soda/vinegar experiments, or absorbency with coffee filters.
- Math: Count leaves, sort materials by size/shape, measure ingredients for dough.
- Literacy: Identify letters on alphabet pumpkins, spell out names on apple trees, or create stories about leaf characters.
- Art: Discuss colors, textures, patterns, and composition.
- Engineering: Challenge kids to build structures with pinecones or design their own recycled creations. At I'm the Chef Too!, our kits inherently blend these subjects, making "edutainment" effortless!
Q3: What are some tips for keeping craft time manageable and mess-free (or at least less messy)? A3: Preparation is key!
- Designate a Space: Cover your work surface with newspaper, a plastic tablecloth, or an old sheet.
- Contain Materials: Use trays or old cookie sheets to hold paints, glue, and small craft items.
- Dress for Mess: Have kids wear old clothes or an apron.
- Easy Cleanup: Keep wet wipes or a damp cloth handy. For paint, warm soapy water usually does the trick.
- Prep Ahead: Pre-cut paper strips or mix dough beforehand to focus on the fun part.
Q4: My child quickly loses interest. How can I keep them engaged? A4:
- Follow Their Lead: Let them choose the craft or materials. Their ownership increases engagement.
- Short Sessions: Keep activities brief, especially for younger children. It's okay to finish later.
- Open-Ended: Focus on the process, not a perfect outcome. Encourage exploration over instruction.
- Tell Stories: Integrate narrative into the craft, like creating characters or imagining a fall scene.
- Join In: Participate alongside them. Your enthusiasm is contagious!
- Offer Variety: If one craft isn't clicking, have a few simple alternatives ready.
Q5: Where can I find more ideas for hands-on, educational activities like these? A5: You're already in the right place! Our blog at I'm the Chef Too! is constantly updated with creative ideas. Beyond that, consider exploring our unique subscription boxes and one-time kits designed by mothers and educators. Each Chef's Club box offers a complete, screen-free "edutainment" adventure blending food, STEM, and arts, delivered right to your door with free shipping in the US. You can also browse our full collection of one-time kits for specific themed learning.