Table of Contents
- Introduction
- The Science Behind the Swirls
- Setting Up Your Creative Lab
- Basic Tie Dye Techniques for Every Age
- Advanced Methods: Ice Dyeing and More
- Using Food as Dye: Kitchen-Based Creativity
- Beyond the T-Shirt: Creative Items to Dye
- Tie Dye as a Lesson in Patience and Observation
- The Math of Tie Dye: Geometry and Symmetry
- Organizing Group Events
- Troubleshooting Common Tie Dye Woes
- Conclusion
- FAQ
Introduction
There is a unique kind of magic in watching a plain, white T-shirt transform into a vibrant explosion of color. For many of us, tie-dyeing is a nostalgic summer staple, but it is also much more than just a craft. At I'm the Chef Too!, we see these colorful swirls as an invitation to explore the worlds of chemistry, geometry, and artistic expression all at once. Whether you are a parent looking for a mess-managed weekend activity or an educator seeking a hands-on science lesson, tie dye offers a tactile way to learn through play.
This guide will walk you through the most engaging tie dye projects for kids while highlighting the hidden educational moments in every fold and splash of pigment. We will cover the best materials to use, how to set up a stress-free workspace, and specific techniques that cater to different age groups. By the end of this article, you will see how a simple bucket of dye can become a laboratory for curiosity. Tie dye is the ultimate "edutainment" experience because it combines the precision of science with the boundless freedom of art.
For another colorful, hands-on activity, explore these creative fabric crafts for kids.
Quick Answer: Tie dye projects for kids involve folding, twisting, or bunching fabric and applying dyes to create vibrant patterns. This activity teaches children about chemical bonds, pH levels, and geometric symmetry through a fun, hands-on creative process.
The Science Behind the Swirls
When we help a child apply bright blue or neon pink dye to a cotton shirt, we are actually facilitating a sophisticated chemical reaction. Most high-quality tie dye kits utilize fiber-reactive dyes, which are fundamentally different from paints. While paint sits on top of the fabric fibers, these dyes actually form a permanent molecular bond with the cotton.
You can explain this to children by using a "lock and key" analogy. Imagine the cotton fibers are a series of tiny locks and the dye molecules are the keys. For the key to turn and stay locked in place, we often need a "helper" called an activator, which is usually soda ash (sodium carbonate). This substance raises the pH level of the fabric, which essentially tells the cotton fibers to open up and accept the dye.
This process is a wonderful way to introduce the concept of molecular structures and chemical reactions. We often use similar cause-and-effect learning in our Erupting Volcano Cakes kit, where children observe how specific ingredients react to create an exciting result. In the kitchen or at the tie-dye station, seeing a physical change happen right before your eyes makes abstract concepts feel real and understandable.
Setting Up Your Creative Lab
Preparation is the secret to a successful tie dye experience that doesn't end with a stained kitchen floor. By treating your workspace like a professional laboratory, you teach children the importance of safety protocols and the scientific method.
Choosing the Right Canvas
The most important factor in a successful project is the fabric content. Dyes bond best with natural fibers like 100% cotton, linen, or silk. Synthetic fibers, such as polyester or nylon, are essentially made of plastic. Because plastic is non-porous, the dye molecules have nowhere to "lock" into, which usually results in the color washing right down the drain.
Essential Supplies for Success
Before you start, gather your materials and organize them into stations. This keeps the process moving and helps manage the excitement.
- 100% cotton items: T-shirts, socks, tote bags, or pillowcases.
- Fiber-reactive dye: Squeeze bottles are easiest for small hands to control.
- Rubber bands: These create the "resist" points where the dye won't reach.
- Plastic bins: Working inside a bin or a shallow tub catches all the drips.
- Wire cooling racks: Placing the fabric on a rack inside the bin prevents it from sitting in a puddle of mixed, muddy colors.
- Protective gear: Old clothes, aprons, and gloves are a must.
Step 1: Pre-wash your items. / New clothes often have "sizing," a chemical finish that can block dye. Washing them first ensures the fibers are ready to absorb the pigment.
Step 2: Cover your surfaces. / Even if you are working outside, a heavy-duty plastic tablecloth or several layers of newspaper will make cleanup much faster.
Step 3: Prepare the dye. / Follow the kit instructions carefully. Most dyes are most vibrant when used within 24 hours of being mixed with water.
Basic Tie Dye Techniques for Every Age
The way you fold or tie the fabric determines the final pattern. This part of the process is a fantastic lesson in spatial awareness and geometry.
The Classic Spiral
The spiral is perhaps the most iconic tie dye pattern. To create it, lay the shirt flat and pinch a small section in the center with your fingers. Twist the fabric in a circular motion until the entire shirt resembles a round cinnamon roll. Secure the bundle with three or four rubber bands that cross in the middle, dividing the circle into "pizza slices."
When applying the dye, instruct the children to use a different color for each slice. This is a great moment to talk about symmetry. When the shirt is unwrapped, the pattern will repeat in a radial design, much like the petals of a flower or the rays of the sun.
The Crumple Method
For younger children who might find precise folding difficult, the crumple method is perfect. Simply have them "scrunch" the fabric into a messy mound and wrap rubber bands around it in random directions. This produces a marbleized effect that looks like natural stone or a cloudy sky. It is a lesson in randomness and organic patterns, showing that beauty doesn't always require a rigid plan.
The Bullseye
To make a bullseye, pull up a small "horn" of fabric from the center of the shirt and tie a rubber band around it. Move down an inch and tie another, and then another. Each rubber band will create a ring of color. This is a perfect visual representation of concentric circles, a key concept in both math and art.
Key Takeaway: Tie dye techniques like the spiral and bullseye use "mechanical resist" to prevent dye from reaching certain areas, demonstrating geometric principles through hands-on artistic creation.
Advanced Methods: Ice Dyeing and More
Once children have mastered the basics, you can introduce more complex methods that highlight different physical properties of matter. These techniques are often slower but yield stunning, professional-looking results.
The Magic of Ice Dyeing
Ice dyeing is a "set it and forget it" method that produces soft, watercolor-like patterns. Instead of using liquid dye, you cover your folded fabric with a thick layer of ice cubes. You then sprinkle dry dye powder directly onto the ice.
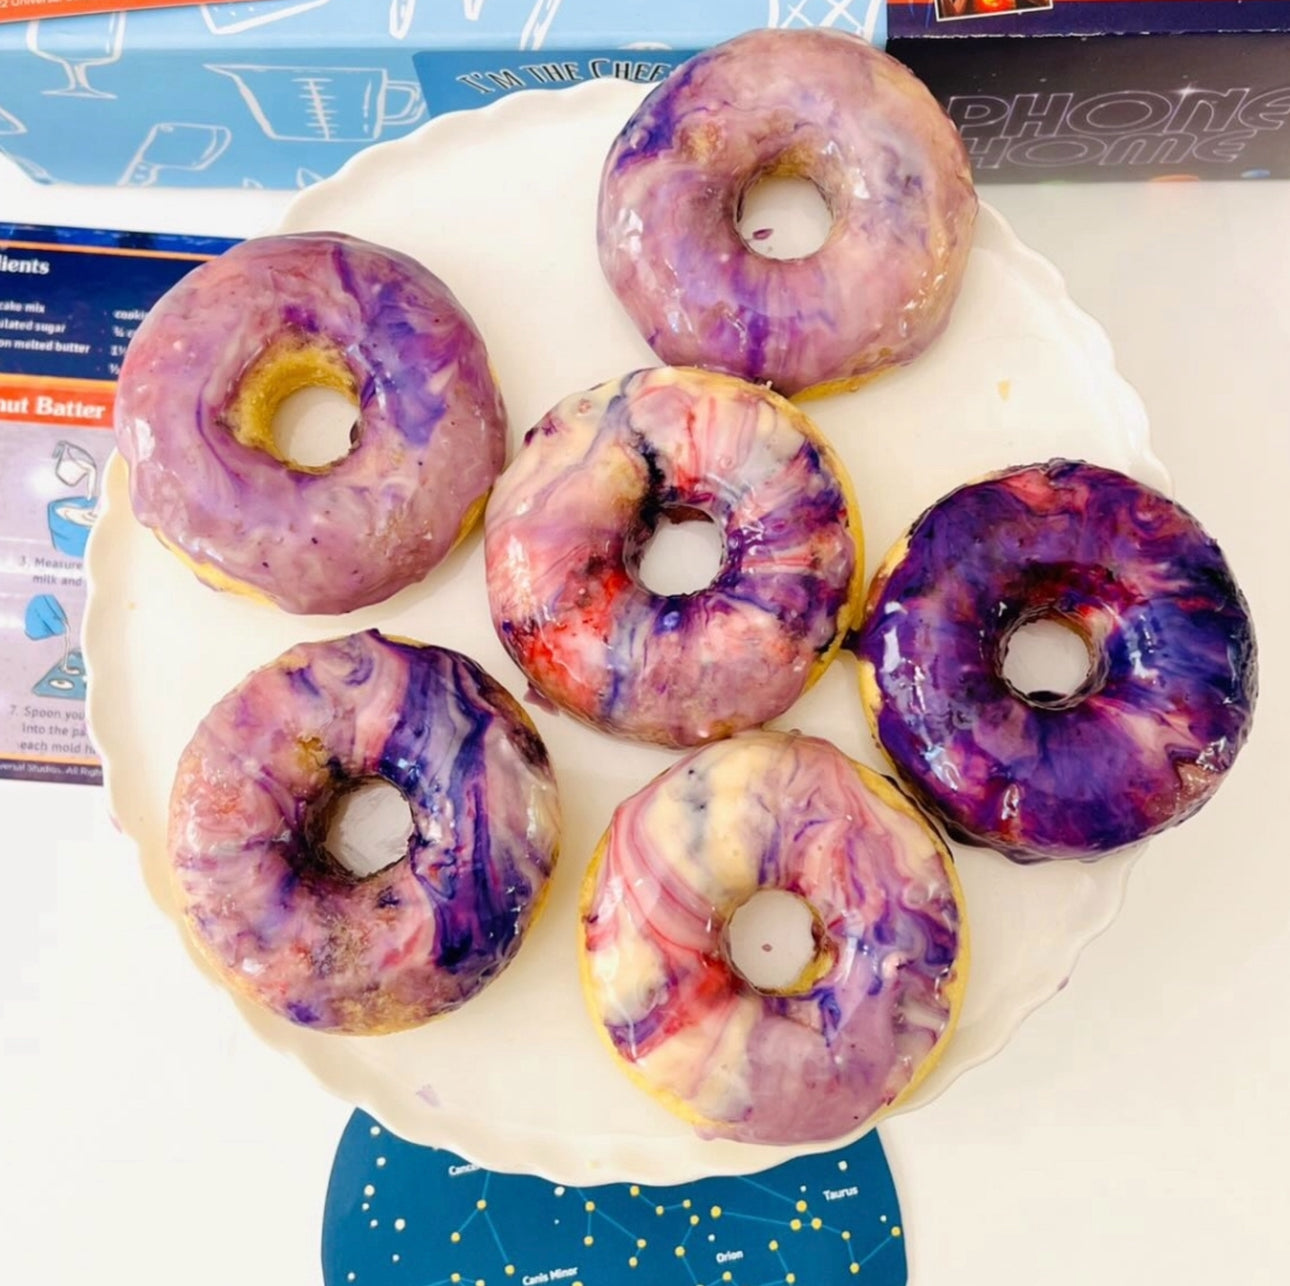
As the ice melts, it carries the pigment into the fabric at different speeds. This is a beautiful lesson in the states of matter (solid to liquid) and solubility. Children can observe how the water moves the color and how some shades in the powder separate into their component colors. This focus on color blending and celestial-looking patterns is very similar to the process used in our Galaxy Donut Kit, where children learn how to swirl pigments to mimic the deep reaches of space.
Spray Bottle Tie Dye
Using spray bottles filled with liquid dye allows for a more "aerosolized" application. You can use stencils—like a cardboard star or even a large leaf from the garden—to create a "resist" pattern. By placing the object on the shirt and spraying over it, children learn about positive and negative space. This is a core art concept that helps them understand how we perceive shapes and borders.
Using Food as Dye: Kitchen-Based Creativity
For a truly sustainable and educational project, you can look right in your pantry. Long before synthetic dyes existed, people used plants, roots, and insects to color their clothing. Making your own dye is a wonderful way to connect history, biology, and chemistry.
The Chemistry of Natural Dyes
Natural dyes often require a "mordant"—a substance like salt or vinegar that helps the color stick to the fiber. This process introduces children to the idea of natural extracts and how heat can change the properties of a substance.
| Natural Source | Color Produced | Fun Fact |
|---|---|---|
| Turmeric | Vibrant Yellow | One of the strongest natural pigments found in the kitchen. |
| Red Cabbage | Blue or Purple | Acts as a pH indicator; add vinegar for pink or baking soda for green! |
| Avocado Skins | Soft Pink | The tannins in the skin react with water to create a rose hue. |
| Blackberries | Deep Mallow | Highly acidic fruits create rich, dark purple tones. |
Using red cabbage is particularly exciting for kids because it behaves like a science experiment. After you have boiled the cabbage to create a purple liquid, you can let the children add "potions" (vinegar or baking soda) to watch the color shift instantly. This is a perfect introduction to acids and bases.
Bottom line: Exploring natural dyes turns the kitchen into a laboratory, teaching kids that scientific materials can be found in everyday objects like fruits and vegetables.
Beyond the T-Shirt: Creative Items to Dye
While T-shirts are the standard choice, almost any cotton item can be transformed into a masterpiece. Expanding the "canvas" helps children think about how art and science apply to the objects they use every day.
Functional Fabric Projects
- Pillowcases: A great way for kids to personalize their own bedrooms. They can experiment with different patterns on each side.
- Canvas Totes: Perfect for carrying books from the library or gear to soccer practice.
- Cotton Socks: These are excellent for "quick" projects because they are small and easy to handle.
- Kitchen Aprons: When children dye their own aprons, they often feel a greater sense of ownership in the kitchen.
We find that when children create their own gear, it boosts their confidence. Whether they are wearing a tie-dyed apron while experimenting with our Wild Turtle Whoopie Pies or using a custom tote for school, the act of making something functional builds a bridge between "learning" and "doing." It shifts their perspective from being a consumer to being a creator.
For families looking for another hands-on project, explore our full kit collection.
Tie Dye as a Lesson in Patience and Observation
One of the hardest parts of tie-dyeing for children is the waiting. Most dyes require 8 to 24 hours to "cure," or fully bond with the fabric. This provides a natural opportunity to practice delayed gratification and observation skills.
The Curing Process
While the shirts sit in their plastic bags, the chemical reaction is still happening. You can explain that the "puzzle pieces" of dye and cotton are still finding their matches. The longer they sit, the more permanent the bond will be.
The Big Reveal
The moment of rinsing and removing the rubber bands is always the highlight of the project. As the water runs over the fabric, the "excess" dye washes away, revealing the patterns hidden underneath.
Step 1: Initial Rinse. / Use cold water to rinse the bundled fabric until the water starts to run clear. This prevents the colors from "bleeding" into the white areas too much.
Step 2: Remove the bands. / This is the "aha" moment. Have the children describe what they see. Did their hypothesis about the pattern come true?
Step 3: Final Wash. / Wash the items in the washing machine (usually alone or with other tie-dyed items) using hot water to set the dye and remove any remaining chemicals.
The Math of Tie Dye: Geometry and Symmetry
Tie dye is a visual playground for teaching mathematical concepts without ever opening a textbook. Because the fabric is often folded before the dye is applied, the resulting patterns are frequently symmetrical.
Understanding Symmetry
When you fold a shirt in half and apply dye, the result is a mirror image. You can discuss bilateral symmetry, which is the kind of symmetry we see in butterflies or human faces. If you use the spiral method, you are creating radial symmetry, where the pattern radiates out from a central point, much like a snowflake.
Repeating Patterns and Tessellations
By using an "accordion fold"—folding the fabric back and forth like a paper fan—kids can create repeating patterns. This is a foundational concept in both advanced mathematics and professional textile design. Seeing how a simple physical fold creates a complex, repeating series of shapes helps children visualize how math exists in the physical world.
Myth: STEM activities are always about math problems and beakers. Fact: Hands-on crafts like tie dye use geometry, chemistry, and physics to teach the same core principles in a joyful, memorable way.
For more ideas that connect art, patterns, and science, explore these engaging STEM projects for kids at home.
Organizing Group Events
Whether you are a teacher planning a classroom activity or a parent hosting a birthday party, managing a group tie dye session requires a bit of strategy to keep the mess contained and the learning high. We often work with educators through our school and group programmes, and we’ve found that structure is the key to a successful group experience.
Tips for Group Success
- Station Rotation: Set up different tables for "Tying," "Dyeing," and "Bagging." This prevents everyone from crowding around one bottle of dye at the same time.
- The "Double Bag" Rule: Once a project is finished, put it in a zip-top bag, and then put that bag into a second one. This prevents leaks during the trip home in a car or backpack.
- Label Everything: Use a permanent marker to write names on the bags before you start. Once a shirt is bundled in rubber bands and covered in dye, it is almost impossible to tell whose is whose.
- Instruction Sheets: Provide a small slip of paper for each child to take home that explains the washing instructions for their parents.
Managing the Mess with Kids
Keep a bucket of soapy water and several rags nearby. Teach the children that keeping a clean "laboratory" is part of the scientific process. This encourages responsibility and ensures that the focus remains on the fun of the project rather than the stress of the cleanup.
Troubleshooting Common Tie Dye Woes
Sometimes, an experiment doesn't go exactly as planned. Instead of seeing this as a failure, use it as a teaching moment. In science, every "failed" experiment provides valuable data for the next attempt.
Why is my dye so light or faded?
This usually happens for one of three reasons:
- The fabric wasn't 100% cotton: Synthetic fibers don't hold the dye well.
- The dye didn't cure long enough: It needs at least 8 hours (ideally 24) to bond.
- The water was too cold: Most dyes need lukewarm or room-temperature water to dissolve and react properly.
Why did my colors turn brown?
If you put complementary colors (colors opposite each other on the color wheel, like red and green or orange and blue) right next to each other, they will mix to form a muddy brown. Encourage children to look at a color wheel before they start. Suggest placing analogous colors (neighbors on the color wheel, like blue and green) next to each other for the most vibrant results.
Why are there large white spots?
This happens if the rubber bands are tied too tightly or if the fabric was too dry when the dye was applied. You can explain that the dye couldn't reach the "hidden" parts of the shirt. Some people love this high-contrast look, but if you want less white, try dampening the shirt slightly before you tie it.
Key Takeaway: Troubleshooting tie-dye encourages critical thinking as children analyze variables like fabric type, curing time, and color placement to improve their future results.
Conclusion
Tie dye projects for kids offer a perfect blend of artistic freedom and scientific discovery. By transforming a simple white garment into a colorful work of art, children engage with chemistry, geometry, and the history of natural materials. These activities provide a vital break from digital screens, allowing families and classrooms to bond over a shared, tactile experience.
At I'm the Chef Too!, our mission is to make learning an adventure that involves all the senses. Whether you are exploring the chemistry of fabric dye or the physics of an erupting volcano, the goal is to spark a curiosity that lasts a lifetime. The mess is simply a sign of a young mind at work.
If you are ready to keep the adventure going, consider joining The Chef's Club. Our monthly subscription delivers a new cooking STEM adventure to your door, making it easy to create joyful, educational memories together as a family.
FAQ
What is the best age to start tie-dyeing with kids?
Children as young as three or four can participate with significant adult help, especially using the simple "crumple" method. By age seven or eight, most children have the fine motor skills to manage complex folds and can begin to understand the basic chemistry of how the dye bonds to the fabric.
How do I make sure the tie dye colors don't wash out?
The most important steps are to use 100% cotton fabric and to let the dye cure for at least 8 to 24 hours before rinsing. Additionally, ensure your kit includes a fixative like soda ash, which creates the permanent chemical bond necessary to keep colors vibrant through multiple washes.
Can we do tie dye projects indoors without a huge mess?
Yes, you can manage the mess by having children work inside large plastic storage bins. These bins catch all the drips and prevent the dye from reaching your floors or countertops. Wearing aprons and gloves, and keeping a roll of paper towels nearby for immediate spills, also helps keep the environment clean.
Is tie dye safe for children to use?
Most modern tie dye kits designed for home use are non-toxic and safe when used with adult supervision. However, it is important to ensure children do not inhale the dye powder or ingest the liquid. Working in a well-ventilated area and wearing gloves to prevent skin staining ensures a safe and fun experience for everyone.