Table of Contents
- Introduction
- Why No-Bake Cookies Are a Parent's Best Friend (and a Kid's Favorite!)
- The Science and Art Behind No-Bake Magic
- Classic No-Bake Chocolate Peanut Butter Oatmeal Cookies: The Timeless Treat
- Simple & Healthy No-Bake Peanut Butter Energy Bites: A Wholesome Delight
- Beyond the Recipe: Making it a Full STEM & Arts Adventure
- Safety First: Essential Tips for Kitchen Fun
- Customizing Your No-Bake Adventures
- Storing Your Delicious No-Bake Creations
- I'm the Chef Too!: Your Partner in Hands-On Learning
- More No-Bake Fun with I'm the Chef Too!
- Conclusion
Do you ever find yourself caught in that late-afternoon lull, when the kids are restless, screen time has run its course, and a sudden craving for something sweet hits, but the thought of preheating an oven feels like climbing Mount Everest? You're not alone! Many parents juggle the desire for fun, engaging activities with the reality of limited time and energy. That’s precisely why we at I'm the Chef Too! are so passionate about empowering families with creative, hands-on experiences. Today, we’re diving into the wonderful world of no bake cookie recipes for kids – the ultimate secret weapon for quick, delicious, and delightfully educational kitchen adventures that require zero oven time.
Introduction
Imagine the sheer delight on your child's face as they proudly present a tray of freshly made cookies, all crafted by their own hands, without ever touching a hot oven. It’s not just a dream; it’s a reality with no-bake cookies! These simple, versatile treats are a fantastic way to introduce young chefs to the joys of cooking, build confidence, and even sneak in a little STEM learning. In this comprehensive guide, we'll explore why no-bake cookies are a family favorite, delve into the fascinating science behind their creation, share our favorite kid-friendly recipes, and provide tips to make these kitchen escapades truly memorable. Our goal is to equip you with everything you need to transform a craving into a captivating, screen-free "edutainment" experience, fostering curiosity and creativity one delicious bite at a time.
Why No-Bake Cookies Are a Parent's Best Friend (and a Kid's Favorite!)
No-bake cookies are more than just a quick snack; they're a gateway to delightful kitchen memories, especially for families with young children. They perfectly embody our mission at I'm the Chef Too! to blend food, STEM, and the arts into one-of-a-kind experiences. Here’s why they earn a permanent spot in our recipe rotation:
- Ultimate Convenience: The clue is in the name! No oven means no waiting for preheating, no hot baking sheets to contend with, and less active cooking time. For busy parents, this translates to less stress and more spontaneity. You can whip up a batch in under an hour, from start to finish, making them perfect for after-school snacks, spontaneous playdates, or even a last-minute dessert for dinner.
- Enhanced Safety for Young Chefs: With traditional baking, the oven is often the biggest hurdle for involving little ones. Removing the oven from the equation dramatically increases the safety factor, allowing even toddlers to participate more actively (with appropriate adult supervision, of course!). This shift empowers children to take on more responsibility, fostering a sense of accomplishment and independence.
- High Engagement and Sensory Exploration: No-bake cookies are incredibly hands-on. From measuring and mixing to rolling and shaping, every step offers a tactile experience that engages multiple senses. Kids love squishing dough, rolling it into balls, and decorating their creations. This sensory involvement isn't just fun; it's crucial for cognitive development and fine motor skill enhancement.
-
Built-in Educational Opportunities (STEM & Arts Connection): Don't let the simplicity fool you – no-bake cookies are a goldmine for learning!
- Science: Children can observe physical changes (like butter melting or mixtures solidifying), understand temperature's role in setting, and even grasp basic concepts of solubility and states of matter.
- Math: Measuring ingredients teaches fractions, volume, and counting. Doubling or halving a recipe introduces basic multiplication and division.
- Engineering: Designing and shaping cookies, understanding how different ingredients bind together, and even stacking them (if they last that long!) involves fundamental engineering principles.
- Art: Decorating opens up a world of creativity – colors, patterns, textures, and imaginative designs.
- Unbeatable Family Bonding: Shared experiences in the kitchen are truly special. Cooking together creates a relaxed environment for conversation, laughter, and collaboration. It's a chance to step away from screens and connect over a common, delicious goal, building lasting memories. These moments are at the heart of our philosophy at I'm the Chef Too!, as we believe in facilitating family bonding through our unique, hands-on adventures developed by mothers and educators.
The Science and Art Behind No-Bake Magic
While they might seem effortless, no-bake cookies are a fantastic demonstration of kitchen chemistry and artistic expression. Understanding these elements can turn a simple snack-making session into a captivating STEM lesson.
Understanding the "Setting" Process
The magic of a no-bake cookie lies in how it transforms from a gooey mixture into a firm, cookie-like treat without heat from an oven. This typically happens through one of two main scientific principles:
- Crystallization and Solidification: In many classic no-bake oatmeal cookies, a mixture of sugar, butter, and liquid (like milk or cocoa) is brought to a boil. When this mixture reaches a specific temperature (often around 230-240°F, the soft-ball stage of candy making), the sugar dissolves completely. Boiling for a precise time allows enough water to evaporate, concentrating the sugar. When this hot, concentrated sugar syrup is removed from the heat and mixed with other ingredients (like oats and peanut butter), it cools down. As it cools, the sugar molecules form tiny crystals, trapping the other ingredients and causing the entire mixture to solidify and "set." Boiling for too long can lead to a harder, more candy-like texture, while not boiling enough might result in a soft, crumbly mess that never fully sets. This delicate balance is a prime example of a chemical reaction at work!
- Chilling and Fat Solidification: Many simpler no-bake recipes, especially those featuring nut butters, oats, and sweeteners like honey or maple syrup, rely on the chilling process. Ingredients like coconut oil, butter, or even the natural fats in peanut butter are solid or semi-solid at cooler temperatures. When these ingredients are combined and then placed in the refrigerator, the fats solidify, acting as a binder that holds the other components (like oats, nuts, or chocolate chips) together. The cold temperature transforms the mixture from soft and pliable to firm and chewable. This is a great demonstration of how temperature affects the physical state of matter.
The Role of Ingredients
Every ingredient in a no-bake cookie plays a crucial role in its structure, flavor, and texture:
- Fats (Butter, Coconut Oil, Nut Butters): These provide richness, flavor, and are critical for binding. Their ability to solidify at lower temperatures is key to the cookie's structure.
- Sweeteners (Sugar, Honey, Maple Syrup): Beyond providing sweetness, these act as binders. In boiled recipes, sugar crystallizes. In chilled recipes, their stickiness helps hold things together.
- Liquids (Milk, Water, Cocoa): Necessary for dissolving sugar in boiled recipes and creating a cohesive mixture in all recipes.
- Bulking Agents (Oats, Cereal, Crushed Biscuits): These add texture, fiber, and absorb moisture, contributing to the final cookie consistency.
- Flavorings (Cocoa Powder, Vanilla Extract, Salt): These elevate the taste profile, transforming simple ingredients into a delightful treat. A pinch of salt, for example, beautifully balances sweetness and enhances other flavors.
The Art of Decorating
Once the scientific marvel of setting is complete, the artistic fun truly begins! No-bake cookies are a blank canvas for creativity. Kids can:
- Sprinkle: Add colorful sprinkles, chocolate shavings, or edible glitter.
- Drizzle: Melted chocolate or a contrasting nut butter can create beautiful patterns.
- Press: Gently press mini chocolate chips, nuts, or dried fruit into the tops.
- Shape: Beyond simple drops, mold the dough into fun shapes using cookie cutters (if firm enough) or by hand.
This blend of scientific observation and artistic expression is precisely what we aim for with our "edutainment" experiences at I'm the Chef Too!. We love to see children connecting complex concepts with tangible, delicious outcomes.
Classic No-Bake Chocolate Peanut Butter Oatmeal Cookies: The Timeless Treat
This is the quintessential no-bake cookie, loved by generations. It requires a brief stovetop boil, which is the "science" part that ensures perfect setting! Remember, adult supervision is paramount for this step.
Yields: Approx. 24 cookies Prep time: 15 minutes Chill time: 30-60 minutes
Ingredients:
- ½ cup (1 stick) salted butter
- 1 ¾ cups granulated sugar
- ⅓ cup unsweetened cocoa powder
- ½ cup milk (any kind works)
- 1 teaspoon pure vanilla extract
- ⅔ cup creamy peanut butter
- 3 cups quick oats (important: use quick oats, not old-fashioned, for best texture)
Equipment:
- Large saucepan (2.5 to 3-quart size recommended)
- Whisk or sturdy wooden spoon
- Parchment paper or wax paper
- Baking sheets (optional, for holding parchment paper)
- Cookie scoop (approx. 2 tablespoons size) or two spoons
Instructions:
- Prepare Your Surface: Lay out two large sheets of parchment paper or wax paper on your counter or on baking sheets. This will be where your cookies set, so make sure you have enough space.
- Combine Wet Ingredients: In your large saucepan, combine the butter, granulated sugar, unsweetened cocoa powder, and milk.
- Bring to a Boil: Place the saucepan over medium heat. Stir frequently with a whisk or spoon as the butter melts and the sugar dissolves. Continue stirring until the mixture comes to a full, rolling boil.
- Boil for One Minute (Crucial Step!): Once the mixture reaches a full boil, stop stirring and let it boil vigorously for exactly 60 seconds. This is the critical step where the sugar concentration increases, ensuring your cookies will set properly. Resist the urge to boil longer, or they'll turn into a crumbly candy! And boiling for less than a minute might leave them too soft.
- Remove from Heat and Add Flavor: Immediately remove the saucepan from the heat. Stir in the vanilla extract and the creamy peanut butter. Stir vigorously until the peanut butter is completely melted and smoothly incorporated into the chocolate mixture.
- Add Oats: Stir in the quick oats until they are fully coated and evenly distributed. The mixture will be thick and sticky.
- Scoop and Shape: Working quickly before the mixture sets, use a cookie scoop or two spoons to drop rounded portions onto your prepared parchment paper. You can leave them as rustic drops or gently flatten them into traditional cookie shapes with the back of a spoon.
- Set and Enjoy: Allow the cookies to cool and set at room temperature for about 20-30 minutes. To speed up the setting process, you can place them in the refrigerator for 10-15 minutes. Once firm, they're ready to enjoy!
Tips for Success:
- Precise Boiling Time: This cannot be stressed enough! One minute is often the sweet spot. Setting a timer is highly recommended.
- Ingredient Quality: While simple, using good quality butter and cocoa powder can significantly enhance the flavor.
- Quick Oats are Key: Old-fashioned or rolled oats have a different texture and absorb liquids differently, which can result in a crumbly cookie. Stick to quick oats for this recipe.
- Working Quickly: The mixture starts to set as soon as it's off the heat, especially once the oats are added. Have your parchment paper ready and work efficiently when scooping.
- Storage: Store any leftover cookies in an airtight container at room temperature for up to 3-4 days, or in the refrigerator for up to a week. They also freeze well for up to 3 months.
Ready to embark on more delicious, educational adventures delivered right to your door? Our monthly Chef's Club subscription brings new themes, pre-measured ingredients, and specialty supplies, making it easy to spark curiosity and creativity without the fuss.
Simple & Healthy No-Bake Peanut Butter Energy Bites: A Wholesome Delight
For an even simpler, no-cook approach (beyond melting a bit of coconut oil), these energy bites are fantastic. They’re packed with good-for-you ingredients and rely solely on chilling to set, making them perfect for younger children to take the lead in preparation.
Yields: Approx. 20-24 bites Prep time: 15 minutes Chill time: 30-60 minutes
Ingredients:
- ⅔ cup natural creamy peanut butter (or other nut/seed butter)
- ⅓ cup honey or maple syrup
- 1 tablespoon coconut oil, melted and slightly cooled (optional, but helps with binding and texture)
- 1 teaspoon pure vanilla extract
- 2 cups instant oats (or rolled oats, pulsed briefly in a food processor for a finer texture)
- ¼ cup mini chocolate chips (optional, or swap for dried fruit like raisins or chopped apricots)
- Pinch of salt (optional, especially if using salted peanut butter)
Equipment:
- Large mixing bowl
- Sturdy spoon or spatula
- Parchment paper
- Baking sheet or plate
Instructions:
- Prepare Coconut Oil (if using): If using coconut oil, melt it in a microwave-safe bowl for 15-30 seconds until liquid, then let it cool slightly.
- Combine Wet Ingredients: In a large mixing bowl, combine the peanut butter, honey (or maple syrup), melted coconut oil (if using), vanilla extract, and pinch of salt. Stir well until smooth and thoroughly combined.
- Add Dry Ingredients: Add the instant oats and mini chocolate chips (or dried fruit) to the bowl. Stir vigorously with a sturdy spoon or spatula until all ingredients are well blended and a thick dough forms. This may take a couple of minutes, and you might even use your clean hands to knead it together if it’s too stiff for a spoon.
- Form Bites: Scoop about 1 tablespoon of the mixture for each bite. Roll it between your palms to form a smooth ball. Place the balls on a parchment-lined baking sheet or plate. You can also press them flat into cookie shapes if preferred.
- Chill to Set: Place the baking sheet with the formed bites into the refrigerator for at least 30-60 minutes, or until they are firm. This chilling time is essential for the bites to hold their shape and have a good texture.
- Store and Enjoy: Once set, transfer the bites to an airtight container. Store them in the refrigerator for up to 2 weeks, or freeze for up to 3 months. They are best enjoyed straight from the fridge!
Tips and Variations:
- Nut-Free Option: For those with nut allergies, sunflower seed butter (like Sunbutter) is an excellent substitute for peanut butter.
- Sweetener Alternatives: Maple syrup or agave nectar can be used instead of honey.
- Texture Control: If the mixture feels too sticky, add a tablespoon more oats. If it's too crumbly, add a teaspoon more peanut butter or honey.
- Add-Ins Galore: Get creative! Stir in shredded coconut, chopped nuts (if no allergies), flax seeds, chia seeds, or a dash of cinnamon.
- Kids in the Kitchen: This recipe is perfect for little hands to measure, pour, mix (with a sturdy spoon), and especially to roll the balls! It's a fantastic activity for toddlers and preschoolers to practice fine motor skills.
These simple, wholesome no-bake treats are just one example of the kind of engaging, hands-on fun you can find in our extensive collection. Not ready for a subscription? Explore our full library of adventure kits available for a single purchase in our Main Shop Collection.
Beyond the Recipe: Making it a Full STEM & Arts Adventure
At I'm the Chef Too!, we believe every kitchen activity is an opportunity for "edutainment." No-bake cookies, with their simplicity, are perfect for diving deeper into educational concepts without overwhelming young learners.
-
Math in the Kitchen:
- Measuring Mastery: Encourage children to use measuring cups and spoons. Discuss how many half-cups make a whole, or how many teaspoons make a tablespoon. This is real-world fraction practice!
- Counting: Count out scoops of oats, chocolate chips, or even the finished cookies.
- Sequencing: Follow the recipe step-by-step. "What comes next?" helps with logical thinking and understanding order.
-
Science Experiments (Big & Small):
- States of Matter: Observe butter or coconut oil melting (solid to liquid) and then solidifying again when chilled. Discuss how temperature changes substances.
- Solubility: In the classic recipe, watch as sugar dissolves in the hot liquid. What happens if you try to dissolve sugar in cold milk? (It’s much harder!)
- Emulsification: When you mix peanut butter, oil, and sweetener, you're creating an emulsion, where ingredients that don't usually mix (like oil and water) are blended into a stable mixture.
- Observation Skills: Ask questions: "What does the mixture look like before we add the oats? How does it change after?"
-
Engineering Edibles:
- Structure and Stability: Discuss why certain ingredients (like oats) are needed to give the cookies structure. What would happen if we left them out? (They wouldn't hold together!)
- Designing and Shaping: How can we make the cookies perfectly round? Can we make them into different shapes? This is an introduction to design and form.
-
Artful Creations:
- Color and Texture: Explore different colors of sprinkles, or swirl melted white and dark chocolate for a marbled effect.
- Patterns and Design: Encourage children to make patterns with their drizzles or arrange toppings creatively.
- Presentation: How can we arrange the cookies on a plate to make them look appealing? This is about aesthetics and presentation.
-
Language and Literacy:
- Recipe Reading: Encourage older children to read the recipe instructions aloud.
- Vocabulary Building: Introduce new words like "dissolve," "solidify," "viscous," or "emulsify."
- Narrative: Have your child describe the process in their own words, fostering verbal communication skills.
These learning moments are built into the very fabric of our cooking kits, which are developed by mothers and educators who understand how children learn best through tangible, hands-on experiences.
For educators, homeschool groups, or those looking to expand this learning to a wider audience, consider bringing our hands-on STEM adventures to your classroom, camp, or homeschool co-op. Learn more about our versatile School and Group Programs, available with or without food components, designed to make learning engaging for every student.
Safety First: Essential Tips for Kitchen Fun
While no-bake cookies minimize some risks, kitchen safety is always paramount, especially when little hands are involved. At I'm the Chef Too!, we always emphasize safety to ensure every adventure is fun and worry-free.
- Adult Supervision is Non-Negotiable: Even for "no-bake" recipes, constant adult supervision is essential, particularly if using a stovetop. Never leave children unattended, especially around hot surfaces or sharp utensils.
-
Heat Safety (for Stovetop Recipes):
- Hot Pot Handles: Always turn pot handles inwards to prevent accidental knocking.
- Splatter Guard: Be mindful of hot mixtures bubbling and splattering. Keep little faces and hands at a safe distance.
- Cooling Down: Emphasize that the mixture is still hot even after being removed from the heat. Allow it to cool slightly before children touch it, especially when adding final ingredients.
- Allergy Awareness: Be acutely aware of any food allergies in your family or among those who will be eating the cookies. If making for a group, always confirm dietary restrictions. Offer alternatives like sunflower seed butter for peanut allergies, or gluten-free oats for gluten sensitivities.
-
Hygiene Habits:
- Hand Washing: Before starting, ensure everyone washes their hands thoroughly with soap and water.
- Clean Surfaces: Work on clean, sanitized surfaces.
- No Raw Tasting (if applicable): While these recipes don't typically involve raw eggs or flour, it's a good general kitchen rule to instill: don't taste raw ingredients that aren't meant for direct consumption.
- Tidying Up Together: Involve children in the cleanup process. This teaches responsibility and reinforces the idea that cooking is a start-to-finish activity, including putting things away and wiping down surfaces. It's a great way to practice organization and teamwork.
By following these simple safety guidelines, you can ensure that your no-bake cookie adventures are not only delicious but also safe and enjoyable for everyone.
Customizing Your No-Bake Adventures
One of the best things about no-bake cookies is their incredible versatility. Once you master the basic techniques, you can unleash your creativity and customize them to suit any taste or occasion. This is where the "art" component of our I'm the Chef Too! "edutainment" truly shines!
-
Flavor Variations:
- Minty Fresh: Add ¼ to ½ teaspoon of peppermint extract (or a few drops of food-grade peppermint oil) to the chocolate mixture for a refreshing twist. Drizzle with melted white chocolate for a "peppermint bark" feel.
- Orange Zest: A teaspoon of orange extract or a tablespoon of finely grated orange zest can brighten up chocolate or peanut butter varieties.
- Spiced Delights: For a cozy treat, add ½ teaspoon of cinnamon, a pinch of nutmeg, or even a tiny bit of cardamom to your oatmeal no-bakes.
- Coffee Kick (for grown-ups!): A teaspoon of instant espresso powder dissolved in the milk component of the classic recipe deepens the chocolate flavor beautifully.
-
Texture Variations:
- Crunch Factor: Stir in crushed pretzels, rice cereal, cornflakes, or chopped nuts (if no allergies).
- Chewy Goodness: Add shredded coconut, dried cranberries, chopped apricots, or other dried fruits.
- Melt-in-Your-Mouth: Use different types of chocolate chips (white, milk, dark, butterscotch) or even chopped chocolate bars.
-
Dietary Considerations & Swaps:
- Nut-Free: As mentioned, sunflower seed butter is a fantastic substitute for peanut butter in most recipes. Always double-check labels for cross-contamination if allergies are severe.
- Dairy-Free: Use plant-based milk (almond, soy, oat) and dairy-free butter substitutes. Ensure your chocolate chips are also dairy-free.
- Gluten-Free: Use certified gluten-free oats.
- Vegan Options: Combine plant-based milk, vegan butter, and maple syrup/agave nectar with cocoa powder and oats. Ensure all chocolate used is vegan.
- Lower Sugar: While some recipes rely on sugar for setting, you can experiment with reducing the amount slightly or using natural sweeteners like honey or maple syrup more predominantly in recipes that set via chilling.
-
Decorative Touches:
- Festive Sprinkles: Use holiday-themed sprinkles for seasonal treats.
- Drizzles and Coatings: Melted chocolate (dark, milk, white) can be drizzled over the set cookies for an elegant touch, or even fully dipped for extra decadence.
- Edible Glitter/Dust: A sprinkle of edible glitter can make cookies sparkle and feel extra special for celebrations.
By experimenting with these variations, you and your child can become true "culinary artists," discovering new favorite flavor combinations and textures. It's all part of the fun and learning process!
If you’re looking for even more convenient ways to explore new themes and flavors, our monthly Chef's Club delivers a fresh, exciting "edutainment" adventure right to your home, complete with pre-measured dry ingredients and specialty supplies, taking the guesswork out of kitchen experiments.
Storing Your Delicious No-Bake Creations
Once your masterpieces are made, proper storage ensures they stay fresh and delicious.
- Airtight is Key: Regardless of where you store them, always use an airtight container. This prevents them from drying out, absorbing other odors, or going stale.
- Room Temperature: Many classic no-bake oatmeal cookies, once fully set, can be stored at room temperature for 3-4 days, especially if your home is cool. However, if your home is warm or humid, refrigerating is often a better option.
- Refrigerator: No-bake cookies that rely on chilling (like the peanut butter energy bites) or those with dairy components are best stored in the refrigerator. They will remain fresh for up to a week. Keeping them chilled also maintains their firm texture.
- Freezer: For longer storage, no-bake cookies freeze beautifully! Place them in a single layer on a parchment-lined baking sheet and freeze until solid. Once frozen, transfer them to a freezer-safe airtight container or freezer bag, separating layers with parchment paper to prevent sticking. They can be stored for up to 2-3 months. Thaw at room temperature for a few minutes or enjoy them straight from the freezer for a delightful, chewy treat.
Always check the texture and smell before serving to ensure freshness.
I'm the Chef Too!: Your Partner in Hands-On Learning
At I'm the Chef Too!, we believe that learning should be an adventure, filled with discovery, creativity, and a whole lot of deliciousness. Our mission is to blend the exciting worlds of food, STEM, and the arts into one-of-a-kind "edutainment" experiences. No-bake cookies are a perfect example of how complex subjects can be taught through tangible, hands-on, and incredibly fun cooking projects.
We understand the challenges parents and educators face in finding engaging, screen-free educational alternatives. That's why our unique approach, developed by mothers and educators, focuses on sparking curiosity and creativity in children, while also facilitating precious family bonding moments. We're not just about recipes; we're about fostering a love for learning, building confidence in the kitchen, and developing key life skills. Our kits simplify the process for you by providing pre-measured dry ingredients and specialty supplies, transforming your kitchen into a dynamic learning lab.
Whether you're making no-bake cookies from scratch or exploring our themed kits, we are committed to providing experiences that encourage imagination, problem-solving, and a deeper understanding of the world around us – all while creating joyful memories.
Ready to embark on a new culinary and educational journey every month? Join our Chef's Club subscription and enjoy the convenience of a new adventure delivered directly to your door with free shipping in the US. We offer flexible 3, 6, and 12-month pre-paid plans, perfect for gifting or ensuring long-term enrichment for your little learners.
Beyond home kitchens, we're dedicated to bringing our unique blend of STEM and culinary arts to broader communities. We offer versatile programs for schools, camps, and homeschool co-ops, allowing groups of children to dive into our hands-on "edutainment." Our School and Group Programs provide options both with and without food components, ensuring our educational experiences can fit various needs and settings.
More No-Bake Fun with I'm the Chef Too!
While this post focuses on traditional no-bake cookies, the concept of "no oven required" is something we embrace in many of our creative kits and activities. We love exploring various methods of food science, from chilling to simple mixing and molding, to create exciting projects.
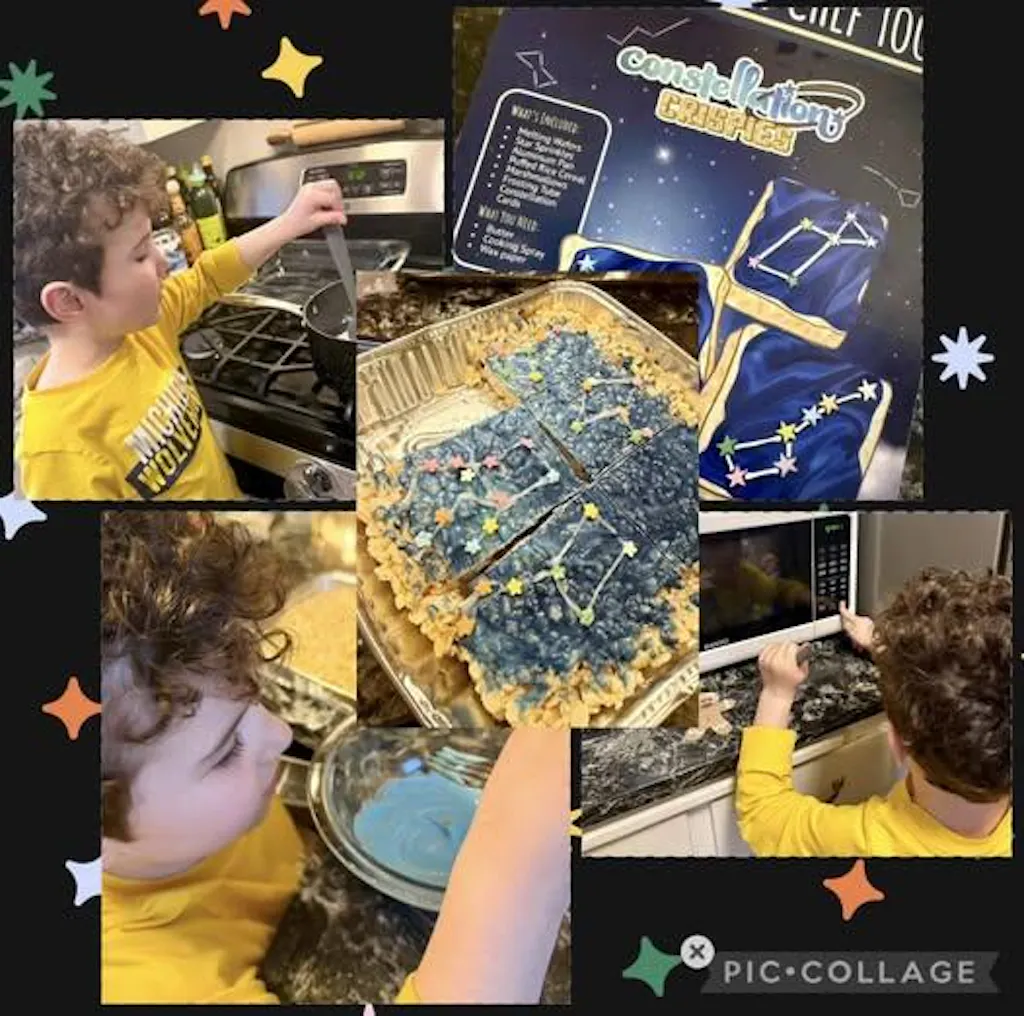
For example, while our Erupting Volcano Cakes Kit does involve baking, it's a fantastic example of a chemical reaction, similar to the science of how ingredients react and set in no-bake creations. And our Galaxy Donut Kit focuses heavily on the artistic, decorating side, bringing vibrant colors and astronomical themes to life, much like decorating your no-bake cookies. These experiences underscore our commitment to teaching complex subjects in an accessible, fun way.
Even beloved characters can make learning fun, like when kids make Peppa Pig Muddy Puddle Cookie Pies which, although a pie, offers a playful, hands-on, no-bake filling experience that’s great for fine motor skills and imaginative play.
If you’re keen to discover more unique, hands-on activities that combine the joy of cooking with fascinating STEM concepts without the need for an oven for every step, we invite you to browse our complete collection of one-time kits in our Main Shop Collection. You'll find a world of adventure waiting to be explored!
Conclusion
No-bake cookie recipes for kids are truly a game-changer for parents and educators seeking fun, engaging, and educational activities. They offer a simple yet profound way to introduce children to the magic of the kitchen, fostering essential life skills, igniting a passion for STEM, and creating cherished family memories – all without the need for an oven. From the fascinating science behind how they set to the endless possibilities for creative customization, these easy-to-make treats provide a rich, multi-sensory learning experience.
At I'm the Chef Too!, we believe that every child deserves the opportunity to explore, create, and learn in exciting new ways. Our unique approach, developed by mothers and educators, is designed to bring that "edutainment" directly into your home. We're passionate about sparking curiosity, encouraging creativity, and building confidence through hands-on, delicious cooking adventures. So, the next time you're looking for a quick, rewarding activity, remember the power of the no-bake cookie.
Ready to make every month an adventure? Don't miss out on the incredible educational fun and convenience that our monthly subscription provides. Join The Chef's Club today and enjoy free shipping on every box, bringing the joy of discovery and delicious learning right to your doorstep!
FAQ
Q1: Why are my no-bake cookies not setting? A1: For classic no-bake oatmeal cookies (with the boiled mixture), the most common reason for them not setting is not boiling the butter, sugar, cocoa, and milk mixture for long enough. It needs to reach a full, rolling boil and maintain it for a precise 60 seconds to allow the sugar to properly crystallize as it cools. For simpler no-bake recipes (like energy bites), insufficient chilling time or an imbalance of wet-to-dry ingredients can be the cause. Ensure your fats (like coconut oil or nut butter) are solidifying properly in the fridge.
Q2: Can I use old-fashioned oats instead of quick oats? A2: For classic no-bake oatmeal cookies, quick oats are highly recommended. Old-fashioned (rolled) oats have a different texture and absorb liquids differently, which can result in a drier, crumblier cookie that doesn't hold together as well. If you only have rolled oats for recipes that don't involve boiling, you can pulse them briefly in a food processor to break them down into a finer consistency, similar to quick oats.
Q3: How long do no-bake cookies last, and how should I store them? A3: Most no-bake cookies will last 3-4 days at cool room temperature in an airtight container. If your home is warm or humid, or for recipes containing dairy or relying on chilling, it's best to store them in an airtight container in the refrigerator for up to a week. For longer storage, they freeze exceptionally well for up to 2-3 months in a freezer-safe bag or container, often with parchment paper between layers to prevent sticking.
Q4: Can I make no-bake cookies gluten-free or nut-free? A4: Yes, absolutely! To make them gluten-free, ensure you use certified gluten-free oats. For nut-free versions, simply substitute peanut butter (or other nut butters) with a seed butter, such as sunflower seed butter (Sunbutter). Always check all ingredient labels to ensure they are free from nuts or gluten, especially for severe allergies.
Q5: What are some fun ways to involve kids in making no-bake cookies? A5: Kids can be involved in almost every step! They can help measure ingredients (a great math lesson!), pour and stir (with supervision for hot mixtures), roll cookie dough into balls, and, of course, decorate the finished treats with sprinkles, chocolate drizzles, or edible glitter. Emphasize hand-washing before and after, and always supervise when using stovetops or hot mixtures.
Q6: My classic no-bake cookies are too crumbly. What went wrong? A6: If your no-bake cookies are too crumbly, it's likely due to over-boiling the wet mixture (butter, sugar, cocoa, milk). Boiling for much longer than the recommended 60 seconds causes too much moisture to evaporate, leading to an overly hard, candy-like sugar matrix that doesn't bind the oats effectively. The solution is to ensure you boil for precisely one minute.
Q7: Can I add extra ingredients to no-bake cookies? A7: Yes, customization is one of the best parts! You can add a variety of mix-ins like shredded coconut, mini marshmallows, chopped nuts, dried fruit (cranberries, raisins, apricots), different types of chocolate chips (white, butterscotch), or even a dash of spices like cinnamon or nutmeg. Just be mindful not to add too many wet ingredients that might alter the setting consistency.