Quick & Delicious Chicken Tenderloin Recipes for Kids

Table of Contents
- Introduction
- Why Chicken Tenders? More Than Just a Kid-Favorite
- The Science of Sensation: Understanding What Kids Love
- Essential Ingredients: Building Blocks for Deliciousness
- Our Top Kid-Friendly Chicken Tenderloin Recipes (with STEM & Arts Twists!)
- Making it a Family Affair: Involving Kids in the Kitchen
- Overcoming Picky Eaters: Strategies for Success
- Meal Prep & Storage: Smart Solutions for Busy Families
- Safety in the Kitchen: Our Top Priority
- Beyond the Plate: The Broader Impact of Cooking Together
- Conclusion
- FAQ Section
Introduction
Picture this: the dinner table, a flurry of activity, and the almost-universal plea from little voices, "Can we have chicken tenders tonight?" It's a scene many parents know well. For reasons that span taste, texture, and the sheer fun of dipping, chicken tenderloins have cemented their place as a top kid-favorite meal. But what if these beloved strips of chicken could offer more than just a quick, satisfying dinner? What if they could be a gateway to discovery, a delicious lesson in science, and a canvas for culinary creativity?
At I'm the Chef Too!, we believe every kitchen moment is an opportunity for "edutainment." Our mission is to seamlessly blend food, STEM, and the arts, transforming meal preparation into an engaging, hands-on adventure. This comprehensive guide to kid-friendly chicken tenderloin recipes isn't just about feeding hungry bellies; it’s about sparking curiosity, building confidence, and fostering joyful family bonding away from screens. We'll dive into diverse preparations, explore the "why" behind what makes food delicious, and show you how to turn a simple chicken tender into an exciting exploration. Get ready to transform your kitchen into a vibrant laboratory and art studio, one delicious tender at a time, proving that learning can truly be a treat!
Why Chicken Tenders? More Than Just a Kid-Favorite
Chicken tenders hold a special place in the hearts (and stomachs) of children everywhere. But why are they such a runaway hit? Understanding their universal appeal is the first step to leveraging them as a fantastic tool for engaging kids in the kitchen and in broader learning.
Firstly, their palatability is undeniable. Chicken tenderloins are naturally moist and tender, making them easy for even young children to chew and swallow. Their mild flavor profile is often less intimidating than other cuts of meat, providing a comforting familiarity that picky eaters appreciate. This neutrality also makes them a perfect base for introducing new flavors and seasonings gradually, without overwhelming sensitive palates.
Secondly, from a nutritional standpoint, chicken tenderloins are a lean source of high-quality protein. This essential nutrient is vital for growth, muscle development, and sustained energy, keeping our little learners fueled for their daily adventures. When prepared thoughtfully, chicken tenders can be a central component of a balanced meal, easily paired with a variety of vibrant fruits and vegetables.
Thirdly, their versatility is a parent's dream. Whether baked, air-fried, pan-seared, or grilled, chicken tenders adapt beautifully to numerous cooking methods and flavor profiles. They can be the star of the plate, nestled in a taco, added to a salad, or tucked into a sandwich. This adaptability allows for endless creative culinary expression, preventing mealtime monotony and encouraging experimentation.
At I'm the Chef Too!, we see this inherent appeal as a perfect springboard for our unique "edutainment" approach. When children are already enthusiastic about a food, they become more open to exploring the science behind its preparation, the art of its presentation, and the math involved in measuring ingredients. Cooking chicken tenders with your kids can spark curiosity about food science – why does breading get crispy? How does marinade tenderize meat? It encourages budding culinary artists to think about color, texture, and aroma. Most importantly, it creates a hands-on, tangible experience that goes far beyond simply eating, building foundational skills and fostering a love for learning that extends well beyond the kitchen.
The Science of Sensation: Understanding What Kids Love
Have you ever wondered why kids adore crispy chicken tenders so much? It's not just about the taste; it's a fascinating interplay of various sensory experiences, each with a dash of science behind it. Understanding these elements allows us to create even more appealing and educational meals.
One of the biggest scientific stars of the crispy chicken tender show is the Maillard Reaction. This isn't just fancy culinary jargon; it's the chemical reaction between amino acids and reducing sugars that gives browned food its distinctive flavor and aroma. When chicken tenders get golden and crispy in the oven or air fryer, they're undergoing the Maillard Reaction, developing those irresistible savory, slightly sweet, and complex flavors that signal "delicious!" Explaining this process in simple terms to your kids – "See how the chicken is changing color and getting yummy? That's a special science trick called browning!" – can turn cooking into an impromptu chemistry lesson.
Beyond flavor, texture play is absolutely crucial for kids. That perfect contrast between a super crispy exterior and a wonderfully moist interior is what makes tenders so satisfying. The crunch provides an exciting sensory experience, while the soft, tender meat is easy to eat. Different breading choices (panko, crushed chips, pretzel crumbs) offer varied textural adventures, inviting children to explore how different ingredients change the mouthfeel. This tactile exploration is a fantastic way to engage sensory development, which is a key part of early childhood learning.
Finally, let's talk about dipping fun. This isn't just a quirky kid habit; it’s an activity that promotes independence, fine motor skills, and an exploration of flavor combinations. Offering a variety of dipping sauces – from classic ketchup to a homemade honey mustard or a creamy ranch – empowers children to make choices and customize their meal. Each dip introduces a new flavor profile, allowing them to experiment with sweet, tangy, savory, and even a little spicy. This hands-on interaction makes eating more engaging and can even encourage hesitant eaters to try new flavors when paired with a familiar favorite like a chicken tender. At I'm the Chef Too!, we believe in fostering this sense of autonomy and discovery, making mealtime an adventure where every bite is a lesson. This is exactly the kind of hands-on "edutainment" we champion, making complex subjects tangible and delicious. Ready to embark on more such culinary quests? Explore a world of monthly discoveries with The Chef's Club Subscription and get a new adventure delivered right to your door!
Essential Ingredients: Building Blocks for Deliciousness
Every great culinary creation starts with quality ingredients, and chicken tenderloin recipes for kids are no exception. Let's break down the core components and how they contribute to a fantastic meal, offering some educational insights along the way.
Chicken Tenderloins: The Star of the Show
When selecting chicken tenderloins, look for fresh, plump pieces. While they are often sold pre-portioned, you can also purchase boneless, skinless chicken breasts and slice them into strips yourself – a great task for older kids to practice their knife skills (with strict adult supervision, of course!).
An interesting biological fact for kids to discover is the "white stringy piece" often attached to the tenderloin. This is a tendon. While safe to eat, many prefer to remove it for a more pleasant texture. Showing kids how to gently pull it out with a paper towel or using a fork to hold it down while pulling with their fingers can be a fun, albeit slightly gross, science experiment in anatomy! This seemingly small step introduces children to understanding different parts of an animal and how they contribute to our food.
Breading and Coating: The Science of Adhesion and Texture
The breading process is where much of the magic happens, transforming a plain piece of chicken into a crispy delight. It’s also a perfect opportunity to teach about physical and chemical changes.
- Flour (or Gluten-Free Alternative): The first dredge in flour creates a dry surface that helps the egg wash adhere better. You can use all-purpose flour or, for a gluten-free option, a cup-for-cup gluten-free flour blend works wonderfully. This step is about surface area and adhesion, a simple physics lesson!
- Eggs (or Egg-Free Alternatives): The egg wash acts as the "glue" that binds the dry breading to the chicken. For those with egg allergies, a splash of milk, buttermilk, plain Greek yogurt, or even a thin layer of mustard can serve as an effective binder. Talk to your kids about how liquids help things stick together, like a culinary cement!
-
Breading Crumbs: This is where you can get really creative and explore different textures:
- Panko Breadcrumbs: These Japanese-style breadcrumbs are known for their light, airy, and extra-crispy texture due to their larger, flakier structure. They absorb less oil, leading to a lighter crisp.
- Crushed Tortilla Chips: A fantastic gluten-free alternative, tortilla chips offer a savory, slightly salty crunch that kids absolutely adore. Crushing them (perhaps with a rolling pin inside a bag – a fun way to release energy!) is an engaging task for little hands.
- Healthier Alternatives: Finely crushed nuts (like almonds), seeds (sesame seeds), or even ground oats can provide a nutritious and crunchy coating. This is a great way to introduce different food groups and discuss the nutritional benefits of each.
Seasoning: The Art and Science of Flavor
Seasoning is the art of enhancing taste. While basic salt and pepper are always a good start, introducing children to a variety of herbs and spices can broaden their palates and teach them about global flavors.
- Simple Savory: Garlic powder, onion powder, and paprika are mild and universally loved.
- Herbal Notes: Italian seasoning or dried oregano can add a fragrant depth.
- Sweet & Savory: A touch of brown sugar (as in some marinade recipes) can balance savory notes, teaching kids about complementary flavors.
Discuss how different spices come from different plants and regions, turning your kitchen into a delicious geography lesson! The act of tasting and adjusting seasonings is a valuable skill that sharpens critical thinking and sensory awareness.
Dipping Sauces: The Grand Finale
Dipping sauces are an integral part of the chicken tender experience, offering another layer of flavor and fun.
- Classic Comforts: Ketchup and ranch are timeless favorites.
- Sweet & Tangy: Honey mustard, BBQ sauce, or even applesauce offer delightful contrasts.
- Adventurous Dips: Consider a homemade marinara, a mild sweet chili sauce, or a simple yogurt-based dip with fresh herbs.
Encourage kids to try different dips and describe the flavors they taste – tangy, sweet, spicy, savory. This helps them develop their vocabulary and express their preferences, transforming mealtime into a sensory language lesson. This kind of exploration, where food meets learning and creativity, is at the heart of what we do at I'm the Chef Too!. We love seeing families connect over delicious discoveries, much like the exciting kits we send out monthly. Ready for more culinary adventures delivered right to your door? Join The Chef's Club Subscription today!
Our Top Kid-Friendly Chicken Tenderloin Recipes (with STEM & Arts Twists!)
Now, let's get to the delicious part! Here are some of our favorite chicken tenderloin recipes, each designed to be kid-friendly, easy to make, and packed with opportunities for "edutainment" that perfectly align with our mission at I'm the Chef Too!.
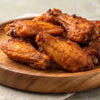
1. The Classic Crispy Baked Tenders: A Culinary Chemistry Experiment
There's nothing quite like a perfectly crispy, golden-brown baked chicken tender. This recipe is a fantastic starting point for understanding basic cooking chemistry and the importance of technique.
Recipe 1: Crispy Golden Baked Tenders
Ingredients:
- 1 pound chicken tenderloins
- 1/3 cup all-purpose flour (or gluten-free blend)
- 2 large eggs, lightly beaten (or 1/3 cup milk/buttermilk for egg-free)
- 1 cup panko breadcrumbs (or finely crushed tortilla chips)
- 1/2 teaspoon seasoned salt (optional, for breading)
- Cooking spray or a drizzle of olive oil
- Dipping sauces of choice (ketchup, ranch, honey mustard)
Instructions:
- Preheat & Prep: Preheat your oven to 425°F (220°C). Place a wire rack inside a rimmed baking sheet and spray it well with non-stick spray. This wire rack is crucial! It allows air to circulate all around the tenders, ensuring both the top and bottom get wonderfully crispy – a mini engineering marvel in your oven!
- Set Up Breading Station: Prepare three shallow dishes. In the first, add the flour. In the second, beat the eggs (or pour milk). In the third, place the panko breadcrumbs (and seasoned salt, if using).
-
The Breading Assembly Line (STEM in Action!):
- Working one tender at a time, dredge the chicken completely in the flour, shaking off any excess. This initial flour layer helps create a dry surface for the next step.
- Next, dip the floured tender into the egg wash, ensuring it’s fully coated. Let any excess drip off. The egg acts as the sticky bridge between the dry flour and the dry crumbs – a fantastic example of adhesion!
- Finally, press the chicken into the panko breadcrumbs, making sure all sides are generously coated. This is a great task for kids to gently pat the crumbs on!
- Bake to Golden Perfection: Place each breaded tender on the prepared wire rack, ensuring they aren't touching. Lightly spray the tops of the tenders with a little more cooking spray for extra crispiness.
- Cook & Observe: Bake for 14-18 minutes, or until the chicken is golden brown and cooked through (internal temperature reaches 165°F/74°C). As the chicken bakes, talk about how the heat transforms the ingredients – the egg solidifies, the breading browns (that’s the Maillard reaction we talked about!), and the chicken cooks through. It’s a delicious chemical reaction right before your eyes!
- Serve: Let cool slightly and serve warm with your favorite dipping sauces. Encourage kids to arrange their tenders artfully on the plate, exploring the visual appeal of food – a touch of culinary arts!
This hands-on process, from ingredient preparation to observing the science of cooking, mirrors the engaging experiences we craft at I'm the Chef Too!. We provide all the specialized supplies and pre-measured dry ingredients, making it easy for families to jump right into the fun. Ready to discover more exciting learning experiences delivered to your door? Join The Chef's Club Subscription and start your monthly culinary journey!
2. Air Fryer Adventures: Speed, Crisp, and Less Oil
The air fryer has become a kitchen MVP for a reason: it delivers incredible crispiness with less oil and in less time. This recipe is perfect for busy weeknights and a great way to introduce kids to a modern cooking appliance.
Recipe 2: Zesty Air-Fried Tenders
Ingredients:
- 1 pound chicken tenderloins
- 1/4 cup all-purpose flour (or gluten-free blend)
- 1 teaspoon garlic powder
- 1/2 teaspoon onion powder
- Pinch of salt and pepper
- 2 large eggs, lightly beaten (or milk/yogurt for egg-free)
- 1 cup panko breadcrumbs
- Zest of 1 lemon (optional, for extra zest!)
- Cooking spray
Instructions:
- Prep Chicken: Pat chicken tenders dry.
- Set Up Breading Station: In one shallow dish, combine flour, garlic powder, onion powder, salt, and pepper. In another, beat the eggs. In a third, mix panko breadcrumbs with lemon zest (if using).
- Bread Tenders: Dredge each tender first in the seasoned flour, then in the egg wash, and finally coat thoroughly in the panko mixture.
- Air Fryer Ready: Lightly spray the air fryer basket with cooking spray. Place the breaded tenders in a single layer, ensuring not to overcrowd the basket. You may need to cook in batches. Lightly spray the tops of the tenders.
- Air Fry: Air fry at 400°F (200°C) for 8-12 minutes, flipping halfway through, until golden brown and cooked through (165°F/74°C internal temperature). Talk to your kids about how the air fryer uses rapidly circulating hot air, much like a tiny convection oven, to cook food quickly and make it crispy, minimizing the need for lots of oil – a practical lesson in physics and healthier cooking!
- Serve: Serve immediately with a side of homemade ranch or a squeeze of fresh lemon juice.
This quick and satisfying method highlights how technology can enhance cooking, a wonderful STEM lesson. For more fantastic single-purchase options that bring immediate hands-on fun and learning to your home, be sure to Browse our complete collection of one-time kits. You might find a kit that makes a chemical reaction that makes our Erupting Volcano Cakes bubble over with deliciousness!
3. Unbreaded & Marinated: Exploring Flavor Infusion
Sometimes, kids prefer their chicken without a crunchy coating. This recipe focuses on tenderizing and flavoring the chicken through a simple marinade, introducing the concept of chemical tenderization.
Recipe 3: Tangy Yogurt-Marinated Tenders
Ingredients:
- 1 pound chicken tenderloins
- 1/4 cup plain whole-milk Greek yogurt
- 1 teaspoon paprika
- 1/2 teaspoon garlic powder
- 1/2 teaspoon onion powder
- 1/4 teaspoon salt
- Pinch of black pepper
- 1 tablespoon olive oil (for cooking)
- Fresh parsley, chopped (for garnish, a touch of green art!)
Instructions:
- Mix Marinade (Chemistry Fun!): In a medium bowl, combine Greek yogurt, paprika, garlic powder, onion powder, salt, and pepper. Stir until well combined. Explain to your kids that the yogurt contains mild acids that help break down the chicken's proteins, making it super tender and juicy – a simple demonstration of food chemistry!
- Marinate Chicken: Add the chicken tenderloins to the bowl, ensuring they are fully coated in the yogurt mixture. Cover the bowl or transfer to a sealed bag and refrigerate for at least 30 minutes, or up to 4 hours. The longer it marinates, the more flavor will infuse!
- Cook to Perfection: Heat olive oil in a large skillet over medium heat. Remove chicken from the marinade, allowing excess to drip off (do not wipe clean).
- Sear & Cook: Place chicken tenders in the hot skillet in a single layer. Cook for 3-4 minutes per side, or until golden brown and cooked through (165°F/74°C internal temperature). Observe how the chicken changes color and browns – more Maillard reaction magic!
- Serve: Garnish with fresh chopped parsley, adding a pop of color and freshness. Serve with rice, quinoa, or a colorful vegetable medley.
This recipe is a wonderful way to explore flavor infusion and the tenderizing power of ingredients, a core concept in culinary science. It encourages experimentation with different spice blends and an appreciation for how different ingredients interact. For us at I'm the Chef Too!, this kind of hands-on experimentation is what makes learning so engaging. We’re all about creating unique experiences that blend food, STEM, and the arts. Ready for a new adventure delivered every month? Join The Chef's Club Subscription and enjoy free shipping on every box!
4. Creative Coatings: Beyond Breadcrumbs
Why stick to just panko when there's a whole world of crunchy coatings to explore? This recipe encourages creativity and sensory exploration by using an unexpected, yet delicious, ingredient.
Recipe 4: Pretzel & Parmesan Crusted Tenders
Ingredients:
- 1 pound chicken tenderloins
- 1 cup finely crushed pretzels (about 2 cups whole pretzels)
- 1/4 cup grated Parmesan cheese
- 1/2 teaspoon garlic powder
- Pinch of salt and pepper
- 1/4 cup all-purpose flour (or gluten-free blend)
- 2 large eggs, lightly beaten
- Cooking spray or olive oil for baking
Instructions:
- Crush Pretzels (Sensory Play!): Place pretzels in a sturdy zip-top bag and use a rolling pin or the bottom of a heavy pan to crush them into fine crumbs. This is a fantastic sensory and motor skill activity for kids – the sound, the feel of crushing, and seeing the transformation!
- Combine Coating: In a shallow dish, combine the crushed pretzels, Parmesan cheese, garlic powder, salt, and pepper. Mix well.
- Set Up Breading Station: In two other shallow dishes, place the flour and the beaten eggs separately.
- Bread Tenders: Dredge each tender first in flour, then egg, and finally generously coat in the pretzel-Parmesan mixture, pressing gently to adhere.
- Bake: Place tenders on a prepared wire rack on a baking sheet. Lightly spray with cooking spray. Bake at 400°F (200°C) for 15-20 minutes, or until golden brown and cooked through.
- Serve: These are fantastic with honey mustard or a creamy cheese dip. Encourage kids to describe the unique crunch and flavor of the pretzel coating.
This recipe is a testament to how thinking outside the box can lead to delicious discoveries, fostering innovation and adaptability in the kitchen – values deeply embedded in our philosophy at I'm the Chef Too!. Our kits are designed to encourage this kind of creative exploration, like making your own edible solar system with our Galaxy Donut Kit, where art and science collide in a delicious way. Dive into more inventive cooking experiences by checking out our Browse our complete collection of one-time kits.
5. Skillet Sizzle: Quick & Flavorful (Garlic Butter Tenders)
For those times when you want unbreaded tenders with a burst of flavor, skillet cooking offers speed and depth. This recipe highlights the art of deglazing and creating a simple pan sauce.
Recipe 5: Garlic Herb Skillet Tenders
Ingredients:
- 1 pound chicken tenderloins
- 1 tablespoon olive oil
- 1 tablespoon butter
- 3-4 cloves garlic, minced
- 1 teaspoon Italian seasoning
- 1/2 teaspoon salt
- 1/4 teaspoon black pepper
- 2 tablespoons chicken broth or water (for deglazing)
- Fresh parsley, chopped (for garnish)
Instructions:
- Season Chicken: Pat chicken tenders dry. Season generously with salt, pepper, and Italian seasoning.
- Heat Skillet: Heat olive oil and butter in a large skillet over medium-high heat until butter is melted and shimmering. Discuss how fats conduct heat and are essential for browning and flavor development.
- Sear Chicken: Add chicken tenders to the hot skillet in a single layer, ensuring not to overcrowd. Cook for 3-4 minutes per side, until golden brown and cooked through. Remove chicken to a plate and set aside.
- Garlic & Deglaze (Flavor Science!): Reduce heat to medium. Add minced garlic to the skillet and cook for about 30-60 seconds until fragrant (be careful not to burn it!). Pour in the chicken broth or water and use a wooden spoon to scrape up any browned bits from the bottom of the pan. This is called deglazing! Explain that these browned bits are packed with flavor from the Maillard reaction, and the liquid helps release them to create a delicious pan sauce – a fantastic culinary transformation!
- Finish & Serve: Return the cooked chicken to the skillet, tossing gently to coat in the garlic butter sauce. Garnish with fresh parsley. Serve immediately with pasta, mashed potatoes, or a crusty bread to soak up the sauce.
This quick skillet method teaches kids about heat management, flavor building, and creating simple sauces – foundational cooking techniques that are both practical and impressive. It's about mastering essential culinary skills, much like how our I'm the Chef Too! kits guide children through the foundational elements of cooking and baking, preparing them for a lifetime of delicious independence.
Making it a Family Affair: Involving Kids in the Kitchen
The true magic of cooking chicken tenderloin recipes for kids isn't just in the delicious outcome, but in the process of making it together. Involving children in the kitchen isn't just about teaching them to cook; it's about building life skills, fostering a love for healthy food, and creating cherished family memories. At I'm the Chef Too!, our core philosophy centers on this very idea: transforming kitchen time into meaningful "edutainment."
Here’s how you can make it a family affair, with age-appropriate tasks and an emphasis on safety:
Age-Appropriate Tasks: Building Skills Bit by Bit
Even the youngest chefs can contribute!
-
Toddlers (1-3 years old):
- Washing: Under supervision, they can wash hands thoroughly and help rinse vegetables or fruit that will accompany the tenders.
- Mixing: Stirring dry ingredients in a bowl (e.g., flour and seasonings for breading).
- "Painting": Using a pastry brush to apply oil or egg wash (if using) to the tenders before baking.
-
Preschoolers (4-5 years old):
- Measuring: Scooping and leveling pre-measured dry ingredients (flour, breadcrumbs) into dishes. This is a fantastic introduction to early math concepts like quantity and fractions!
- Coating: Dipping chicken into the flour, egg, and breadcrumbs. This develops fine motor skills and hand-eye coordination.
- Mashing: Using a fork to mash soft ingredients for a dip.
-
Early Elementary (6-8 years old):
- Reading Recipes: Following simple instructions and identifying ingredients. This builds literacy skills in a practical context.
- Crushing: Crushing tortilla chips or pretzels in a bag with a rolling pin.
- Basic Chopping (with supervision): Using a plastic knife or a small, child-safe metal knife to chop soft vegetables or herbs.
- Forming: Helping to shape or arrange tenders on a baking sheet.
-
Upper Elementary/Pre-Teens (9+ years old):
- Advanced Measuring: Precisely measuring liquids and smaller quantities.
- Knife Skills: Under close supervision, using a chef's knife for more complex chopping and slicing.
- Pan Sautéing: With adult guidance, stirring ingredients in a skillet (e.g., garlic for the skillet tenders).
- Problem-Solving: Encouraging them to think about why a recipe step is important or what to do if an ingredient is missing.
Safety First: Always Adult Supervision
While fostering independence, adult supervision is paramount in the kitchen.
- Hand Washing: Emphasize proper hand washing before, during, and after handling raw chicken to prevent cross-contamination. This is a crucial public health lesson!
- Knife Safety: Teach proper knife grip and how to always cut away from the body. Start with softer foods and child-safe tools.
- Heat Safety: Always be present when children are near a hot stove, oven, or air fryer. Teach them to recognize steam and hot surfaces.
- General Awareness: Remind kids to be mindful of their surroundings, avoid running, and know where sharp objects and hot liquids are.
Learning Opportunities Galore: The Hidden Curriculum
Every step in cooking is a lesson:
- Math: Measuring, counting, fractions, understanding ratios.
- Reading: Following a recipe, ingredient labels.
- Science: Chemical reactions (browning, leavening), physical changes (solids to liquids), nutrition, food safety.
- Fine Motor Skills: Stirring, pouring, kneading, chopping.
- Problem-Solving: Adjusting to unexpected situations, understanding cause and effect.
- Creativity: Plating food, experimenting with flavors, decorating.
The I'm the Chef Too! Philosophy is built on these foundational principles. We design our cooking STEM kits to be screen-free educational alternatives that spark joy and discovery. By turning everyday cooking into an engaging learning adventure, we help families create lasting memories and foster skills that extend far beyond the kitchen.
When kids actively participate in preparing their chicken tenders, they gain confidence, develop essential life skills, and are often more willing to try new foods. This collaborative spirit, coupled with educational enrichment, is precisely what we aim to cultivate. Our school and group programs also leverage this hands-on approach to deliver engaging STEM learning experiences in a communal setting. Bring our hands-on STEM adventures to your classroom, camp, or homeschool co-op. Learn more about our versatile programs for schools and groups, available with or without food components.
Overcoming Picky Eaters: Strategies for Success
Picky eating is a phase many families navigate, but cooking together can be one of your most powerful tools. Chicken tenders, being a kid-favorite, offer a fantastic "in" to introduce new flavors, textures, and ultimately, a broader palate. Our approach at I'm the Chef Too! is all about making learning fun and accessible, and that extends to making mealtime less of a battle and more of an adventure.
Here are some strategies to help overcome picky eating, leveraging the appeal of chicken tenders:
1. Offer Choices (Within Reason)
Empowerment is key. Instead of dictating everything, give your child choices regarding their chicken tender meal.
- Dipping Sauce Bar: Offer a selection of 2-3 dipping sauces. Maybe their go-to ketchup, a homemade honey mustard, and a new, slightly adventurous option like a mild yogurt-cucumber dip. Letting them choose their dip makes the meal feel more like "theirs."
- Side Dish Selection: Present two healthy side options (e.g., roasted broccoli vs. apple slices) and let them pick one. Even if they don't eat much of it, the act of choosing is a step towards acceptance.
- Coating Experiment: If making breaded tenders, let them choose between panko and crushed tortilla chips, or even a mix.
2. Involve Them in the Process (The "Chef Too!" Effect)
This is perhaps the most effective strategy. When kids have a hand in preparing a meal, they develop a sense of ownership and are significantly more likely to try (and enjoy!) what they've made.
- Active Participation: Let them measure ingredients, mix coatings, or dip the chicken. The sensory experience of cooking can be incredibly motivating.
- "Taste Testing": As you cook, let them safely taste individual ingredients (e.g., a pinch of dry seasoning, a tiny bit of sauce). This desensitizes them to new flavors in a low-pressure environment.
- Pride in Creation: Celebrate their contribution! "You helped make these amazing tenders!" boosts their confidence and positively associates cooking with delicious outcomes. This aligns perfectly with our I'm the Chef Too! mission, where hands-on creation leads to joyful, screen-free learning.
3. Experiment with Presentation: Food as Art
The visual appeal of food can greatly influence a child's willingness to eat.
- Fun Shapes: After cooking, you can use cookie cutters to create fun shapes from larger tenders (though this might waste some food, it can be a great motivator).
- Colorful Plates: Pair chicken tenders with a rainbow of fruits and vegetables. Brightly colored bell peppers, cherry tomatoes, and cucumber slices make the plate exciting.
- "Deconstructed" Meals: Instead of mixing everything, arrange components separately on the plate. Some kids prefer not to have their food touching.
4. Healthy Integration: The Sneaky Veggie Approach
While we believe in transparency in cooking, there are ways to boost nutrition without making a big fuss.
- Pureed Veggies in Sauces: Blend steamed carrots or butternut squash into a cheese sauce for dipping, or finely dice bell peppers into a marinara.
- "Hidden" Coatings: Finely ground flaxseed or chia seeds can be mixed into breading for an omega-3 boost, or pureed spinach can be added to a yogurt marinade.
- Flavor Bridges: If your child loves a specific flavor (e.g., mild cheese), try incorporating it into a new dish. For instance, sprinkle a little cheese over freshly baked tenders.
Remember, patience is key. It can take multiple exposures to a new food before a child accepts it. Keep offering, keep involving, and keep making it a positive experience. Focus on the process – the fun, the learning, the bonding – rather than just the outcome of a clean plate. These are the values we instill at I'm the Chef Too!, believing that every shared cooking experience is a step towards a confident, curious learner. If you're looking for ongoing inspiration and easy-to-use kits to keep your kids engaged and exploring new flavors and concepts, a subscription to The Chef's Club Subscription is the perfect solution, delivering new adventures monthly with free shipping!
Meal Prep & Storage: Smart Solutions for Busy Families
In the whirlwind of family life, any strategy that saves time and reduces stress is a win. That's where smart meal prep and proper food storage for chicken tenderloin recipes for kids truly shine. By planning ahead, you can ensure healthy, kid-friendly meals are always within reach, even on the busiest days.
Batch Cooking: Your Future Self Will Thank You
Cooking a larger batch of chicken tenders than you need for a single meal is a game-changer.
- Cook Once, Eat Thrice: Prepare double or triple the amount of your favorite baked or air-fried tenders. Serve half for dinner tonight, and save the rest for quick lunches or another dinner later in the week.
- Marinade Ahead: For marinated tenders, you can prepare the chicken in the marinade up to 3 days in advance. This means on cooking day, all you have to do is cook the chicken – a huge time saver!
- Pre-Breading: You can even bread chicken tenders a day in advance. Store them on a wire rack set over a baking sheet, lightly covered with plastic wrap, in the refrigerator. This keeps the breading from getting soggy.
Proper Storage: The Science of Food Preservation
Understanding how to store food correctly isn't just about freshness; it's about food safety and minimizing waste. This is a practical science lesson for kids!
- Refrigeration: Cooked chicken tenders should be stored in an airtight container in the refrigerator within two hours of cooking. They are typically good for 3-4 days. Labeling containers with the date they were made can be a fun activity for kids and a good lesson in organization.
-
Freezing: Cooked chicken tenders freeze beautifully.
- Allow them to cool completely after cooking.
- Place them in a single layer on a parchment-lined baking sheet and freeze for 1-2 hours, until solid. This "flash freezing" prevents them from sticking together.
- Transfer the frozen tenders to a freezer-safe bag or container. Remove as much air as possible to prevent freezer burn.
- Frozen tenders can be stored for up to 2-3 months. Talk to your kids about how freezing slows down the growth of bacteria, preserving food for longer. This is a real-world application of biology and chemistry!
Reheating Tips: Keeping That Crispiness Alive
The microwave is often a no-go for reheating breaded tenders, as it tends to make them soggy.
- Oven or Toaster Oven: The best way to revive crispy tenders is in a preheated oven or toaster oven at 350-400°F (175-200°C) for 10-15 minutes (longer if frozen), until heated through and re-crisped.
- Air Fryer: The air fryer is also excellent for reheating, taking only about 5-8 minutes at 375-400°F (190-200°C).
Lunchbox Ideas: Creative Ways to Pack Tenders
Leftover chicken tenders are perfect for school lunches!
- Cool Before Packing: Always ensure tenders are completely cooled before packing to prevent condensation, which can lead to sogginess.
- Compartmentalized Containers: Use bento-style lunch containers to keep tenders separate from fruits and veggies, preventing flavors from mixing and textures from degrading.
- Sauce on the Side: Pack dipping sauces in small, leak-proof containers.
- Pairings: Pack tenders with carrot sticks, cucumber slices, grapes, apple wedges, or whole-grain crackers. A small ice pack will keep everything fresh and safe until lunchtime.
Implementing these meal prep and storage strategies not only simplifies family meals but also subtly educates children about planning, efficiency, and the science of food. This practical approach to learning and living is at the heart of our mission at I'm the Chef Too!. For educators and group leaders looking to implement similar life skills and STEM education, our customized programs are an excellent resource. Explore how our versatile programs for schools and groups, available with or without food components, can bring hands-on culinary STEM adventures to your community.
Safety in the Kitchen: Our Top Priority
While the kitchen is a fantastic place for learning and fun, it's also home to potential hazards. At I'm the Chef Too!, we always emphasize that while our activities are engaging and hands-on, adult supervision and a strong focus on safety are absolutely paramount. Teaching kids kitchen safety isn't about scaring them; it's about empowering them with the knowledge and skills to navigate the environment responsibly and confidently.
Here are the key areas to focus on when involving children in cooking chicken tenderloin recipes for kids:
1. Hygiene: The First Line of Defense Against Germs
- Thorough Hand Washing: Before, during (especially after touching raw chicken!), and after cooking, everyone's hands should be washed thoroughly with soap and warm water for at least 20 seconds. Make it a fun habit with a song!
-
Cross-Contamination Prevention: This is critical when handling raw chicken.
- Use separate cutting boards for raw meat and fresh produce. If you only have one, cut produce first, then meat, and wash thoroughly in between.
- Use separate plates and utensils for raw and cooked chicken. Never put cooked chicken back on a plate that held raw chicken.
- Clean all surfaces (countertops, sinks) that came into contact with raw chicken using hot, soapy water or a disinfectant spray.
- Avoid Rinsing Raw Chicken: Despite old habits, rinsing raw poultry can spread bacteria around your sink and countertops. Cooking to the correct internal temperature (165°F/74°C) is what truly kills harmful bacteria.
2. Knife Skills: Learning to Cut Safely
- Age-Appropriate Tools: Start young children with plastic knives that can cut soft fruits and vegetables. As they get older, introduce blunt-tip child-safe metal knives, then graduate to sharper tools with extensive instruction and supervision.
- Proper Grip: Teach them to hold the knife correctly and keep fingers curled back, creating a "bear claw" shape to protect fingertips.
- Cutting Board Stability: Always place a damp paper towel or non-slip mat under the cutting board to prevent it from sliding.
- Supervision: Never leave children unattended with sharp knives. Guide their hand movements and be ready to step in.
3. Heat Safety: Understanding Hot Surfaces
- Stove/Oven Awareness: Teach children that anything on the stove, in the oven, or just removed from them is hot. "Red means hot!" is a simple rule.
- Handle Direction: Turn pot and pan handles inward on the stove to prevent accidental knocking.
- Oven Mitts: Emphasize the use of oven mitts and teach how to properly handle hot baking sheets or dishes.
- Air Fryer Caution: While generally safer than deep frying, air fryers still get very hot. Keep children away from the hot air vents and opening mechanisms.
- Splatter Prevention: When cooking with oil (e.g., skillet tenders), teach children about splattering and the importance of standing back or using a splatter guard.
4. General Awareness: Being Mindful of Surroundings
- Clear Workspaces: Keep the cooking area tidy and free of clutter to prevent accidents.
- Heavy Objects: Be careful when lifting heavy pots or bowls, and ensure children are not near the edge of the counter.
- Electrical Appliances: Teach children about safe use of blenders, food processors, and other electrical appliances, especially keeping hands away from moving parts and water away from outlets.
- Supervision is Key: Ultimately, the most important safety rule is constant adult supervision, especially for younger children. The kitchen is a dynamic environment, and an adult's watchful eye can prevent most accidents.
By integrating these safety lessons into every cooking session, you’re not only protecting your children but also teaching them invaluable life skills that will serve them well as they grow into independent, confident cooks. Our commitment at I'm the Chef Too! is to provide enriching experiences that are both fun and safe, setting realistic expectations for learning and development in the home kitchen.
Beyond the Plate: The Broader Impact of Cooking Together
When you gather your family around the kitchen counter to prepare chicken tenderloin recipes for kids, you're doing so much more than just making a meal. You are creating a vibrant learning environment, a space for connection, and a foundation for essential life skills. At I'm the Chef Too!, we believe in the profound, multifaceted impact of hands-on cooking, blending food, STEM, and the arts into unforgettable "edutainment."
Consider the ripple effects that extend far beyond the delicious plate:
1. Confidence Building: From Helper to Head Chef
As children successfully complete tasks in the kitchen, from measuring flour to breading chicken, their self-esteem soars. Each new skill mastered, each recipe completed, reinforces a sense of accomplishment. They learn that they are capable, that their contributions are valued, and that they can transform raw ingredients into something wonderful. This boost in confidence isn't confined to the kitchen; it spills over into other areas of their lives, encouraging them to tackle new challenges at school and beyond.
2. Creativity Unleashed: The Culinary Artist Within
Cooking is a highly creative endeavor. From choosing ingredients to plating a dish, there are endless opportunities for artistic expression.
- Flavor Experimentation: Encouraging kids to suggest a new spice or a different dipping sauce fosters imaginative thinking.
- Aesthetic Presentation: Arranging food on a plate, adding a colorful garnish, or even drawing with sauce allows them to engage with the visual and sensory aspects of food as art.
- Problem-Solving: What if you run out of an ingredient? How can you adapt? These moments spark innovative thinking.
This creative freedom aligns perfectly with our I'm the Chef Too! mission, where we see every cooking session as a chance for children to explore their artistic side while learning practical skills.
3. Communication and Collaboration: The Recipe for Family Bonding
Cooking together naturally encourages communication. Children ask questions ("Why does the egg do that?"), share observations ("This smells so good!"), and follow instructions. It's a collaborative effort where everyone has a role, fostering teamwork and strengthening family bonds. This dedicated, screen-free time allows for genuine connection, laughter, and shared experiences that become cherished memories. It's a powerful way to talk about the day, share stories, and simply enjoy each other's company in a productive, fun environment.
4. Life Skills for Independence: Preparing for the Future
The skills learned in the kitchen are fundamental life skills. Knowing how to plan a meal, select ingredients, measure accurately, follow a recipe, and clean up afterward are invaluable lessons that contribute to a child's eventual independence. These aren't just abstract concepts; they are tangible abilities that empower them to care for themselves and others. Cooking teaches responsibility, organization, and the practical application of academics like math and reading.
At I'm the Chef Too!, we are committed to providing these holistic learning experiences. Our unique blend of food, STEM, and arts is designed to spark curiosity and creativity, facilitate family bonding, and offer a powerful screen-free educational alternative. We see cooking as a dynamic laboratory, an art studio, and a family gathering place all rolled into one. The joy, the skills, and the memories created in your kitchen today will shape curious, confident, and capable individuals for tomorrow. This transformative learning is also available in group settings, where collaboration and shared discovery amplify the educational impact. To learn how we can bring these enriching, hands-on experiences to a larger audience, please explore our versatile programs for schools and groups, available with or without food components.
Conclusion
From the sizzle in the pan to the satisfying crunch of a perfectly baked bite, cooking chicken tenderloin recipes for kids offers an incredible array of benefits that extend far beyond the dinner plate. We've journeyed through the science of sensation, explored diverse preparation methods, delved into strategies for picky eaters, and highlighted the profound impact of shared kitchen experiences. What began as a simple request for a kid-favorite meal can truly evolve into a rich tapestry of learning, creativity, and connection.
At I'm the Chef Too!, our core belief is that every family kitchen holds the potential to be a vibrant hub of discovery. By blending food with STEM and the arts, we transform ordinary cooking into extraordinary "edutainment." We've seen how teaching complex subjects through tangible, hands-on, and delicious cooking adventures developed by mothers and educators can spark curiosity, build confidence, and create invaluable family bonding moments, all while offering a refreshing screen-free educational alternative.
So, gather your little chefs, pick a recipe, and prepare to embark on a culinary adventure that nourishes both body and mind. The skills your children will develop – from mathematical measurement and scientific observation to creative plating and collaborative teamwork – are foundational life lessons dressed in deliciousness. Don't just make dinner; make memories, make scientists, make artists.
Ready to bring more of these one-of-a-kind learning experiences into your home every month? Ignite a continuous spark of curiosity and creativity. Join The Chef's Club Subscription today and enjoy the convenience of a new, exciting cooking STEM kit delivered to your door with free shipping! Give the gift of learning that lasts all year, or simply enrich your family’s routine with ongoing delicious discoveries.
FAQ Section
How do I keep chicken tenders crispy when reheating?
To keep chicken tenders crispy, avoid using the microwave, as it often makes them soggy. The best methods are reheating in a preheated oven or toaster oven at 350-400°F (175-200°C) for 10-15 minutes, or in an air fryer at 375-400°F (190-200°C) for 5-8 minutes, until heated through and re-crisped.
Can I make these chicken tender recipes gluten-free or egg-free?
Yes, absolutely!
- Gluten-Free: Simply substitute all-purpose flour with a cup-for-cup gluten-free flour blend and use gluten-free breadcrumbs (like panko) or finely crushed gluten-free tortilla chips for the coating.
- Egg-Free: For breaded recipes, you can use 1/3 cup of milk, buttermilk, plain Greek yogurt, or a thin layer of mustard in place of beaten eggs as a binder for the breading.
How long can cooked chicken tenders be stored?
Cooked chicken tenders can be stored in an airtight container in the refrigerator for 3-4 days. For longer storage, they can be frozen for up to 2-3 months. Ensure they are fully cooled before refrigerating or freezing to maintain quality and safety.
What's the best way to get kids involved safely in making chicken tenders?
Involving kids safely is about assigning age-appropriate tasks and constant adult supervision.
- Younger Children (toddlers/preschoolers): Focus on washing hands, stirring dry ingredients, or dipping chicken into breading mixtures.
- Older Children (elementary/pre-teens): They can help with measuring, reading recipe steps, crushing ingredients, or even supervised basic chopping with child-safe knives. Always emphasize thorough handwashing, discuss heat safety around the oven/stove, and practice safe knife handling.
What are chicken tenderloins compared to chicken breasts?
Chicken tenderloins are a specific cut of meat, typically a small, lean strip found naturally underneath the chicken breast. They are inherently more tender and moist than the larger chicken breast. While often sold separately, you can also cut boneless, skinless chicken breasts into thin strips to use as "chicken tenders," though the texture might be slightly different from true tenderloins.