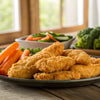
Kid-Friendly Crispy Baked Chicken Wings Recipe

Table of Contents
- Why Cooking Chicken Wings is Perfect for Kids (and Parents!)
- The Science of Crispy: A Kitchen STEM Lesson
- Essential Equipment for Our Kid-Friendly Kitchen Adventure
- Gathering Our Ingredients: A Sensory Exploration
- Step-by-Step: Crafting Crispy Baked Chicken Wings with Your Little Chefs
- Beyond the Basic: Kid-Friendly Flavor Explorations & Dipping Adventures
- Safety First: Essential Kitchen Rules for Little Chefs
- Making Memories: Turning Mealtime into an Event
- Storing and Reheating: Making the Most of Our Delicious Creation
- Common Questions & Troubleshooting for Your Chicken Wing Journey
- Conclusion
- FAQ: Your Chicken Wing Recipe for Kids Questions Answered
The doorbell rings. Your little one, mid-storytelling, pauses with a dramatic flourish. "It's game night!" they declare, eyes wide with anticipation. Meanwhile, you're picturing the usual dinner dilemma: a flurry of "I don't like that!" and plates barely touched. What if dinner could be just as exciting as the game? What if it could be an adventure, a hands-on learning experience that sparks joy and fills hungry bellies without the usual fuss? That's exactly what we believe in here at I'm the Chef Too! – transforming everyday meals into extraordinary moments of discovery.
Today, we're diving into a universally loved dish that often feels reserved for adult gatherings: crispy baked chicken wings. But we're not just making any wings; we're crafting a delightful, kid-friendly chicken wings recipe that invites your children into the kitchen as eager co-chefs. This isn't just about feeding them; it's about empowering them, teaching them, and creating cherished memories around the chopping board and mixing bowl. We'll explore the science behind that perfect crisp, discover the magic of flavors, and turn a simple meal into a memorable "edutainment" experience where STEM, culinary arts, and family bonding beautifully intertwine. Get ready to ditch the screens, roll up those sleeves, and embark on a delicious journey together – because some of the best lessons are learned in the kitchen!
Why Cooking Chicken Wings is Perfect for Kids (and Parents!)
You might think chicken wings are too complicated or messy for little hands, but we see them as a fantastic blank canvas for learning and fun. Our mission at I'm the Chef Too! is to blend food, STEM, and the arts into one-of-a-kind "edutainment" experiences, and this recipe perfectly embodies that spirit. When children get involved in cooking, they're not just helping; they're actively engaging with a multitude of developmental areas.
Think about it:
- Math in Action: Measuring spices, counting wings, understanding fractions when halving ingredients – these are all practical math lessons that feel like play.
- Science Experiments: From observing how heat transforms raw chicken to understanding why certain ingredients create crispiness, the kitchen is a live laboratory. We’ll delve into the fascinating science behind achieving that coveted crispy skin.
- Fine Motor Skills: Stirring, sprinkling, basting, and even carefully placing wings on a tray all help refine hand-eye coordination and dexterity.
- Sensory Exploration: Touching different textures, smelling aromatic spices, tasting new flavors – cooking engages all five senses, broadening a child's palate and appreciation for food.
- Following Instructions & Problem Solving: Recipes teach children to follow a sequence of steps, and when something doesn't go quite as planned, it's a gentle introduction to problem-solving.
- Building Confidence & Independence: There's immense pride in eating something you helped create. This boosts self-esteem and encourages a sense of accomplishment.
At I'm the Chef Too!, we believe in providing screen-free educational alternatives that spark curiosity and creativity. This chicken wings adventure is a prime example. It's an opportunity for genuine family bonding, where conversations flow naturally, laughter fills the air, and everyone contributes to a shared goal. Plus, it's a great way to encourage picky eaters to try new things when they've been part of the making process. It’s a win-win, offering valuable skills and delicious rewards!
The Science of Crispy: A Kitchen STEM Lesson
Achieving truly crispy chicken wings isn't just luck; it's a delightful dance of chemistry and physics, and it’s a perfect opportunity for some real kitchen STEM! Understanding why certain steps are crucial can turn a simple cooking task into an exciting scientific investigation for your little chefs.
Let's break down the magic:
- The Power of Dry: This is perhaps the single most important secret to crispiness. Moisture on the surface of the chicken wing creates steam in the hot oven. Steam is the enemy of crispiness! By thoroughly patting the chicken wings dry with paper towels, we remove this surface moisture. This allows the heat to directly interact with the skin, rather than having to evaporate water first. Less steam means more crisp. You can explain this to kids by likening it to trying to dry off after a swim – you wouldn’t just stand there, you’d use a towel!
- The Role of Flour (or Coating): While some recipes skip it, a light dusting of flour (or a combination like flour and baking powder) provides a protective coating that absorbs residual moisture and helps create a structural scaffold for the crispness. When heated, this flour mixture forms a crispy crust, much like the outer layer of bread. It also helps to distribute the fats and seasonings evenly.
- Fat is Flavor (and Crisp): Ingredients like butter or oil aren't just for taste; they're critical for crisping. Fat conducts heat efficiently and, when rendered from the chicken skin, helps fry the outer layer. The butter we brush on adds flavor and promotes even browning, contributing to that desirable golden-brown color and crunchy texture.
- The Maillard Reaction: This is a fancy term for what happens when amino acids and reducing sugars react at high temperatures, creating hundreds of new flavor compounds and that beautiful golden-brown color. It's the same reaction that gives roasted coffee its aroma, seared steak its crust, and baked goods their golden hue. When your wings turn golden and smell amazing, that’s Maillard in full effect!
- Hot Air Circulation: Baking at a high temperature (like 400-425°F) ensures the oven's hot air can quickly cook the wings and render the fat. Using a wire rack placed over a baking sheet is a game-changer because it lifts the wings, allowing air to circulate all around them. This prevents the bottoms from getting soggy from sitting in rendered fat, promoting even crispness on all sides.
By explaining these concepts in simple terms, you're not just teaching them how to cook; you're nurturing a deeper understanding of the world around them. This "edutainment" approach is at the core of what we do at I'm the Chef Too! We believe that understanding the why makes the how so much more exciting, and a delicious outcome is the ultimate reward for their scientific curiosity.
Essential Equipment for Our Kid-Friendly Kitchen Adventure
Before we dive into the fun of cooking, let's gather our tools. Just like a scientist needs the right instruments for an experiment, a chef needs the proper equipment for a successful dish. When cooking with kids, safety and accessibility are key. We'll outline both essential items and a few optional ones that make the process even smoother and more engaging for your little chefs.
Must-Have Equipment:
- Baking Sheets: You'll need at least one, preferably two, rimmed baking sheets. These provide the surface for baking your wings. Look for sturdy ones that won't warp in high heat.
- Wire Racks: This is a crucial, non-negotiable item for truly crispy wings. Place a wire rack inside your baking sheet. It elevates the wings, allowing air to circulate underneath and preventing them from sitting in rendered fat, which can make them soggy.
- Aluminum Foil or Parchment Paper: While not strictly for the wings themselves, lining your baking sheets with foil or parchment paper makes cleanup a breeze! This is a parent-friendly tip that saves time.
- Large Resealable Plastic Bag (Gallon Size): This is our "magic shaker" for coating the wings. It's much less messy and more fun for kids than tossing in a bowl.
- Measuring Cups and Spoons: Essential for accurate ingredient measurement – a great way to practice those math skills!
- Small Microwave-Safe Bowl or Saucepan: For melting butter.
- Basting Brush: A silicone basting brush is ideal as it's easy to clean and heat-resistant. Kids love to "paint" the butter onto the wings.
- Tongs: Useful for safely flipping and transferring hot wings.
- Meat Thermometer: The most reliable way to ensure chicken is cooked to a safe internal temperature (165°F). This is a critical safety tool.
- Paper Towels: For patting those wings dry – remember, dryness is the secret to crispiness!
Kid-Friendly "Chef" Tools (with supervision):
- Kid-Safe Knife (or Butter Knife): For very young children, a butter knife can help them practice "cutting" soft herbs or even spreading butter. For older children, consider a dull-edged, child-safe knife designed for cooking. Adult supervision is always required when any cutting is involved.
- Aprons: Not essential for cooking, but they definitely get kids into the "chef" mindset and protect their clothes from inevitable spills.
When we create our I'm the Chef Too! kits, we consider every tool needed to make the experience seamless and fun, right down to the specialty supplies. While this recipe uses common kitchen items, the principle is the same: having the right equipment makes the process enjoyable and successful. Not ready to subscribe? Explore our full library of adventure kits available for a single purchase in our shop. You might just find another culinary adventure waiting! Browse our complete collection of one-time kits.
Gathering Our Ingredients: A Sensory Exploration
Every great dish begins with great ingredients, and our crispy baked chicken wings are no exception. This part of the process is a wonderful opportunity to talk to your children about where food comes from, how different textures feel, and how various spices create unique flavors. It's a true sensory exploration, a cornerstone of our "edutainment" philosophy at I'm the Chef Too!
Here's what we'll need, along with some insights for your little chefs:
-
Chicken Wings (about 2-3 pounds):
- Choosing Your Wings: You'll typically find them sold as "party wings," which means they've already been separated into "drumettes" (the mini drumstick-like piece) and "flats" (the flatter, middle section), with the wing tip often removed. This is ideal for kids as they're easier to handle and eat. If you buy whole wings, we’ll show you how to separate them safely later.
- Discussing Sourcing: This is a chance to talk about where chicken comes from and the importance of responsible farming.
- Safety First: Remind children that raw chicken needs to be handled carefully, and hands must be washed thoroughly after touching it.
-
The Crispy Coating & Flavor Blend: This is where the magic happens, transforming plain chicken into something irresistible.
- 1/2 cup All-Purpose Flour: This forms the base of our crispy coating. Explain that flour helps absorb moisture and gives the wings a golden, crunchy exterior when baked. It’s like the "glue" that holds our yummy spices on!
- 1 Tablespoon Paprika: A beautiful red spice that adds color and a mild, sweet, peppery flavor. Ask your child if they can guess what color it is! You can use regular paprika or, for a slightly deeper, smoky flavor, try smoked paprika – a fun taste test for older kids.
- 1 1/2 teaspoons Garlic Salt (or Garlic Powder + Salt): Garlic salt provides a savory punch. If you only have garlic powder, use 1 teaspoon of garlic powder and 1 teaspoon of kosher salt separately, so you can discuss the individual contributions of each. Salt is essential for flavor and helps draw out moisture, aiding crispiness.
- 1 teaspoon Black Pepper: This adds a gentle warmth and a classic, slightly pungent taste. Let your child smell it – what does it remind them of?
- A Pinch of Cayenne Pepper (Optional, or more to taste for older kids/adults): For a very subtle kick! This is totally optional for a kid-friendly recipe. If you include it, explain that just a tiny bit adds a "warm" feeling, but too much can be "spicy." This is a great way to introduce the concept of balancing flavors.
-
1/2 stick (4 tablespoons) Unsalted Butter, melted:
- Why Butter? Butter adds richness, flavor, and helps achieve that beautiful golden-brown color and incredible crispiness. When melted, it also acts as a binder for our spice mixture.
- The Science of Melting: You can talk about how solid butter turns into a liquid when heated, a simple but observable physical change.
At I'm the Chef Too!, we carefully select ingredients and develop recipes that are both delicious and educational. This selection process, from understanding spices to observing changes, encourages children to be more observant and engaged with their food. Ready for a new adventure every month? Join The Chef's Club and enjoy free shipping on every box. Every box is a complete experience, containing pre-measured dry ingredients and specialty supplies, making it easy to bring these fun lessons right into your kitchen!
Step-by-Step: Crafting Crispy Baked Chicken Wings with Your Little Chefs
Now for the main event – the cooking! This is where the real "edutainment" happens. We'll guide you through each step, highlighting age-appropriate tasks and the learning opportunities embedded within. Remember, the goal is to have fun, learn, and create something delicious together, so keep it light and encouraging!
1. Prep the Wings: A Lesson in Anatomy (and Patience!)
Before we even think about seasoning, we need to prepare our chicken wings. This step offers some gentle lessons in anatomy and the importance of preparation.
-
Separating the Wings (Adult Task): If you purchased whole chicken wings, you'll need to separate them into drumettes and flats. Locate the two joints on the wing. With a sharp knife, carefully cut through the skin and cartilage at each joint. The wing tip can be discarded or saved for making chicken stock.
- Kid's Role: While adults handle the sharp knife, kids can observe the different parts of the wing. You can explain that chickens have wings just like birds, and these are the parts we love to eat!
- Safety Talk: Reiterate that knives are for adults only and always require extreme caution.
-
Patting Dry (Kid-Friendly Task with Supervision): This is the most crucial step for crispy wings, and kids can absolutely help!
- Lay the separated chicken wing pieces on a plate or cutting board lined with several layers of paper towels.
- Give your child a fresh piece of paper towel and show them how to gently but firmly pat each side of every wing piece. Emphasize getting them as dry as possible.
- Science Snippet: Explain that we're removing water from the surface because water turns into steam in the oven, and steam makes things soggy, not crispy! It's like taking a towel to dry off after a bath. Just like how our Erupting Volcano Cakes Kit teaches about chemical reactions, drying chicken is a science too – it's all about moisture control!
2. The Flavor Shake-Up: Mixing and Coating
This is where your little chefs truly shine! It’s hands-on, a little messy (in a fun way!), and full of sensory engagement.
- Preheat the Oven (Adult Task): Preheat your oven to 425°F (220°C). Discuss with your child why we preheat the oven – just like how a car needs to warm up before a long drive, the oven needs to be hot and ready to cook our food properly.
-
Measure the Spices (Kid-Friendly Task):
- Ask your child to help you measure out the flour, paprika, garlic salt, black pepper, and cayenne (if using). This is an excellent opportunity for practicing math skills and understanding units of measurement (tablespoons, teaspoons).
- Sensory Experience: Let them smell each spice before it goes into the bag. Ask them to describe the scent.
-
The Magic Shaker Bag (Kid-Friendly Task):
- Carefully pour all the measured dry ingredients into a large, resealable plastic bag (gallon size works best).
- Add the thoroughly dried chicken wings to the bag.
- Seal the bag tightly, making sure there’s some air trapped inside.
- Now, for the fun part: let your child shake the bag! Encourage them to gently tumble and turn it until every wing piece is evenly coated. This is great for gross motor skills!
- Why a Bag? Explain that the bag helps distribute the spices evenly and keeps the mess contained – a chef's clever trick! Experience new flavors and skills every month with The Chef's Club Subscription! Each box is a complete experience, containing pre-measured dry ingredients and specialty supplies, making these "magic shaker" moments a regular feature in your kitchen.
3. Arranging for Perfection: Spacing is Key
Proper arrangement on the baking sheet is crucial for crispiness. This step teaches spatial awareness and the importance of giving food "room to breathe."
- Prepare the Baking Sheets (Kid-Friendly Task with Supervision): Line your baking sheets with aluminum foil or parchment paper for easy cleanup. Place a wire rack on top of each lined baking sheet.
-
Arranging the Wings (Kid-Friendly Task with Supervision):
- Carefully remove each coated chicken wing from the bag, gently shaking off any excess flour.
- Have your child arrange the wings in a single layer on the wire racks. Emphasize that the wings should not be touching each other.
- Science Snippet: Explain that giving the wings space allows the hot air in the oven to circulate around each piece, ensuring even cooking and crispiness. If they're too crowded, they'll steam instead of bake, leading to soggy wings.
4. The Golden Touch: Butter Basting
This step adds incredible flavor and helps achieve that beautiful golden-brown color.
-
Melt the Butter (Adult Task): In a small microwave-safe bowl or saucepan, melt the 1/2 stick of butter.
- Science Snippet: You can talk about how heat changes the state of matter from solid to liquid.
-
Brush the Butter (Kid-Friendly Task with Supervision):
- Once the wings are arranged, give your child a silicone basting brush.
- Show them how to gently brush the melted butter over the top of each chicken wing piece. They're like little artists, "painting" the wings!
- Why Butter? Remind them that the butter adds flavor and helps the wings get super crispy and golden in the oven.
5. The Grand Bake: Oven Science in Action
This is where the transformation happens!
-
Bake (Adult Task): Carefully place the baking sheets with the buttered wings into the preheated 425°F oven.
- Bake for 30 minutes.
- Mid-Bake Basting (Kid-Friendly Task with Supervision): After 15 minutes, carefully pull out the baking sheets (adults handle hot items!). Have your child help you baste the wings with any remaining melted butter or the rendered fat on the pan. You can even gently flip them with tongs if you feel comfortable. This ensures even crisping on both sides.
- Return to the oven for another 15 minutes.
-
Check for Doneness (Adult Task): After a total of 30 minutes, the wings should be cooked through and starting to look golden and crispy.
- Food Safety Lesson: The most important part is ensuring food safety. Use a meat thermometer to check the internal temperature of the thickest part of a drumette. It should reach 165°F (74°C). This is a crucial lesson in safe cooking practices.
- Optional Extra Crispy Step (Adult Decision): If you want them extra crispy, or if your oven tends to run a little cooler, you can reduce the oven temperature to 170°F (77°C) and bake for an additional 15-30 minutes. This slow-bake step further renders fat and dries out the skin, leading to maximum crunch!
- Cool and Serve: Once the wings are perfectly crispy and cooked through, carefully remove them from the oven. Let them rest for a few minutes before serving.
Every month, The Chef's Club brings a new, exciting culinary science experiment right to your home, much like understanding the optimal baking temperature for these wings. Our kits are developed by mothers and educators, ensuring that these hands-on, delicious cooking adventures teach complex subjects in an accessible, engaging way.
Beyond the Basic: Kid-Friendly Flavor Explorations & Dipping Adventures
While our basic crispy baked chicken wings recipe is delicious on its own, part of the fun of cooking is customizing flavors! This is another excellent opportunity for creativity and sensory exploration with your children. Think of the wings as a blank canvas, and the sauces and seasonings as their culinary palette.
Here are some kid-friendly ideas for dressing up your wings (many can be added after baking for best results) and some delicious dipping sauces:
Post-Baking Flavor Enhancements:
These are best tossed with the hot, freshly baked wings right after they come out of the oven, allowing the flavors to adhere and melt slightly.
- Sweet Honey-Garlic: In a small bowl, whisk together 1/4 cup honey, 1 tablespoon melted butter, 1 teaspoon garlic powder, and a pinch of salt. Toss the hot wings in this mixture until evenly coated. The sweetness balances the savory wings perfectly!
- Zesty Lemon-Pepper: After baking, sprinkle the hot wings generously with store-bought lemon pepper seasoning. The bright citrus and peppery kick are fantastic. You can even squeeze a little fresh lemon juice over them for extra zing.
- Parmesan Perfection: Toss hot wings with 1/4 cup grated Parmesan cheese and 1 teaspoon garlic powder. The cheese will melt slightly, creating a savory, cheesy crust.
- Mild BBQ: Choose your favorite kid-friendly BBQ sauce (look for lower sugar options or make your own with less sugar). After baking, toss the wings in the sauce or serve it on the side for dipping. For an extra sticky glaze, you can toss them in the sauce and return them to the oven for 5-10 minutes, keeping a close eye so the sauce doesn't burn.
Dipping Sauce Adventures:
Dipping sauces are an absolute must for chicken wings and allow kids to customize every bite. Plus, making homemade sauces adds another layer of culinary skill!
- Classic Creamy Ranch: This is a universal favorite. You can use store-bought or try making a simple homemade version with plain yogurt or sour cream, a squeeze of lemon juice, and a mix of dried herbs like dill, chives, and parsley, plus a little garlic powder and onion powder.
- Sweet & Tangy Honey Mustard: Combine equal parts honey and dijon mustard (or regular yellow mustard for a milder flavor), then whisk in a little mayonnaise to make it creamy. A tiny splash of apple cider vinegar can brighten it up.
- Cool Cucumber-Dill Dip: Blend plain Greek yogurt with finely diced cucumber, fresh dill, a squeeze of lemon juice, and a pinch of salt and pepper. It’s refreshing and light.
- Avocado Ranch: Blend ripe avocado with store-bought ranch dressing or a homemade ranch base for a creamier, greener, and vitamin-packed dip!
Encourage your children to experiment! Ask them, "What flavors do you think would go well together?" This fosters creativity and critical thinking about food combinations. Looking for more culinary inspiration? Our kits offer unique themes and flavors to explore. Just like our Galaxy Donut Kit sparks imagination with edible planets and cosmic creations, these sauces let kids get creative with flavors and expand their culinary universe. Browse our complete collection of one-time kits to find your next family adventure, perhaps a kit that inspires a whole new sauce creation!
Safety First: Essential Kitchen Rules for Little Chefs
While cooking with kids is incredibly rewarding and educational, safety must always be our top priority. The kitchen, with its hot surfaces, sharp tools, and electrical appliances, requires a mindful approach, especially when little ones are involved. Our approach at I'm the Chef Too! emphasizes learning in a safe, supervised environment, and these rules are paramount for ensuring a joyful and secure cooking experience.
Non-Negotiable Safety Rules:
- Adult Supervision is Paramount: Never leave children unsupervised in the kitchen, especially when the oven, stovetop, or sharp tools are in use. Your active presence is the best safety measure.
- Handwashing Heroes: This is a crucial food safety lesson! Before touching any food, and especially after handling raw chicken, everyone must wash their hands thoroughly with soap and warm water for at least 20 seconds. Sing the "Happy Birthday" song twice to ensure proper washing!
-
Raw Chicken Awareness: Explain that raw chicken can carry germs that make us sick. Teach children:
- Do not touch raw chicken with bare hands, if possible. Use tongs or gloves if preferred.
- Never cross-contaminate: Use separate cutting boards and utensils for raw chicken, or wash them thoroughly with hot, soapy water immediately after use.
- Keep raw chicken away from other ingredients that won't be cooked.
-
Oven Safety - The "Hot Zone": The oven is a dangerous area for children.
- Establish a clear "hot zone" around the oven that children should not enter when it's on.
- Teach them that the oven gets extremely hot, and touching it will cause burns.
- Adults should always be the ones to put food into and take food out of the oven. Use oven mitts.
- Be mindful of hot steam when opening the oven door.
-
Knife Safety - Grown-Up Tools: Sharp knives are for adults only.
- If children are helping with "cutting," use kid-safe nylon knives for soft items or assign tasks like tearing lettuce or mashing ingredients.
- Always emphasize that real knives are tools that need respect and careful handling by grown-ups.
-
Hot Food & Liquids: Just like the oven, hot food (especially melted butter or freshly baked wings) can cause burns.
- Teach children to keep a safe distance from hot pans and dishes.
- Always allow food to cool slightly before children taste or handle it.
-
Clean and Clear Workspace: A tidy kitchen is a safe kitchen.
- Teach children to help clear their workspace, so there are no tripping hazards or cluttered areas for spills.
- Wipe up spills immediately to prevent slips.
- Hair Tied Back: Long hair should always be tied back to keep it out of the food and away from heat sources.
By establishing these rules from the beginning and consistently reinforcing them, you're not just ensuring safety; you're also teaching children essential life skills in responsibility, caution, and hygiene. We prioritize these foundational lessons in every kit we develop, recognizing that the joy of discovery truly blossoms in a secure environment. Our goal is to facilitate family bonding through these experiences, knowing that a safe kitchen is a happy kitchen.
Making Memories: Turning Mealtime into an Event
Cooking together is fantastic, but the experience doesn't have to end when the wings come out of the oven. At I'm the Chef Too!, we believe in holistic "edutainment" that extends beyond just the culinary process. Turning mealtime into a special event enhances family bonding, encourages appreciation for the food, and builds delightful traditions.
Here are some ways to elevate your chicken wing dinner from a casual meal to a memorable occasion:
- Themed Dinner Night: Declare it "Crispy Wing Night!" or "Game Night Feast!" This simple designation makes it feel more special. You could even create a "restaurant" theme where your child takes orders, serves the food, and helps clear the table.
- Kid-Designed Place Settings: Let your children get creative with setting the table. They can choose plates, napkins, and even create handmade place cards or drawings for each family member. This taps into their artistic side and makes them feel invested in the dining experience.
- Craft a Menu: For older kids, this is a fun writing and design project. Have them write out a simple menu for "Tonight's Special," listing the chicken wings and any side dishes or dipping sauces you've prepared. They can add descriptions and even prices (imaginary, of course!).
-
Conversation Starters: While eating, make it a point to talk about the cooking process. Ask your child:
- "What was your favorite part of making the wings?"
- "What was something new you learned today?"
- "Which dipping sauce did you like the best, and why?"
- "What science did we see happening in the kitchen?" This reinforces the learning and encourages them to articulate their experiences.
- Gratitude Practice: Encourage everyone at the table to share something they're grateful for, perhaps even specifically about the meal or the time spent together. This fosters a positive atmosphere and appreciation.
- Photo Op! Don't forget to snap a picture of your proud little chef with their crispy creations. These photos become cherished memories, documenting their culinary journey and growth.
- Post-Dinner Clean-Up Crew: Just as they helped prepare, encourage them to help clean up (age-appropriately, of course!). Wiping the table, putting away non-breakable dishes, or sorting silverware are all valuable contributions that teach responsibility and teamwork.
These little touches transform a meal into a cherished family ritual. The focus shifts from merely eating to celebrating effort, creativity, and togetherness. At I'm the Chef Too!, our mission is to facilitate family bonding through these kinds of engaging, screen-free experiences. We know that these moments of shared creation are the building blocks of lasting memories and a lifelong love for learning. Create these unforgettable family moments consistently with The Chef's Club Subscription – your monthly dose of discovery and deliciousness, delivered right to your door with free shipping!
Storing and Reheating: Making the Most of Our Delicious Creation
Congratulations, you've successfully created a batch of delicious, crispy chicken wings with your little chefs! But what if you have leftovers? Or what if you want to prepare some in advance? Knowing how to properly store and reheat your culinary masterpieces is just as important as knowing how to cook them. This section offers another opportunity to teach children about food safety and minimizing waste.
Proper Storage for Leftovers:
- Cool Down Quickly: After serving, allow any leftover wings to cool down to room temperature within two hours. Do not leave them out longer than this, as it enters the "danger zone" for bacterial growth.
- Airtight Container: Once cooled, transfer the chicken wings to a clean, airtight container. This prevents them from drying out and protects them from absorbing odors from other foods in the fridge.
- Refrigerate Promptly: Store the airtight container in the refrigerator. Cooked chicken wings are best consumed within 3-4 days when properly refrigerated.
-
Freezing for Longer Storage: If you've made a large batch or don't anticipate eating them within a few days, you can freeze cooked chicken wings.
- Method: Once completely cooled, place the wings in a single layer on a baking sheet and flash-freeze them for about 1-2 hours until solid. This prevents them from sticking together.
- Transfer: Once solid, transfer the frozen wings to a freezer-safe bag or airtight container. Remove as much air as possible to prevent freezer burn.
- Duration: Frozen cooked chicken wings can be stored for up to 2-3 months.
- Thawing: When ready to eat, thaw them overnight in the refrigerator before reheating.
Reheating for Maximum Crispiness:
The challenge with reheating chicken wings is often losing that wonderful crispness. Here's how to bring them back to their crunchy glory:
- Oven is Best: The oven is your best friend for re-crisping baked chicken wings. Microwaving them will make them rubbery and soggy – avoid at all costs!
-
Method:
- Preheat Oven: Preheat your oven to 350-375°F (175-190°C).
- Arrange: Place the wings on a wire rack set over a baking sheet (just like when you first baked them). Ensure they are in a single layer with space between them. If reheating from frozen, it's best to thaw first, but you can technically reheat from frozen at a slightly lower temperature (around 325°F/160°C) for a longer time, carefully monitoring them.
- Bake: Bake for 10-20 minutes, or until thoroughly heated through and the skin has re-crisped. The exact time will depend on whether they were refrigerated or just thawed. For best results, flip them halfway through the reheating process.
- Check Temperature: Always ensure the internal temperature reaches 165°F (74°C) for safe consumption.
-
Air Fryer (Optional): If you have an air fryer, it's fantastic for reheating wings!
- Method: Place the wings in a single layer in the air fryer basket (do not overcrowd).
- Temperature & Time: Air fry at 350-375°F (175-190°C) for 5-10 minutes, shaking the basket halfway through, until hot and crispy.
Teaching children about food storage and reheating isn't just about safety; it's about respecting food, understanding its lifecycle, and preventing waste. These are invaluable lessons that extend far beyond the kitchen. At I'm the Chef Too!, we instill a comprehensive understanding of food and its journey, ensuring that every delicious adventure is also a lesson in responsibility and sustainability.
Common Questions & Troubleshooting for Your Chicken Wing Journey
Embarking on a new recipe, especially with kids, often brings up questions. Don't worry, that's part of the learning process! Here are some common questions and troubleshooting tips to help ensure your kid-friendly crispy baked chicken wings are a resounding success every time.
Q1: My wings aren't getting crispy! What am I doing wrong? A: This is the most common issue!
- Moisture is the Enemy: Did you thoroughly pat the wings dry with paper towels? This is absolutely critical. Any surface moisture will steam instead of crisp.
- Crowding the Pan: Were the wings spaced out in a single layer on the wire rack? If they're touching or overlapping, hot air can't circulate, and they'll steam rather than bake.
- Oven Temperature: Was your oven preheated to 400-425°F? A hot oven is essential for rendering fat and crisping the skin. Your oven thermometer might also be off, so consider getting an inexpensive oven thermometer to verify.
- Wire Rack: Are you using a wire rack? This is key to lifting the wings out of rendered fat, allowing air to circulate all around them.
- Baking Powder (Advanced Tip): For an extra scientific boost, some chefs add 1-2 teaspoons of aluminum-free baking powder (not baking soda!) to their flour coating. The baking powder helps break down proteins in the skin, allowing it to dry out and crisp better.
Q2: Can I use frozen chicken wings? A: Yes, but you must thaw them completely first.
- Thawing Method: The safest way to thaw frozen chicken wings is overnight in the refrigerator. You can also thaw them in cold water (changing the water every 30 minutes) or in the microwave (but cook immediately after).
- Pat Dry (Again!): After thawing, they will likely be quite wet. Pat them extra thoroughly dry with paper towels before proceeding with the recipe.
Q3: My child doesn't like spicy food. Can I still make these? A: Absolutely! The recipe is very adaptable.
- Omit Cayenne: Simply leave out the cayenne pepper entirely. The paprika, garlic, salt, and pepper will still provide plenty of delicious flavor without any heat.
- Separate Batches: If some family members like a little spice and others don't, you can divide the dry seasoning mix before adding cayenne to one portion. Coat half the wings in the mild mix and the other half in the spicier mix. Just be sure to label your pans so you know which is which!
Q4: Can I fry chicken wings instead of baking them? A: You certainly can, but baking offers several advantages, especially when cooking with kids:
- Healthier: Baking uses less oil than deep-frying, resulting in a lighter dish.
- Safer: No large pots of hot oil to manage, significantly reducing the risk of burns and spills. This is particularly important with little ones in the kitchen.
- Easier Cleanup: Less oil means less splattering and greasy cleanup.
- Hands-Off: Once in the oven, you can step back (while supervising, of course!) and let them cook, freeing you up for other tasks or to engage with your child.
Q5: How do I know when the chicken wings are fully cooked? A: The only truly reliable way is with a meat thermometer.
- Internal Temperature: Insert a meat thermometer into the thickest part of a drumette, avoiding the bone. The temperature should read at least 165°F (74°C). The wings should also appear golden-brown and the juices should run clear when pierced.
Q6: Can I prepare the wings ahead of time? A: You can do some prep work in advance.
- Seasoning: You can season the wings and coat them in the flour mixture a few hours before baking, keeping them refrigerated. Some even find this helps the flavors meld.
- Separating: If using whole wings, you can separate them the day before and store them in the fridge.
- Baking is Best Fresh: For optimal crispiness, it's best to bake them just before serving. However, as discussed in the storage section, you can bake them fully and then reheat them (preferably in the oven or air fryer) for surprisingly good results.
By addressing these common questions and offering practical troubleshooting, we empower you to approach this recipe with confidence. We want every culinary adventure to be a positive and successful one, sparking curiosity and building confidence in your young chefs, just as we aim to do with every I'm the Chef Too! kit we develop.
Conclusion
Who knew that a simple chicken wings recipe for kids could unfold into such a rich tapestry of learning, creativity, and family fun? From understanding the science behind that satisfying crisp to mastering measuring skills and exploring a world of flavors, cooking together is so much more than just preparing a meal. It’s about building foundational STEM skills, nurturing artistic expression, and, most importantly, creating cherished, screen-free moments of connection that will last a lifetime.
At I'm the Chef Too!, we are dedicated to transforming everyday activities into extraordinary "edutainment" experiences. This crispy baked chicken wings adventure is a testament to our unique approach of teaching complex subjects through tangible, hands-on, and utterly delicious cooking. We've seen firsthand how sparking curiosity and creativity in children through food can lead to a love for learning, boosted confidence, and joyful family memories. Every shake of the bag, every brush of butter, every discussion about why the oven is hot, contributes to a child's development in ways that textbooks often can't.
So, gather your little chefs, roll up your sleeves, and embrace the delightful chaos of the kitchen. These moments are precious, and the skills your children gain are invaluable. If you've enjoyed this culinary journey and are eager to discover a world of new, exciting, and educational cooking adventures, we invite you to join our family.
Ready to bring monthly doses of discovery, deliciousness, and developmental growth right to your doorstep? Make learning a continuous adventure! Join The Chef's Club Subscription today and enjoy free shipping on every box. Each kit is carefully designed by mothers and educators, ensuring a complete, enriching experience with pre-measured dry ingredients and specialty supplies. Your next family bonding experience is just a click away!
FAQ: Your Chicken Wing Recipe for Kids Questions Answered
Q: What is the best internal temperature for cooked chicken wings? A: The USDA recommends that all poultry, including chicken wings, be cooked to an internal temperature of 165°F (74°C) for food safety. Always use a meat thermometer inserted into the thickest part of the wing, avoiding the bone, to verify.
Q: Do I need to add flour to make chicken wings crispy? A: While some recipes achieve crispiness without flour, a light dusting of flour (or a flour-baking powder mix) can significantly enhance the crispness by absorbing surface moisture and providing a structure for the skin to crisp up. For this kid-friendly recipe, we find it yields excellent results.
Q: Can I use whole chicken wings instead of "party wings" (separated flats and drumettes)? A: Yes, you can. The cooking time might need to be slightly extended if they are very large. You can also separate whole wings yourself by cutting through the joints, as described in our step-by-step guide.
Q: What are some kid-friendly dipping sauces for chicken wings? A: Classic ranch dressing, honey mustard, or a mild homemade BBQ sauce are always popular choices. For a healthier option, try a creamy cucumber-dill yogurt dip or a blended avocado ranch.
Q: How can I make chicken wings less messy for kids to eat? A: "Party wings" (drumettes and flats) are generally easier for kids to handle than whole wings. Serving them with plenty of napkins and perhaps offering small plates can help contain the mess. You can also encourage using a fork for larger pieces.
Q: Is it safe for kids to handle raw chicken? A: It is recommended that adults handle raw chicken due to the risk of foodborne illness. If children are involved in tasks where raw chicken is near, ensure constant adult supervision and rigorous handwashing immediately afterward with soap and warm water for at least 20 seconds. Teach children about cross-contamination.
Q: My oven runs hot/cold. How can I adjust the baking time? A: Oven temperatures can vary. An inexpensive oven thermometer can help you verify your oven's accuracy. If your oven runs hot, you might need to check for doneness a bit earlier (e.g., at 25 minutes). If it runs cold, you might need an extra 5-10 minutes. Always rely on a meat thermometer for food safety, ensuring 165°F internal temperature.
Q: Can I use an air fryer for this recipe? A: While this recipe focuses on oven baking, an air fryer can also produce excellent crispy wings! If using an air fryer, follow the manufacturer's instructions for temperature and time, usually around 375-400°F (190-200°C) for 20-25 minutes, flipping halfway through.
Q: What are the benefits of baking chicken wings compared to frying them? A: Baking is generally considered a healthier cooking method as it uses less oil. It's also safer for cooking with children, as it eliminates the risks associated with hot oil. Baking offers easier cleanup and a more hands-off approach, freeing up time for family engagement.
Q: How long can I store leftover baked chicken wings? A: Properly stored in an airtight container in the refrigerator, baked chicken wings can be kept for 3-4 days. They can also be frozen for up to 2-3 months. For best re-crisping, reheat them in the oven or air fryer.