Cookie Adventures: Recipes to Bake with Kids

Table of Contents
- Introduction: The Sweet Science of Family Fun
- Why Baking Cookies with Kids is a Recipe for Success
- Preparing for Sweet Success: Tips for Baking with Little Chefs
- Essential Tools for Tiny Hands
- Delicious Cookie Recipes to Make with Kids: Our Favorites!
- Beyond the Basics: Exploring Different Cookie Categories
- Extending the Learning & Fun Beyond the Bake
- Safety First: Essential Kitchen Rules for Little Bakers
- Conclusion: Bake Memories, Spark Curiosity
- Frequently Asked Questions (FAQ)
Imagine a quiet Saturday morning. You're sipping your coffee, maybe catching up on a little reading, when suddenly, a little voice pipes up, "I'm bored!" Sound familiar? Before you reach for the tablet, consider an antidote that's not only incredibly fun but also surprisingly educational: baking cookies. The aroma of warm chocolate chip, the delightful squish of dough between tiny fingers, the sheer joy of decorating a sprinkle-covered masterpiece – these are the moments that weave the fabric of childhood memories.
At I'm the Chef Too!, we believe in the magic that happens when food, STEM, and the arts collide. Our mission is to transform everyday kitchen activities into one-of-a-kind "edutainment" experiences, sparking curiosity and creativity in children while fostering invaluable family bonding. We're committed to providing screen-free educational alternatives that teach complex subjects through tangible, hands-on, and, most importantly, delicious cooking adventures. This blog post isn't just about giving you a list of cookie recipes to make with kids; it's about unlocking the incredible potential for learning, growth, and joyful connection that lies within your kitchen. We'll explore why baking is such a powerful tool for development, share practical tips for making it a smooth and fun experience, and, of course, dive into some truly delightful cookie recipes that your little chefs will adore creating – and devouring! So, tie on those aprons, gather your tiny sous chefs, and let's embark on a sweet adventure together.
Introduction: The Sweet Science of Family Fun
Is there anything quite as comforting and inviting as the scent of freshly baked cookies wafting through your home? For many of us, it evokes cherished childhood memories of helping grandma in the kitchen or eagerly waiting for a warm treat straight from the oven. But beyond the delicious aroma and the promise of a tasty reward, baking cookies with kids offers an unparalleled opportunity for learning and connection. It’s an activity that transcends simple recipe following; it’s a canvas for creativity, a laboratory for scientific discovery, and a classroom for essential life skills.
We often hear about the challenges of keeping children engaged and learning in a world saturated with digital distractions. That's where the kitchen truly shines as a vibrant, hands-on learning environment. Baking provides a multi-sensory experience that ignites curiosity and encourages exploration. From the moment children measure flour to the final sprinkles on a cookie, they're actively participating in a process that builds foundational knowledge in science, math, and even art. Our goal here at I'm the Chef Too! is to empower parents and educators to embrace these opportunities. We want to show you how making a batch of cookies can be a rich educational journey, fostering confidence, fine motor skills, and a love for learning that extends far beyond the kitchen counter. We’ll delve into the many benefits of baking with children, equip you with practical tips for a successful and mess-managed baking session, and share a delightful array of cookie recipes to make with kids that are sure to become family favorites. Get ready to transform your kitchen into a hub of "edutainment," where every cookie baked is a lesson learned and a memory made.
Why Baking Cookies with Kids is a Recipe for Success
Baking with children is so much more than just combining ingredients and popping them in the oven. It's a holistic developmental activity disguised as delicious fun. From toddlers eager to dump ingredients to older kids mastering complex decorating techniques, every age group benefits immensely. This is at the heart of our philosophy at I'm the Chef Too! – to blend culinary creativity with core educational principles, making learning an irresistible adventure.
Igniting Curiosity and Fostering a Love for STEM
Consider the humble cookie dough. To an adult, it’s just flour, sugar, butter, and eggs. To a child, it’s a magical transformation! This is where the STEM (Science, Technology, Engineering, and Math) learning truly takes off.
- Science in Action: Baking is essentially chemistry. Children observe ingredients changing states (solid butter melting), forming new substances (dough becoming a cookie), and reacting (baking soda creating bubbles). What happens if you add too much flour? Too little? This experimentation fosters critical thinking and an understanding of cause and effect. They might see a chemical reaction that makes our Erupting Volcano Cakes bubble over with deliciousness, and then apply that knowledge to how baking powder works in cookies!
- Math Made Tangible: Measuring ingredients, counting chocolate chips, setting timers, understanding fractions (half a cup, a quarter teaspoon) – these are all practical math lessons. It’s not abstract numbers on a page; it’s hands-on, directly impacting the final, delicious outcome. This makes math relevant and engaging, turning abstract concepts into concrete experiences.
- Engineering and Design: Rolling dough, cutting shapes with cookie cutters, arranging cookies on a baking sheet, and even designing decorations – these are all exercises in engineering and spatial reasoning. How much space do cookies need to spread? What's the best way to assemble a gingerbread house (or a decorated cookie)? These activities encourage planning and problem-solving.
- Technology in the Kitchen: Using kitchen gadgets like mixers, ovens, and timers introduces children to practical technology in a safe, supervised way. Understanding how these tools work and why they're used builds foundational knowledge for technological literacy.
Developing Essential Life Skills and Building Confidence
The kitchen is a fantastic training ground for life. Every step in cookie-making contributes to a child's overall development:
- Fine Motor Skills: Stirring, kneading, scooping, pouring, decorating with icing – these actions refine hand-eye coordination and strengthen small muscles, which are crucial for writing, drawing, and other everyday tasks.
- Following Instructions and Problem-Solving: Recipes are step-by-step guides. Learning to follow them precisely, or to troubleshoot when something goes awry (e.g., "the dough is too sticky, what should we do?"), teaches patience, attention to detail, and adaptive thinking.
- Patience and Delayed Gratification: Waiting for dough to chill, cookies to bake, and then cool before decorating requires patience – a vital skill in our instant-gratification world. The reward, a warm, delicious cookie, makes the wait worthwhile.
- Responsibility and Independence: Assigning age-appropriate tasks instills a sense of responsibility. From washing hands to cleaning up, children learn that they are capable contributors. This autonomy builds immense self-esteem and confidence.
- Creativity and Self-Expression: Decorating cookies is an art form! Kids can experiment with colors, textures, and designs, transforming a simple cookie into a personalized masterpiece. This artistic freedom encourages self-expression and imagination, much like when they might create an edible solar system with our Galaxy Donut Kit.
Fostering Family Bonding and Screen-Free Engagement
In an age where screens often dominate leisure time, baking offers a precious opportunity for genuine, screen-free interaction. It’s a shared activity that creates a relaxed atmosphere for conversation, laughter, and making memories.
- Quality Time: Baking together provides undivided attention, strengthening parent-child relationships. It's a space where communication flows naturally, and children feel valued as active participants.
- Teamwork and Collaboration: Working together on a baking project teaches collaboration, sharing, and compromise. Everyone has a role, and the success of the project depends on working as a team.
- Creating Lasting Memories: The smells, tastes, and shared experiences in the kitchen become powerful, positive memories that children will carry with them for years to come. These are the joyful, tangible experiences we champion at I'm the Chef Too!.
Baking cookies with your children isn't just about the finished product; it's about the entire process – the learning, the growing, the bonding, and the sheer delight found in creating something wonderful together. These "edutainment" experiences are what we strive to deliver at I'm the Chef Too!, whether through a simple recipe from this blog or one of our thoughtfully designed kits.
Preparing for Sweet Success: Tips for Baking with Little Chefs
Baking with kids can be wonderfully chaotic, but with a little preparation and a sprinkle of patience, it can be a smooth, fun, and incredibly rewarding experience. Our philosophy at I'm the Chef Too! emphasizes setting realistic expectations and focusing on the joy of the process, rather than striving for perfection. Here are our best tips for a successful baking adventure:
1. Plan Ahead: The Secret Ingredient
Before you even call your little chefs into the kitchen, take a few minutes for "mise en place" – everything in its place.
- Choose the Right Recipe: Start with simple cookie recipes to make with kids that don't require extensive chilling times or complicated techniques. We'll share some great ones later!
- Gather All Ingredients & Tools: Pull out everything you'll need – flour, sugar, butter, eggs, bowls, measuring cups, spoons, baking sheets, parchment paper, cooling racks. Having everything at arm's reach prevents frantic searches mid-recipe and keeps little hands from wandering.
- Pre-Measure Key Ingredients: For younger children or to reduce mess, pre-measure some of the dry ingredients like flour and sugar. You can still let them dump it into the bowl, which is a satisfying task for them. For older kids, measuring is an excellent math lesson, so let them take the lead!
- Read Through the Recipe: Familiarize yourself with the steps. This allows you to anticipate potential challenges and simplify instructions for your child.
2. Set the Stage: A Kid-Friendly Kitchen
Making the environment accessible and safe is key to a positive experience.
- Designate a Workspace: Clear a specific area on the counter or even a kitchen table where your child can comfortably reach. A sturdy step stool is a must for younger helpers.
- Use Bigger Bowls: Always use a mixing bowl larger than you think you'll need. This significantly reduces spills and makes stirring easier for little hands.
- Aprons On! Not only do aprons protect clothes, but they also signal that it's "baking time" and can add to the fun.
- Handwashing is Mandatory: Start every session with a thorough handwashing lesson, emphasizing hygiene.
3. Delegate with Purpose: Age-Appropriate Tasks
The beauty of baking is that there's a job for every age and skill level. Remember, kids don’t have to make the entire recipe from start to finish to reap the benefits.
-
Toddlers (1-3 years):
- Washing hands (with supervision)
- Dumping pre-measured ingredients into a bowl
- Stirring (with a large spoon in a large bowl)
- Adding sprinkles or chocolate chips (the finishing touches are often the most fun!)
- Tasting (the best part!)
-
Preschoolers (3-5 years):
- Scooping ingredients (e.g., flour with a small cup)
- Cracking eggs (into a separate bowl first!)
- Mashing ingredients (like bananas for banana bread cookies)
- Using cookie cutters
- Decorating with enthusiasm
-
School-Aged Kids (6+ years):
- Reading recipe steps aloud
- Accurately measuring all ingredients
- Cracking eggs confidently
- Operating a hand mixer (with close supervision)
- Rolling out dough
- Independently decorating
- Helping with cleanup
4. Embrace the Mess (Within Reason!)
Let's be honest: baking with kids will be messy. Flour will fly, sugar will spill, and dough might end up in unexpected places. This is part of the learning and sensory experience!
- Cover Surfaces: Lay down newspaper, parchment paper, or an old tablecloth to make cleanup easier.
- Keep a Damp Cloth Handy: For quick wipe-ups.
- Focus on the Process, Not Perfection: A slightly lopsided cookie or an overly sprinkled one is a sign of a child's unique creation. Celebrate their effort and creativity!
- Involve Them in Cleanup: Make cleaning up part of the baking process. Kids can wipe counters, put away utensils, and even wash some plastic bowls. This teaches responsibility and reinforces the full cycle of a kitchen project.
5. Prioritize Safety: Always Supervise
Safety in the kitchen is paramount.
- Oven Use: Always handle the hot oven and baking sheets yourself. Explain to children why it's dangerous and what precautions you're taking.
- Sharp Tools: Supervise closely when using knives or graters. For younger kids, stick to blunt tools or pre-chop ingredients.
- Electrical Appliances: Teach children how to safely use mixers or other appliances, stressing not to touch moving parts.
- Hand Hygiene: Reiterate the importance of washing hands before, during, and after handling food.
By following these tips, you're not just baking cookies; you're creating a positive, educational environment where your child can thrive, learn, and make cherished memories. And if you're looking for even more structured, hands-on "edutainment" experiences, remember that we at I'm the Chef Too! deliver a new adventure right to your door every month. Join The Chef's Club and enjoy free shipping on every box, making it easy to keep the learning and fun going all year long!
Essential Tools for Tiny Hands
Having the right equipment can make all the difference when baking with kids. You don't need a gourmet kitchen full of specialized gadgets, but a few kid-friendly tools can enhance the experience, promote independence, and even reduce frustration. At I'm the Chef Too!, we ensure our kits come with specialty supplies that are perfect for little hands, making complex tasks approachable. Here’s what we recommend for your home kitchen:
Basic Baking Essentials:
- Large Mixing Bowls: As mentioned, bigger is better! Large, sturdy bowls prevent ingredients from spilling over when enthusiastic little hands are stirring. Stainless steel or melamine bowls are durable and easy to clean.
- Measuring Cups and Spoons: A full set of both wet and dry measuring cups and spoons is crucial. For younger kids, brightly colored plastic sets can be more engaging. Clearly show them the numbers and explain what they mean – a great math lesson!
- Rubber Spatulas: These are incredibly versatile. Kids love to scrape bowls clean, and rubber spatulas are gentle on bowls and effective at mixing.
- Whisks: A small whisk is perfect for mixing dry ingredients or gently combining wet ones. It's a fun tool that also helps develop fine motor skills.
- Child-Safe Knives/Cutters: For tasks like cutting softened butter or fruit, plastic or nylon knives with blunt edges allow kids to participate safely. Cookie cutters, of course, are a must-have for sugar cookies and are fantastic for developing dexterity.
- Baking Sheets & Parchment Paper: Non-stick baking sheets are great, but parchment paper is your best friend when baking with kids. It ensures cookies don't stick, makes cleanup a breeze, and allows for easy transfer of baked goods.
- Cooling Racks: Essential for letting cookies cool evenly and preventing soggy bottoms.
- Kid-Sized Aprons: Protect clothes and make kids feel like real chefs.
- Sturdy Step Stool: Crucial for allowing children to comfortably reach the counter and participate safely.
Optional Fun Enhancers:
- Cookie Scoops: These make portioning dough incredibly easy and ensure uniform cookie sizes, which helps them bake evenly. Kids love using them!
- Decorating Squeeze Bottles or Bags: For older children, these tools allow for more precise icing and intricate designs.
- Rolling Pin: A small, lightweight rolling pin is ideal for little hands to practice rolling out dough.
- Timers: An egg timer or kitchen timer gives children a tangible understanding of time and patience. Let them be in charge of starting and stopping it.
By equipping your kitchen with these thoughtful tools, you're not just buying gadgets; you're investing in an enriching experience. These tools make baking more accessible and enjoyable for children, encouraging their participation and fostering their growing independence in the kitchen. For even more curated experiences that blend all these elements, remember to Browse our complete collection of one-time kits for a wide variety of themed adventures perfect for your little learner!
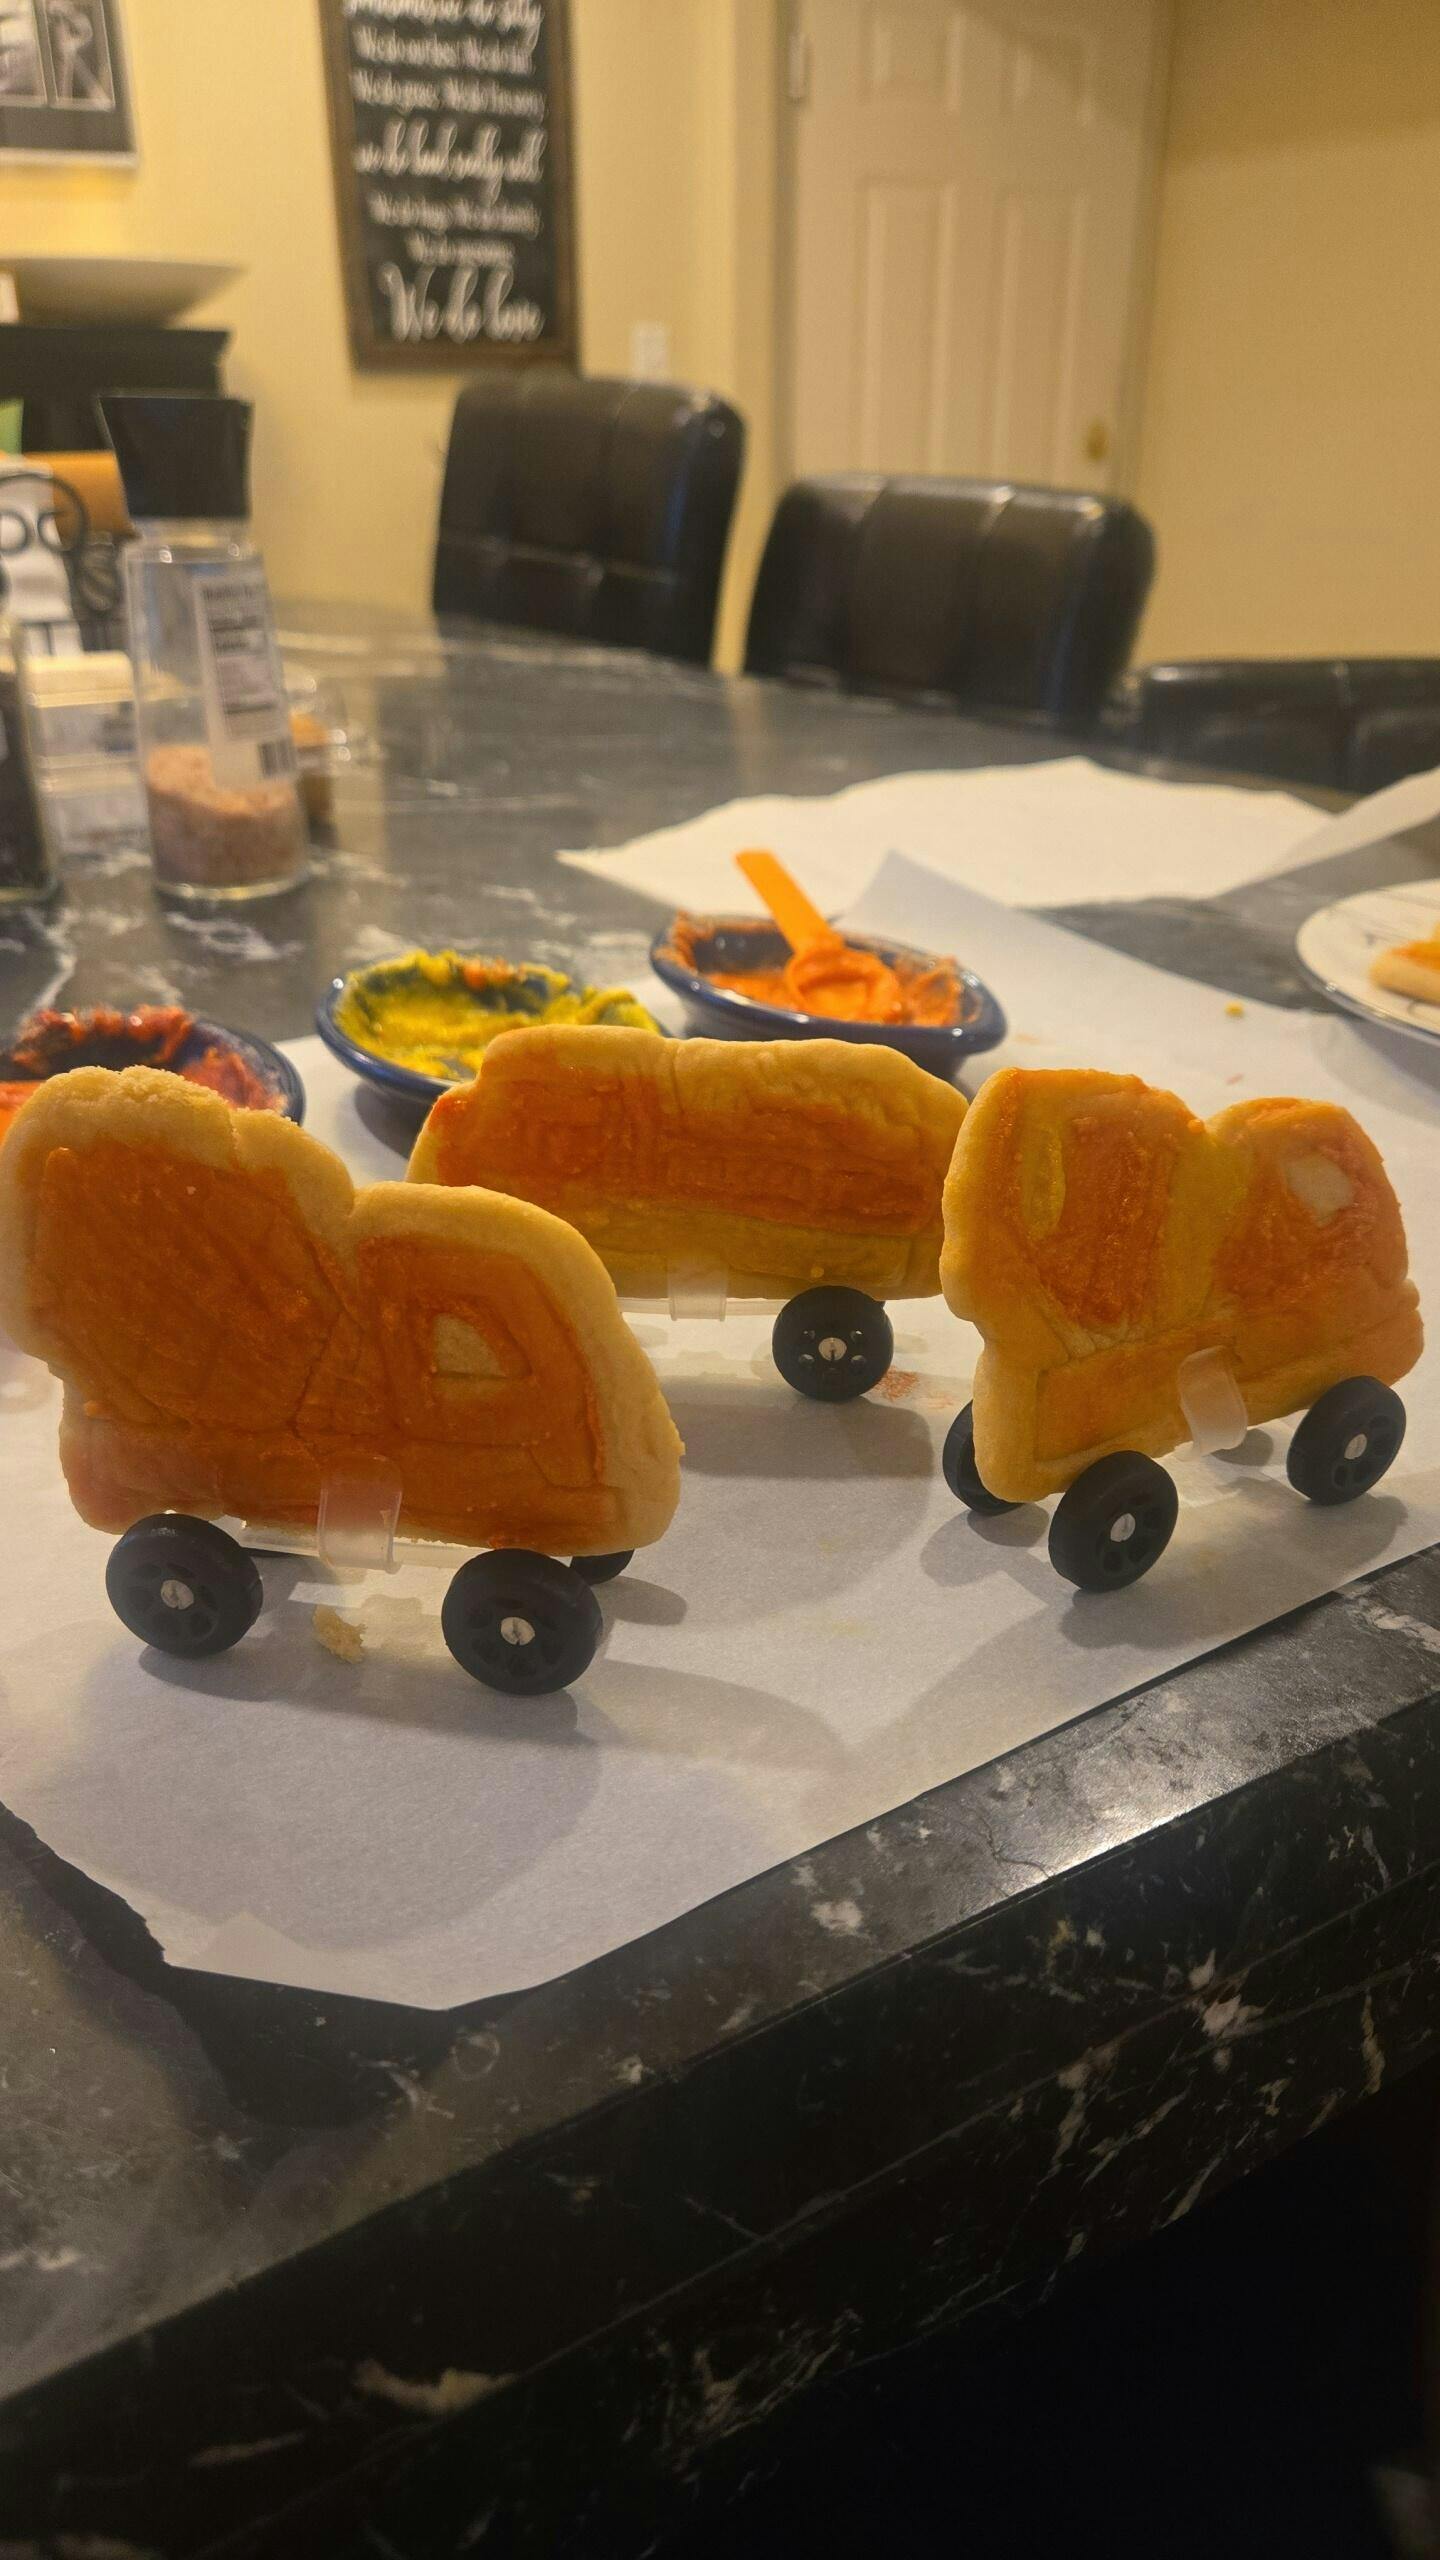
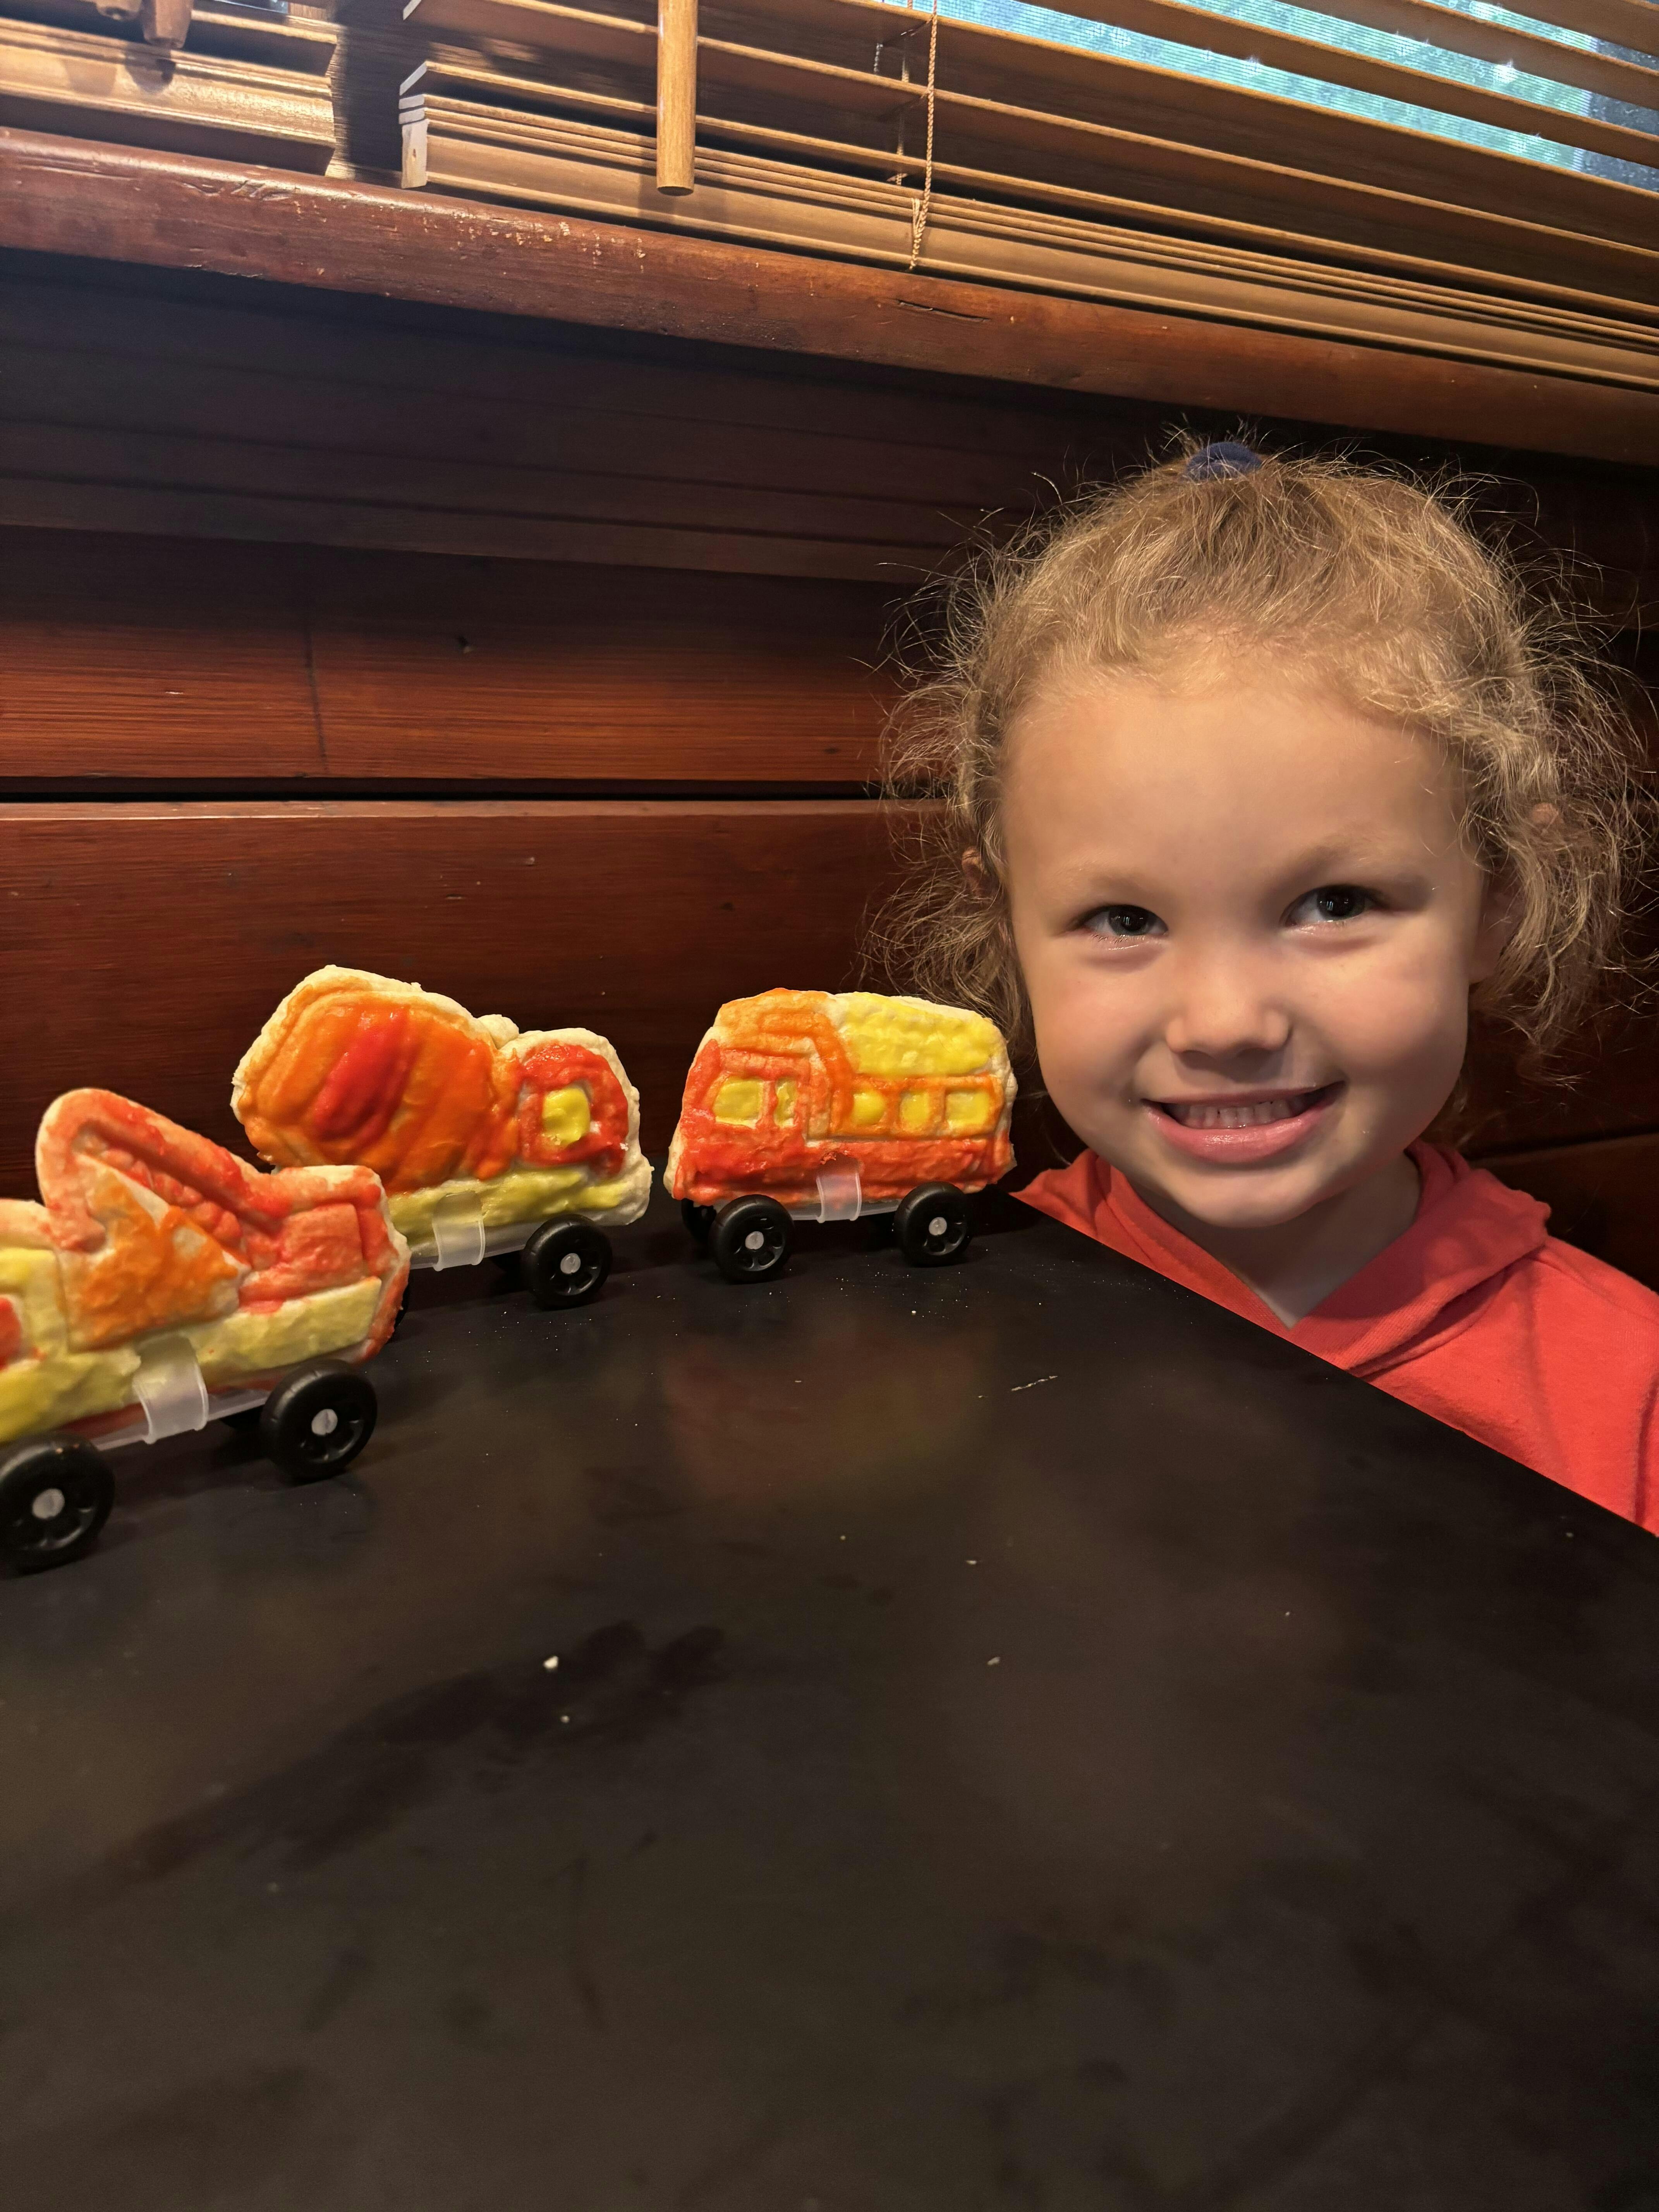
Delicious Cookie Recipes to Make with Kids: Our Favorites!
Now for the sweet part – the cookies themselves! We've curated a selection of cookie recipes to make with kids that are known for their ease, versatility, and sheer kid-appeal. These recipes are designed to maximize hands-on fun and minimize fuss, aligning perfectly with our mission to make learning delicious and accessible.
1. Classic Sprinkle Sugar Cookies: The Ultimate Canvas for Creativity
Sugar cookies are a timeless favorite, not just for their delightful taste, but because they are the perfect blank canvas for artistic expression. This recipe is designed to be easy to handle, with minimal chilling time, making it ideal for eager young bakers.
Why it's great for kids:
- Dough Handling: Rolling out dough and cutting shapes is fantastic for fine motor skills.
- Creative Decorating: Sprinkles, icing, edible glitter – the possibilities are endless for self-expression.
- Math in Action: Counting sprinkles, understanding "portions" for cutting.
Yields: About 24-30 cookies Prep time: 15 minutes Bake time: 8-10 minutes
Ingredients:
- 1 cup (2 sticks) unsalted butter, softened
- 1 ½ cups granulated sugar
- 2 large eggs
- 1 teaspoon pure vanilla extract
- 3 cups all-purpose flour
- 1 teaspoon baking powder
- ½ teaspoon salt
- Plenty of colorful sprinkles! (And optional icing for decorating)
Instructions:
- Prep the Oven & Pan: Preheat your oven to 375°F (190°C). Line two baking sheets with parchment paper.
- Cream Butter & Sugar: In a large mixing bowl, with your child's help, beat the softened butter and granulated sugar together until light and fluffy. This is a great task for an older child with a hand mixer (supervised!) or for younger kids to watch as you demonstrate the "creaming" process.
- Add Wet Ingredients: Let your child crack the eggs into a separate small bowl first (to catch any shells!), then add them one at a time to the butter mixture, beating well after each addition. Stir in the vanilla extract.
- Combine Dry Ingredients: In a separate medium bowl, have your child whisk together the flour, baking powder, and salt. Explain that these dry ingredients need to be evenly distributed.
- Mix Dough: Gradually add the dry ingredients to the wet ingredients, mixing on low speed (or with a sturdy spoon) until just combined. Be careful not to overmix; demonstrate how to stop once no dry streaks remain.
- Roll & Cut: Lightly flour a clean surface (or use parchment paper on top and bottom). Divide the dough in half. With a rolling pin, guide your child in rolling out the dough to about ¼-inch thickness. Let them choose their favorite cookie cutters and press them into the dough. This is a fantastic opportunity to discuss different shapes!
- Sprinkle Time! Carefully transfer the cut-out shapes to your prepared baking sheets. Now for the fun part: let your child generously sprinkle the tops of the cookies with their chosen colorful sprinkles. This is excellent for fine motor skills and creative expression.
- Bake: Bake for 8-10 minutes, or until the edges are lightly golden.
- Cool: Let the cookies cool on the baking sheets for a few minutes before transferring them to a wire rack to cool completely. Once cool, they're ready to eat or decorate further with icing!
2. Chewy Chocolate Chip Cookies: The Timeless Favorite
There’s a reason chocolate chip cookies are a classic – they're universally loved! This recipe is straightforward and forgiving, making it perfect for kids learning basic baking techniques.
Why it's great for kids:
- Measuring & Pouring: Plenty of opportunities to measure different ingredients.
- Mixing: Stirring the dough is great for arm strength and coordination.
- Chocolate Chip Distribution: Kids love adding and mixing in chocolate chips (and sneaking a few!).
Yields: About 2 dozen cookies Prep time: 15 minutes Bake time: 10-12 minutes
Ingredients:
- ½ cup (1 stick) unsalted butter, softened
- ¾ cup packed light brown sugar
- ¼ cup granulated sugar
- 1 large egg
- 1 teaspoon pure vanilla extract
- 1 ¾ cups all-purpose flour
- ½ teaspoon baking soda
- ¼ teaspoon salt
- 1 cup semi-sweet chocolate chips (or milk chocolate, or a mix!)
Instructions:
- Preheat & Prep: Preheat oven to 375°F (190°C) and line baking sheets with parchment paper.
- Cream Butter & Sugars: In a large bowl, let your child help beat the softened butter with the brown and granulated sugars until light and fluffy. This is another moment to talk about how different sugars contribute to texture and flavor.
- Add Egg & Vanilla: Mix in the egg and vanilla extract until well combined.
- Dry Ingredients: In a separate bowl, whisk together the flour, baking soda, and salt. Discuss what each ingredient does (e.g., baking soda makes cookies rise).
- Combine: Gradually add the dry ingredients to the wet mixture, mixing until just combined.
- Chocolate Chips! This is where the real fun begins! Have your child pour in the chocolate chips and gently fold them into the dough. This is a good time to practice counting, too!
- Scoop & Bake: Use a cookie scoop or two spoons to drop rounded tablespoons of dough onto the prepared baking sheets, leaving about 2 inches between them. Bake for 10-12 minutes, or until the edges are golden and the centers are still slightly soft.
- Cool: Let cool on the baking sheets for a few minutes before transferring to a wire rack. Serve warm for ultimate gooey deliciousness!
3. "Monster" or "Everything-But-The-Kitchen-Sink" Cookies: A Customizable Adventure
These cookies are fantastic because they encourage creativity and allow for endless customization with whatever mix-ins you have on hand. They're also great for using up leftover bits of candy, nuts, or dried fruit.
Why it's great for kids:
- Ingredient Choices: Kids can help choose what goes into the cookies, giving them ownership.
- Sensory Experience: Mixing in various textures and shapes is a rich sensory experience.
- Problem-Solving: Deciding "how much" of each mix-in creates a fun challenge.
Yields: About 2 dozen cookies Prep time: 20 minutes Bake time: 12-15 minutes
Ingredients:
- ½ cup (1 stick) unsalted butter, softened
- ½ cup creamy peanut butter
- ½ cup granulated sugar
- ½ cup packed light brown sugar
- 1 large egg
- 1 teaspoon vanilla extract
- 1 ¼ cups all-purpose flour
- ½ teaspoon baking soda
- ½ teaspoon salt
- 1 cup old-fashioned rolled oats
- ½ to 1 cup total of various mix-ins: ideas include chocolate chips, M&M's, raisins, chopped nuts (if no allergies), shredded coconut, pretzel pieces, white chocolate chips, etc.
Instructions:
- Preheat & Prep: Preheat oven to 350°F (175°C). Line baking sheets with parchment paper.
- Cream Wet Ingredients: In a large bowl, beat together the softened butter, peanut butter, granulated sugar, and brown sugar until creamy and smooth. Have your child add the egg and vanilla extract, mixing until well combined.
- Dry Ingredients: In a separate bowl, whisk together the flour, baking soda, and salt. Then, have your child stir in the rolled oats. Discuss the different textures of the dry ingredients.
- Combine & Mix-Ins: Gradually add the dry ingredients to the wet mixture, mixing until just combined. Now for the "monster" part! Invite your child to choose and add their favorite mix-ins. Encourage them to mix gently to distribute everything evenly throughout the dough.
- Scoop & Bake: Using a cookie scoop or two spoons, drop rounded scoops of dough onto the prepared baking sheets, about 2 inches apart. Flatten slightly with the back of a spoon if desired.
- Bake: Bake for 12-15 minutes, or until the edges are set and lightly golden.
- Cool: Let cool on the baking sheets for a few minutes before transferring to a wire rack to cool completely. These are fantastic for an afternoon snack!
4. No-Bake Oatmeal Raisin Energy Bites: Quick, Easy, and Oven-Free Fun
Sometimes, you want the joy of making a "cookie" without the oven. These no-bake energy bites are perfect for tiny chefs, focusing on mixing, rolling, and tasting!
Why it's great for kids:
- No Oven Needed: Safe for all ages, no heat involved.
- Simple Mixing: Just stir ingredients together.
- Rolling Balls: Excellent for developing hand strength and coordination.
- Healthy-ish: Packed with oats, peanut butter, and fruit.
Yields: About 18-24 bites Prep time: 15 minutes Chill time: 30 minutes
Ingredients:
- 1 cup old-fashioned rolled oats
- ½ cup peanut butter (or sunbutter/almond butter for allergies)
- ⅓ cup honey or maple syrup
- ¼ cup raisins (or mini chocolate chips, dried cranberries)
- 1 teaspoon vanilla extract
- Optional: 1 tablespoon chia seeds or flax meal for added nutrition
Instructions:
- Combine Ingredients: In a medium-sized mixing bowl, have your child add the rolled oats, peanut butter, honey (or maple syrup), raisins (or other mix-ins), and vanilla extract. If using, add chia seeds or flax meal.
- Mix Thoroughly: This is a great arm workout! Encourage your child to mix all the ingredients together with a sturdy spoon until everything is well combined and forms a thick, sticky dough. This might take a few minutes of good stirring.
- Roll into Balls: Have your child scoop out small portions of the mixture (about 1 tablespoon each) and roll them into compact balls between their palms. This is excellent for developing fine motor skills and hand strength.
- Chill: Place the rolled energy bites on a plate or baking sheet lined with parchment paper. Refrigerate for at least 30 minutes to allow them to firm up.
- Enjoy! Once chilled, these "cookies" are ready to eat! Store them in an airtight container in the refrigerator for up to a week for a quick, healthy snack.
These recipes are designed to be starting points for your family's culinary adventures. Remember, the goal is the shared experience, the learning, and the joy of creating something together. And for even more unique "edutainment" experiences, remember our mission at I'm the Chef Too! is to blend food, STEM, and the arts into one-of-a-kind adventures. Join The Chef's Club today and receive a new themed kit directly to your home every month!
Beyond the Basics: Exploring Different Cookie Categories
Once your little chefs have mastered the basics, you can venture into a world of diverse cookie experiences! Each category offers unique learning opportunities and delicious rewards.
Healthier Cookie Alternatives: Sneaking in Goodness
For parents looking to balance treat time with nutritious choices, there are fantastic cookie recipes to make with kids that cleverly incorporate fruits, vegetables, and whole grains.
- Oatmeal & Fruit Cookies: Think apple cinnamon oatmeal cookies, or ones with mashed banana and blueberries. The oats provide fiber, and the fruit adds natural sweetness, reducing the need for added sugar. Kids can help mash bananas or applesauce and stir in the oats.
- Veggie-Boosted Bites: Pumpkin puree is a fantastic addition to cookies, adding moisture and nutrients (and a beautiful color!). Zucchini can also be finely grated and folded into cookie dough, especially chocolate chip or oatmeal varieties, for an undetectable veggie boost. Our "Monster" cookie recipe above is also easily adapted with grated carrots!
- Sweet Potato Cookies: Mashed sweet potato can add a wonderful texture and earthy sweetness. These are great opportunities to talk about different food groups and the benefits of eating colorful foods.
Themed & Holiday Cookies: Celebrating with Edible Art
Cookies are synonymous with celebrations! Making themed cookies turns baking into a festive activity and allows for immense creativity.
- Holiday Cut-Outs: Gingerbread men, festive stars, hearts for Valentine's Day – these provide endless opportunities for decorating with icing, edible markers, and sprinkles. This is where the "arts" component of I'm the Chef Too!'s edutainment really shines.
- Storybook & Character Cookies: Even beloved characters can make learning fun, like when kids make Peppa Pig Muddy Puddle Cookie Pies. These kits transform baking into an imaginative play experience, connecting culinary arts with storytelling.
- Seasonal Delights: Lemon cookies for spring, berry thumbprints for summer, pumpkin cookies for fall, and peppermint hot cocoa cookies for winter – aligning cookie making with the seasons adds another layer of learning about nature and traditions.
Global Cookie Adventures: A Taste of Culture
Baking can also be a wonderful way to introduce children to different cultures and cuisines.
- Shortbread (Scotland): Simple, buttery, and great for cutting into unique shapes.
- Biscotti (Italy): A fun, twice-baked cookie, great for older kids to learn about different baking methods.
- Snickerdoodles (American Classic, German/Dutch Roots): Cinnamon-sugar coated, an easy and aromatic cookie.
- Fortune Cookies (China): While intricate to make from scratch, you can always buy plain ones and let kids write their own fortunes to insert before assembling!
Each type of cookie offers new flavors, textures, and techniques to explore, expanding your child's palate and culinary skills. Remember, if you're looking for curated "edutainment" that blends these themes with science and art, our kits at I'm the Chef Too! provide pre-measured dry ingredients and specialty supplies for a complete, stress-free experience. Find the perfect theme for your little learner by Browse our complete collection of one-time kits and start your next adventure today!
Extending the Learning & Fun Beyond the Bake
The learning doesn't stop when the cookies come out of the oven! At I'm the Chef Too!, we encourage families to see every activity as an opportunity for continuous discovery. Here are ways to extend the educational fun:
1. The Art of Decoration: More Than Just Sprinkles
Cookie decorating is a fantastic way to engage the artistic side of the brain.
- Color Theory: Talk about primary and secondary colors as you mix food coloring into icing. "What happens when we mix blue and yellow?"
- Design & Patterns: Encourage kids to create patterns, faces, or even tell a story with their decorations. This boosts creativity and fine motor control.
- Different Mediums: Beyond traditional icing, explore edible glitter, candy melts, mini candies, and various sprinkles for different textures and visual effects.
- Painting Cookies: Mix a tiny bit of food coloring with a drop of clear vanilla extract to create edible "paint" and let kids paint designs onto cooled sugar cookies using small, clean paintbrushes.
2. Packaging & Gifting: Spreading Joy and Practicing Generosity
Sharing homemade cookies teaches generosity and the joy of giving.
- Homemade Gifts: Encourage children to package their cookies nicely for friends, neighbors, or teachers. This teaches thoughtfulness and presentation skills.
- Card Making: Have them create handmade cards to go along with their cookie gifts. This integrates arts and crafts.
- Community Giving: Bake an extra batch to donate to a local shelter or nursing home, teaching empathy and community involvement.
3. Sensory Play with Dough: Exploring Textures
Even before baking, raw dough (egg-free varieties are best for this, or ensure no ingestion) offers rich sensory play.
- Kneading & Rolling: The tactile experience of kneading dough is calming and excellent for developing hand strength.
- Playdough Alternative: Unbaked cookie dough can be used like playdough (under supervision) for sculpting and imaginative play, emphasizing its changing properties.
4. Journaling the Experience: Documenting Discoveries
For older children, documenting their baking adventures can reinforce learning.
- Recipe Journal: Start a family recipe journal where kids can write down their favorite recipes, draw pictures of their cookies, or even suggest ingredient substitutions.
- Scientific Observations: Encourage them to note observations: "What did the dough feel like?" "How did the cookies change in the oven?" "What was our favorite part?"
By embracing these extensions, you transform a simple baking session into a multi-faceted learning event that touches upon science, math, art, and essential life skills. This holistic approach to "edutainment" is what we champion at I'm the Chef Too!, inspiring children to explore, create, and learn in every delicious endeavor. Ready for a new adventure every month? Join The Chef's Club and enjoy free shipping on every box. It's the perfect way to keep the hands-on learning coming!
Safety First: Essential Kitchen Rules for Little Bakers
While baking with kids is incredibly rewarding, safety must always be the top priority. Establishing clear rules and maintaining constant supervision will ensure a fun and secure environment for everyone. At I'm the Chef Too!, we always emphasize adult supervision and safety as an implicit understanding of all kitchen activities.
Fundamental Rules for a Safe Kitchen:
- Always Wash Hands: This is non-negotiable before touching any ingredients or tools. Make it a fun routine!
- Adult Supervision is Key: Never leave children unattended in the kitchen, especially when the oven or stove is in use.
- No Touching Hot Surfaces: Clearly define what is hot (oven, stove, baking sheets, hot liquids) and why it's dangerous. Use oven mitts for all hot items and explain their purpose.
- Careful with Sharp Objects: Knives, graters, and even sharp-edged cookie cutters should only be used with direct adult supervision. For younger children, provide child-safe plastic knives for cutting softer items or pre-chop ingredients yourself.
- Read and Follow the Recipe: Emphasize that recipes are like instructions for a science experiment – following them ensures safety and good results.
- "Ask Before You Taste": Teach children not to taste raw dough or batter that contains raw eggs, as this can pose a health risk. Explain that some ingredients need to be cooked to be safe to eat.
- Keep it Clean and Clear: Encourage children to help keep the workspace tidy. Spills can cause slips, and clutter can lead to accidents. Wipe up messes immediately.
- Mind Electrical Appliances: Teach children to use mixers or other electrical tools only with an adult present and to keep fingers away from moving parts. Unplug appliances when not in use.
- Store Chemicals Safely: Ensure cleaning supplies and other household chemicals are stored securely and out of reach of children.
- Emergency Plan: Briefly discuss what to do in case of a small fire (get an adult, don't try to put it out alone) or other emergencies.
Creating a Culture of Safety:
- Demonstrate Good Habits: Children learn by example. Always follow safety rules yourself.
- Explain "Why": Instead of just saying "don't touch," explain why it's dangerous in simple terms (e.g., "The oven is very hot and can burn your skin").
- Empower Them: Give children age-appropriate responsibilities, which builds their confidence and teaches them to be careful and aware.
- Practice Patience: Accidents can happen. Approach them calmly, use them as teachable moments, and reinforce the rules without shaming.
By integrating these safety practices into your baking routine, you create a safe space for exploration and learning, fostering not only a love for cooking but also a deep respect for kitchen safety. These foundational lessons are invaluable and align with our commitment at I'm the Chef Too! to provide enriching educational experiences where safety and learning go hand-in-hand.
Conclusion: Bake Memories, Spark Curiosity
Baking cookies with your children is more than just a culinary activity; it's a profound journey of discovery, growth, and connection. From the initial measurement of flour to the joyful scattering of sprinkles, every step in the process offers a unique blend of STEM learning, artistic expression, and the development of crucial life skills. We’ve seen how these simple cookie recipes to make with kids can transform your kitchen into a dynamic "edutainment" zone, sparking curiosity and creativity in your little ones, fostering invaluable family bonding, and providing a much-needed screen-free alternative.
Remember the tangible benefits: the math skills honed through measuring, the science concepts observed in transformations, the fine motor skills refined through mixing and decorating, and the patience cultivated while waiting for treats to bake. These are not just cookies; they are edible lessons, lovingly crafted memories, and stepping stones towards confident, curious, and creative individuals. At I'm the Chef Too!, our mission is built upon these very principles – to bring complex subjects to life through hands-on, delicious adventures, developed by mothers and educators who understand the magic of learning through doing.
So, the next time your child exclaims, "I'm bored!", reach for the flour and sugar instead of the remote. Embrace the delightful chaos, cherish the shared laughter, and savor the sweet rewards. You’re not just baking cookies; you’re building a foundation for a lifetime of learning and unforgettable family moments.
Ready to infuse your home with even more "edutainment" adventures that blend food, STEM, and the arts? Don't let the fun stop here! Join The Chef's Club today and receive a brand-new, unique cooking STEM kit delivered right to your door every month, complete with pre-measured dry ingredients and specialty supplies. With free shipping in the US and flexible 3, 6, or 12-month plans, it’s the perfect way to ensure continuous hands-on learning and delicious family fun. Give the gift of curiosity and creativity – subscribe to The Chef's Club now and start creating more cherished memories tomorrow!
Frequently Asked Questions (FAQ)
Q1: What age is best to start baking cookies with kids?
A1: You can start involving children in the kitchen as early as 18 months to 2 years old! For toddlers, simple tasks like dumping pre-measured ingredients, stirring with a large spoon, or adding sprinkles are perfect. As they grow, they can take on more complex roles like measuring, cracking eggs, and eventually reading recipes. The key is to choose age-appropriate tasks and always supervise.
Q2: How can I minimize the mess when baking with kids?
A2: Preparation is key! Lay down newspaper or an old tablecloth on your workspace. Use larger bowls than you think you’ll need to contain ingredients. Pre-measure some of the dry, messier ingredients like flour for younger kids. Keep a damp cloth handy for quick wipe-ups. Most importantly, embrace that some mess is part of the fun and learning experience! Involving kids in the cleanup afterwards also teaches responsibility.
Q3: My child gets impatient waiting for cookies to bake. Any tips?
A3: Patience is a skill learned over time! For younger children, choose recipes with minimal chilling or baking time, like our No-Bake Oatmeal Raisin Energy Bites. During baking, engage them in another short activity, like drawing pictures of their cookies, setting the table, or helping with pre-cleanup. Setting a timer and letting them watch it count down can also give them a sense of control and understanding of the wait.
Q4: What if my child doesn't like the taste of the cookies we bake?
A4: The goal isn't always about the final perfect product, but the process of learning and bonding. If they don't love the taste, focus on their effort and the fun they had making it. You can try adapting the recipe next time to include flavors they do enjoy, or let them pick their favorite mix-ins. For instance, our "Monster" cookies are highly customizable! Sometimes, just the act of creating something with their own hands is reward enough.
Q5: Can I make these recipes gluten-free or dairy-free?
A5: Many cookie recipes can be adapted! For gluten-free, you can often substitute a 1:1 gluten-free flour blend for all-purpose flour, though some recipes might need slight adjustments in liquid or baking time. For dairy-free, swap butter for a plant-based butter stick or coconut oil (ensure it’s solid/softened, not liquid), and use non-dairy milk alternatives. Always test small batches first to ensure the texture is right, as results can vary.
Q6: How do I choose the best cookie recipes to make with kids?
A6: Look for recipes that are simple, have clear instructions, and don't require too many complex steps or long chilling times. Recipes with opportunities for hands-on tasks like stirring, measuring, and decorating are ideal. Our Classic Sprinkle Sugar Cookies or Chewy Chocolate Chip Cookies are excellent starting points. Consider your child's interests too; themed kits like Peppa Pig Muddy Puddle Cookie Pies can be highly engaging!
Q7: What are some good ways to encourage older kids (8+) in the kitchen?
A7: Older kids can take on more responsibility and leadership roles. Let them choose the recipe, read the instructions, measure all ingredients accurately, and even supervise younger siblings. Challenge them with slightly more complex techniques or encourage them to experiment with flavors and decorating styles. You can also connect baking to specific STEM concepts, like the chemistry of baking soda or the physics of heat transfer. Encourage them to document their experiments in a "chef's journal."