Sheriff Badge Craft for Kids: Creative Play & Learning
Table of Contents
- The Enduring Appeal of the Sheriff Badge Craft
- Why Crafting is a Superpower for Kids (and Parents!)
- Getting Started: Essential Supplies for Your Sheriff Badge Adventure
- Sheriff Badge Craft for Kids: Step-by-Step Guides for Every Skill Level
- Beyond the Craft: Turning Badges into Learning Adventures (I'm the Chef Too! Connection)
- Making Learning Delicious: How I'm the Chef Too! Blends Food, STEM, and Fun
- Tips for Parents and Educators for Successful Crafting
- Elevate Your Child's Learning Journey with I'm the Chef Too!
- Conclusion
- FAQ Section
Remember that feeling as a child, when a simple object could transform into a magical artifact, unlocking an entire world of adventure? Perhaps it was a stick becoming a trusty sword, or a blanket draped over chairs creating an impenetrable fort. For many children, few symbols spark imagination quite like the gleaming star of a sheriff's badge. It's not just a piece of metal or paper; it's an emblem of justice, courage, and endless possibilities for imaginative play. Crafting one isn't merely an art project; it's an invitation to step into a world where they are the hero, the protector, and the problem-solver.
At I'm the Chef Too!, we wholeheartedly believe in the power of hands-on experiences to ignite curiosity and foster learning. Our mission is to blend food, STEM, and the arts into one-of-a-kind "edutainment" experiences, developed by mothers and educators, that spark creativity and facilitate family bonding. Creating a sheriff badge craft for kids perfectly embodies this spirit, offering a tangible gateway to screen-free educational fun. This comprehensive guide will take you through a variety of sheriff badge crafts, from simple paper designs to more intricate mixed-media projects, detailing the supplies you’ll need and offering step-by-step instructions. More importantly, we’ll explore how this classic craft can be a launching pad for deeper learning, connecting art, history, and even foundational STEM concepts, all while creating cherished family memories. Get ready to saddle up and craft some badges that will inspire hours of imaginative play and joyful discovery!
The Enduring Appeal of the Sheriff Badge Craft
There’s something undeniably captivating about a sheriff badge that transcends generations. It's more than just a shiny star; it's a powerful symbol that resonates deeply with children's innate desire for justice, protection, and adventure.
From the rugged landscapes of the Wild West to the bustling streets of a modern-day community, the sheriff represents authority, fairness, and the unwavering commitment to helping others. When a child pins on a homemade sheriff badge, they’re not just playing dress-up; they're stepping into a significant role. They become the guardian of their imaginary town, the solver of mysterious puzzles, and the leader of their own adventures. This kind of imaginative play is absolutely vital for healthy child development, allowing children to explore social roles, practice problem-solving, and develop empathy.
Beyond the rich symbolism, the sheriff badge craft offers a fantastic entry point into a world of developmental benefits. The simple act of creating something with their own hands helps children refine crucial fine motor skills as they cut, glue, and decorate. Following instructions, making design choices, and overcoming small crafting challenges all contribute to cognitive development and a growing sense of independence. Moreover, it's a wonderful way to introduce a touch of history, discussing the roles of sheriffs in different eras and how communities relied on these figures. This hands-on connection to historical context makes abstract concepts more concrete and relatable for young learners.
The true magic, however, lies in the extension of the craft into play. Once the badge is complete, it transforms from a project into a prop, breathing life into countless scenarios. Your child might become the "Shelf Sheriff" in their room, ensuring all toys are in their proper place, or the "Book Nook Sheriff," protecting the stories from mischievous dust bunnies. This seamless transition from creation to imaginative play is what makes crafting such a powerful tool for learning and development, and it’s why we at I'm the Chef Too! are so passionate about blending tangible experiences with educational outcomes. It’s a wonderful screen-free alternative that truly nourishes the mind and spirit.
Why Crafting is a Superpower for Kids (and Parents!)
In a world increasingly dominated by screens, finding engaging, hands-on activities that truly capture a child’s attention can feel like a quest in itself. This is where crafting, particularly something as engaging as a sheriff badge, truly shines as a superpower. It pulls children away from passive consumption and invites them into active creation, fostering a love for learning that extends far beyond the craft table.
Screen-Free Engagement and Focused Attention: One of the core values at I'm the Chef Too! is providing enriching, screen-free educational alternatives. Crafting offers a magnificent escape into focused play. When a child is absorbed in cutting shapes, choosing colors, or carefully gluing pieces, they are practicing sustained attention and concentration – skills that are incredibly valuable in all areas of life, from academics to social interactions. This dedicated time to create, without digital distractions, allows their minds to truly engage and explore.
Family Bonding and Shared Experiences: Crafting together is a fantastic way to build stronger family connections. Imagine the laughter as you help your little one cut out a star, the conversation sparked by choosing glitter colors, or the shared pride when the finished badge is proudly displayed. These moments become cherished memories, fostering communication and teamwork. It’s about more than just the end product; it’s about the journey you take together, learning and creating side-by-side. This shared experience is central to our philosophy at I'm the Chef Too!, where our kits are designed to be enjoyed as a family, creating joyful memories around delicious learning adventures. Ready for a new adventure every month delivered right to your door? Join The Chef's Club today and enjoy free shipping on every box, packed with pre-measured dry ingredients and specialty supplies.
Boosting Confidence and Self-Esteem: There's an incredible sense of accomplishment that comes with creating something from scratch. When a child completes their sheriff badge, they hold tangible proof of their effort, skill, and creativity. This sense of achievement is a powerful boost to their self-esteem and confidence. They learn that they are capable, that their ideas have value, and that hard work can lead to wonderful results. This positive reinforcement encourages them to take on new challenges and embrace the learning process with enthusiasm.
Developing Key Skills Beyond the Obvious: Beyond fine motor skills and creativity, crafting a sheriff badge involves a surprising array of cognitive and practical skills:
- Problem-Solving: "How do I make the star perfectly symmetrical?" "What if the glue isn't holding?" These small challenges encourage critical thinking.
- Following Instructions: Whether from a template or your guidance, children learn to follow sequential steps.
- Decision-Making: Choosing materials, colors, and embellishments involves making choices and understanding consequences.
- Patience and Persistence: Some steps require careful work or waiting for glue to dry, teaching valuable lessons in patience.
- Early STEM Concepts: As we’ll explore, even a simple craft can introduce ideas of geometry (star shapes), material properties (which glue works best?), and basic engineering (how to attach it securely).
Crafting is truly a holistic activity that nourishes a child's mind, body, and spirit. It provides a foundational experience for learning that is active, engaging, and deeply rewarding, aligning perfectly with our "edutainment" approach to blending education and fun. Not quite ready for a monthly commitment? No problem! You can still dive into the fun with our wide array of individual kits. Explore our full library of adventure kits available for a single purchase in our shop and find the perfect theme to ignite your child's imagination.
Getting Started: Essential Supplies for Your Sheriff Badge Adventure
Before embarking on your crafting journey, gathering the right supplies is key. The beauty of a sheriff badge craft is its versatility; you can make one with minimal materials you likely already have at home, or you can get a little more sophisticated with craft store finds. Remember, adult supervision is always recommended, especially when using scissors or crafting tools.
Basic Materials (Likely Already in Your Home)
- Paper: Construction paper (yellow, gold, brown, white), cardstock (heavier paper for durability).
- Scissors: Child-safe scissors are a must for young crafters.
- Glue: White school glue (PVA glue) or glue sticks.
- Markers, Crayons, or Colored Pencils: For adding details, coloring, and personalizing.
- Pencils: For tracing and outlining.
- Ruler: For drawing straight lines and measuring.
- Safety Pins or Magnets: To attach the finished badge to clothing or a magnetic surface. Be mindful of small parts for very young children.
Advanced Materials (From the Craft Store)
- Craft Foam Sheets: Gold, yellow, or metallic colors. Easy to cut and adds a nice texture and slight dimension.
- Felt Sheets: Yellow, gold, or brown felt can create a soft, wearable badge.
- Metallic Paint: Gold or silver acrylic paint to give a realistic "metal" look.
- Glitter or Glitter Glue: For that extra sparkle and authentic "sheriff star" shine.
- Self-Adhesive Vinyl or Foil Paper: For a super shiny, metallic finish without paint or glitter.
- Wood Blanks: Unfinished wood star shapes (available at craft stores in various sizes) offer a more durable, paintable surface.
- Hot Glue Gun: For adult use only, for quick and strong adhesion of layers or embellishments.
- Mod Podge or Clear Sealant: To protect painted badges and give a finished look.
Recycled and Upcycled Materials (Eco-Friendly Fun!)
At I'm the Chef Too!, we love finding creative ways to repurpose and re-imagine everyday items into something new and exciting. This not only encourages environmental awareness but also sparks incredible ingenuity in children as they see the potential in what others might consider trash.
- Cardboard: Cereal boxes, tissue boxes, delivery packaging – perfect for creating sturdy badge bases or multiple layers for a 3D effect.
- Aluminum Foil: Crinkled and smoothed-out foil can provide a brilliant metallic sheen when glued onto a cardboard base.
- Bottle Caps: Can be used for the center of a badge or as "rivets" on a larger design.
- Buttons: Old buttons can be used as decorative elements or to create texture.
- Newspaper/Magazines: For cutting out letters for a name, or for decoupaging a base layer.
Safety First!
No matter what materials you choose, safety is paramount.
- Always ensure children use age-appropriate scissors.
- Use non-toxic glues and paints.
- Supervise closely, especially with smaller embellishments like beads or buttons that could be choking hazards for very young children.
- If using safety pins, ensure they are securely attached by an adult and positioned safely when worn. Magnets or adhesive squares are often a safer alternative for younger kids.
Having your supplies organized and ready to go can make the crafting experience much smoother and more enjoyable for everyone. Now, let’s get to the fun part: making those badges!
Sheriff Badge Craft for Kids: Step-by-Step Guides for Every Skill Level
Ready to deputize your little ones? Here are several methods for creating a sheriff badge, ranging from super simple to a bit more involved, ensuring there's a perfect project for every age and skill level.
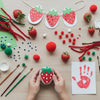
1. The Classic Paper & Cardboard Badge (Beginner-Friendly)
This is the quintessential sheriff badge craft – easy to make, highly customizable, and perfect for young crafters. It’s a great way to start building confidence and practicing basic cutting and gluing skills.
Materials List:
- Yellow or gold construction paper OR white cardstock (for coloring)
- Pencil
- Scissors (child-safe)
- Glue stick or white school glue
- Markers, crayons, or colored pencils
- Optional: Glitter, gold metallic marker, small piece of aluminum foil, safety pin or self-adhesive magnet
Instructions:
- Draw Your Star: On your paper or cardstock, draw a large five or six-pointed star. If drawing freehand is tricky, you can find a star template online, print it, and cut it out to trace. The classic sheriff badge is often a five-pointed star.
- Cut it Out: Carefully cut along the lines of your star. This is a great exercise for developing fine motor skills and hand-eye coordination.
-
Add Details: This is where the badge truly comes to life!
- "Sheriff" Title: In the center of the star, write "SHERIFF" or your child's name (e.g., "SHERIFF [Child's Name]"). You can also add "DEPUTY."
- Border: Draw a darker outline around the edges of the star.
- Metallic Shine: If using plain paper, color it in with a yellow crayon, gold marker, or even glue down small pieces of aluminum foil for a metallic effect.
- Sparkle: Add a touch of glitter glue for that extra sheriff-star dazzle!
-
Make it Wearable:
- Carefully glue a safety pin to the back of the badge (adult supervision required for this step). Ensure the pin is facing the correct direction to attach to clothing.
- For a safer alternative, especially for younger children, use a self-adhesive magnet strip or a piece of double-sided tape that can stick to a shirt.
Variations for Added Flair:
- Layered Look: Cut two stars, one slightly smaller than the other. Glue the smaller star on top of the larger one for a subtle 3D effect. Use different shades of yellow or gold.
- Aged Appearance: Use a brown ink pad or a diluted brown paint to gently smudge the edges of the badge, making it look like a well-worn, authentic piece of the Wild West.
- Sticker Badge: Once cut and decorated, use a Xyron machine (if you have one) to turn it into a sticker badge, as seen in some professional classroom resources.
2. The 3D Pop-Out Badge (Intermediate)
This version adds dimension and a more professional look, utilizing layers of cardboard for a sturdy, raised effect.
Materials List:
- Cardboard (from a cereal box or similar thin packaging)
- Yellow or gold construction paper/cardstock, or metallic self-adhesive vinyl
- Pencil
- Scissors (stronger ones for cardboard, adult help may be needed)
- White school glue or hot glue (adult use only for hot glue)
- Gold acrylic paint and a brush (optional, for a truly metallic finish)
- Safety pin or strong magnet
Instructions:
- Cardboard Base: Draw and cut out a large star shape from the cardboard. This will be your sturdy base.
- Top Layer: Draw and cut out a slightly smaller star from your yellow/gold paper, cardstock, or metallic vinyl.
- Create Relief (Optional): If you want a truly prominent center, cut out another small circle or star from cardboard for the very center of the badge.
-
Assemble Layers:
- Glue the smaller paper/cardstock star onto the cardboard base. Make sure it's centered.
- If you created a central relief, glue that on top of the paper star.
- Press firmly and allow glue to dry completely. Hot glue can speed this up (adults only).
-
Add Shine:
- If using metallic vinyl, your badge will already be shiny!
- If using paper, paint the entire front with gold acrylic paint. Let it dry completely, then apply a second coat if desired.
- Optional: Once dry, use a black fine-point marker to write "SHERIFF" and add outlines.
- Secure Backing: Attach a safety pin or strong magnet to the back with hot glue or a very strong craft adhesive.
Connecting to STEM: This craft introduces basic engineering concepts. Children learn about structural integrity (how multiple layers of cardboard make the badge stronger) and design principles (creating depth and visual interest with raised elements). It also touches on material science as they observe how different materials (cardboard, paper, paint) behave and combine.
3. The Upcycled Material Badge (Eco-Friendly Fun)
Embrace sustainability and creativity by making badges from materials destined for the recycling bin! This encourages innovative thinking and resourcefulness, a quality we highly value at I'm the Chef Too!.
Materials List:
- Cardboard (from cereal boxes, paper towel rolls, etc.)
- Aluminum foil
- Bottle caps, buttons, or small plastic lids
- White school glue or hot glue (adult use only for hot glue)
- Scissors (adult help for cutting thick cardboard)
- Markers or paint (optional)
- Safety pin or magnet
Instructions:
- Cardboard Base: Cut a star shape from a sturdy piece of cardboard.
- Foil Overlay: Take a piece of aluminum foil slightly larger than your star. Spread white glue evenly over one side of the cardboard star. Carefully press the foil onto the glued surface, smoothing out wrinkles as much as possible. Wrap the excess foil around the edges to the back and glue it down. This gives your badge a fantastic metallic look.
-
Embellishments:
- Glue a bottle cap or a large button to the center of the foil-covered star.
- You can use smaller buttons or even tiny circles cut from cardboard and covered in foil as "rivets" around the points of the star.
- Use a permanent marker to write "SHERIFF" directly on the foil (test first on a scrap piece).
- Secure Backing: Attach a safety pin or magnet to the back.
STEM Link: This craft is a fantastic lesson in material science and environmental engineering through repurposing. Children learn about the properties of different materials (sturdy cardboard, flexible foil, rigid plastic) and how they can be transformed and combined to create something new. It also highlights the importance of reducing waste and creative problem-solving with limited resources.
4. The Wearable Felt Badge (Durable & Soft)
For a badge that’s soft, flexible, and comfortable to wear, felt is an excellent choice. It's durable and doesn't fray, making it perfect for active play.
Materials List:
- Felt sheets (yellow, gold, or brown)
- Fabric glue or hot glue (adult use only)
- Scissors
- Embroidery floss and needle (optional, for stitching details)
- Velcro dots or a safety pin
Instructions:
- Cut Felt Stars: Cut two identical star shapes from your felt. These will be the front and back of your badge.
- Embellish the Front: On one felt star (this will be the front), use a fabric marker or embroidery floss to stitch "SHERIFF" or decorative lines. You could also cut out smaller felt shapes (e.g., a circle, letters) and glue them onto the front.
- Assemble: Lay the unembellished felt star flat. If using a safety pin, carefully secure it to the center of this back piece using hot glue or strong fabric glue, ensuring it’s stable. If using Velcro, attach one side of a Velcro dot here.
- Glue Together: Apply fabric glue around the edges of the back felt star, making sure to avoid the area where the pin/Velcro is. Carefully press the embellished front star on top, aligning the edges perfectly.
- Dry: Allow the glue to dry completely. For extra durability, you can stitch around the edges once the glue is dry.
Art & Design: This craft is wonderful for exploring color theory (choosing contrasting felt colors for details), texture (the softness of felt), and basic textile design (embroidery or layering felt shapes). It also introduces the concept of making a durable, wearable item.
5. The "Wooden" Badge (Cardboard & Paint Simulation)
If you like the idea of a sturdy wooden badge but don't have wood blanks, you can simulate the look with cardboard and paint.
Materials List:
- Thick cardboard (e.g., from a shipping box)
- Pencil
- Scissors or craft knife (adult use only for craft knife)
- Brown acrylic paint and paintbrush
- Black permanent marker (fine-point)
- Clear sealant (Mod Podge or clear spray varnish, optional)
- Safety pin or magnet
Instructions:
- Cut Cardboard Star: Draw a star shape onto your thick cardboard. Use scissors for thinner cardboard, or a craft knife (adult use!) for a cleaner cut on thicker material.
- Paint Base Color: Paint the entire star brown. Let it dry completely. You might need two coats for even coverage.
- Create Wood Grain (Optional but Recommended): While the brown paint is still slightly tacky (or after it dries, you can add thin lines of a slightly darker or lighter brown paint), use a fork or a dry paintbrush to gently drag across the surface, creating a subtle wood grain effect. Let dry.
- Add Details: Once fully dry, use the black permanent marker to outline the star, write "SHERIFF" or your child’s name, and add any other details you like, such as "carved" lines or patterns.
- Seal (Optional): For added protection and a finished look, apply a coat of clear sealant or Mod Podge. This also helps prevent the paint from rubbing off during play.
- Attach Backing: Secure a safety pin or magnet to the back once everything is completely dry.
Artistry: This craft is a fantastic lesson in mimicking textures through paint and line work. Children learn about creating visual effects, understanding how different brushstrokes or tools can transform a simple surface. It’s a foray into artistic representation and detail work.
Imagine sparking that same curiosity month after month! With our flexible 3, 6, and 12-month pre-paid plans, The Chef's Club subscription is the perfect way to ensure a steady stream of engaging, screen-free fun and learning for your little one.
Beyond the Craft: Turning Badges into Learning Adventures (I'm the Chef Too! Connection)
Once your child’s sheriff badge is proudly crafted, the real adventure begins! At I'm the Chef Too!, we believe that the learning doesn't stop when the project is done. It's just the beginning of sparking curiosity and fostering a lifelong love for discovery. A sheriff badge can be a powerful catalyst for imaginative play that naturally integrates various educational concepts.
Storytelling & Role-Play: The Heart of the Wild West
The sheriff badge is an instant prop for dramatic play, which is crucial for developing language, social, and emotional skills.
- Create a Town: Encourage your child to name their imaginary town (e.g., "Courageous Creek," "Discovery Dale"). What kind of "laws" does Sheriff [Child's Name] uphold?
- "Wanted" Posters: Help them draw or write "Wanted" posters for mischievous toy villains or even a lost sock! This incorporates drawing, writing, and creative problem-solving.
- Mystery Solving: A "missing" cookie or a "disappearing" block can become a grand mystery for the sheriff to solve, promoting logical thinking and observation skills.
- Character Development: What's the sheriff's personality? Are they stern but fair, or goofy but brave? This helps children explore different character traits and perspectives.
STEM in the Wild West: Protecting and Discovering
Even a simple sheriff badge can lead to rich STEM exploration. This is precisely how we approach our I'm the Chef Too! kits – by taking familiar themes and weaving in complex STEM subjects in an accessible, delicious way.
- Physics of Movement: How does a "horse" (a stick horse or even just running) move? Discuss gravity, friction, and force. What makes a wagon wheel turn? This is basic physics in action.
- Simple Machines: Can your sheriff use a pulley system to "rescue" a toy from a high shelf? Or a lever to "move a heavy rock"? These hands-on explorations introduce fundamental engineering principles.
- Chemistry in the "Gold Rush": Imagine your little sheriff discovering the 'gold' of geological science! Perhaps they’re investigating a strange bubbling spring in "Sheriff Gulch." This is a perfect natural bridge to an activity like making our Erupting Volcano Cakes Kit bubble over with deliciousness. That’s the kind of hands-on, tangible learning we specialize in – turning a simple chemical reaction into a memorable, tasty science experiment.
- Astronomy of the Night Patrol: A sheriff on night patrol might gaze at the stars. This can spark conversations about constellations, the moon, and planets. Your child can "map the stars" of their imaginary town. This is a fantastic opportunity to explore astronomy by creating their own edible solar system with our amazing Galaxy Donut Kit, learning about planets and space in the most delicious way possible.
- Engineering & Architecture: Challenge your child to build a "jail," a "saloon," or a "bank" for their town using blocks, LEGOs, or even recycled cardboard. This encourages basic engineering design, spatial reasoning, and understanding stability.
Art & Design Exploration: Beyond the Star
The act of crafting the badge itself offers artistic learning opportunities.
- Badge Design Variations: Look at different historical badges or design elements. Why do some have specific patterns? This introduces concepts of symbolism and cultural design.
- Color Mixing: Experiment with mixing paints to create different shades of "gold" or "silver" for a more realistic metallic effect.
- Texture Play: How does adding glitter change the look and feel? What about crumpled foil? This explores sensory aspects of art.
Literacy & Numeracy: The Law and Order of Learning
- Writing & Reading: As mentioned with "Wanted" posters, children can write laws for their town, create signs for their buildings, or even write a short story about their sheriff's adventures.
- Counting & Sorting: A sheriff might need to count "cattle" (toy animals), "gold nuggets" (painted rocks), or "criminals" (other toys). This brings math into play naturally.
- Mapping: Drawing a simple map of their "town" helps with spatial reasoning, understanding directions, and basic cartography.
This commitment to hands-on discovery is at the heart of everything we do at I'm the Chef Too!. We believe every child deserves the chance to explore, create, and taste their way to new knowledge. Why not make it a regular family tradition? Discover the joy of The Chef's Club and watch their excitement grow with each new theme. Our kits are meticulously developed by mothers and educators who understand how to make learning irresistible, blending culinary arts with scientific principles for a truly unique "edutainment" experience.
Making Learning Delicious: How I'm the Chef Too! Blends Food, STEM, and Fun
At I'm the Chef Too!, we've taken the concept of hands-on, engaging "edutainment" to a whole new, delicious level. While a sheriff badge craft sparks incredible imaginative play and foundational learning, we know that children learn best when they are fully immersed in an experience that appeals to all their senses. That's why we've pioneered a unique approach: blending food, STEM, and the arts into one-of-a-kind cooking adventures.
Our core philosophy revolves around sparking curiosity and creativity in children, fostering family bonding, and providing a dynamic, screen-free educational alternative. We understand that complex subjects can often feel daunting, but when presented through tangible, hands-on, and delicious cooking projects, they become approachable, exciting, and unforgettable. Imagine your child learning about chemical reactions by watching dough rise, understanding geology by excavating edible fossils, or exploring astronomy by creating a galaxy of sugary treats. These aren't just recipes; they are carefully designed learning experiences, developed by mothers and educators, that bring science, technology, engineering, and mathematics to life in the kitchen.
For instance, while your little sheriff might be protecting their imaginary town, they could also be baking "gold nugget" cookies, learning about fractions as they measure ingredients, or experimenting with different frosting "adhesives" for their edible creations. Our kits take this blend of hands-on creation and delicious learning to the next level by delivering everything you need right to your door. Each box is a complete experience, containing pre-measured dry ingredients and specialty supplies, making it incredibly convenient for busy families to dive into educational fun without the hassle of shopping or planning.
Whether your child is a budding scientist, an aspiring artist, or simply loves to get their hands dirty (and then clean them to enjoy their delicious creations!), our kits offer a unique pathway to discovery. They build confidence, develop key skills, and create joyful family memories that will last a lifetime. It’s about transforming abstract concepts into tangible triumphs, all with the added bonus of a scrumptious treat at the end.
Not ready to subscribe? No problem! You can still dive into the fun with our wide array of individual kits. Explore our full library of adventure kits available for a single purchase in our shop and find the perfect theme to ignite your child's imagination. Whether it's building a 'fort' for their sheriff badges or embarking on a delicious culinary journey, the options are limitless. Browse our complete collection of one-time kits and discover how we blend food, STEM, and the arts into unforgettable experiences.
Tips for Parents and Educators for Successful Crafting
Creating with children should always be an enjoyable and enriching experience, not a stressful one. Here are some tips to help parents and educators maximize the fun and learning from sheriff badge crafts and any other hands-on activity.
- Embrace the Mess (Within Reason!): Crafting often involves glue, glitter, and paint. Lay down newspapers, old towels, or a plastic tablecloth. Remind yourself that a little mess is a sign of creativity in action! Having a designated "crafting zone" and setting clear expectations for cleanup beforehand can help manage the chaos.
- Focus on the Process, Not Just the Product: The goal isn't to create a perfect, Pinterest-worthy badge. It's about the child's engagement, their learning, their decision-making, and their enjoyment of the creative journey. Celebrate their effort and imagination, even if the final product isn't exactly what you envisioned.
- Provide Choices, Encourage Personalization: Offer a selection of materials, colors, and embellishments. "Would you like a gold marker or glitter glue for the shine?" "What name should your sheriff badge have?" Allowing children to make choices gives them ownership over their creation and boosts their confidence.
- Encourage Storytelling and Extension of Play: Once the badge is dry, prompt questions to spark imaginative play. "Who is your sheriff, and what's their story?" "What kind of adventures will they have?" "What laws will they enforce?" The craft is just the beginning; the real magic happens in the play that follows.
- Prioritize Safety and Supervise Appropriately: Always use child-safe tools and non-toxic materials. For activities involving scissors, hot glue guns (adults only!), or small parts, maintain close supervision. Teach children how to use tools safely and responsibly.
- Connect to Real-World Concepts: Use the craft as a springboard for discussions. Talk about community helpers, the history of the Wild West, or even the different types of stars. Connecting the craft to broader concepts makes learning relevant and engaging.
- Be a Collaborator, Not a Director: Offer assistance when needed, but resist the urge to take over. Let children lead the creative process, even if their ideas seem unconventional. Your role is to facilitate, encourage, and enjoy the experience alongside them.
- Celebrate Achievements: Once the badge is complete, celebrate your child's accomplishment! Display it proudly, take a photo, and acknowledge their hard work and creativity. This positive reinforcement encourages them to continue exploring and learning through hands-on activities.
These tips are at the heart of how we develop our I'm the Chef Too! kits. We aim to make it easy for you to facilitate incredible learning experiences, providing everything you need while encouraging the kind of open-ended play and discovery that truly fuels a child's imagination. This process-oriented approach ensures that every child, regardless of their "artistic skill," can feel successful and motivated.
Elevate Your Child's Learning Journey with I'm the Chef Too!
Crafting a sheriff badge is a fantastic start to a world of creative play and hands-on learning, but the adventure doesn't have to end there! At I'm the Chef Too!, our commitment is to provide ongoing, enriching experiences that spark curiosity, foster creativity, and build essential skills in children. We know that the joy of discovery, especially when it involves delicious treats, is a powerful motivator for learning.
Our unique "edutainment" approach seamlessly blends culinary arts with STEM principles and artistic expression. Each of our kits, developed by experienced mothers and educators, offers a tangible, screen-free alternative that transforms complex subjects into engaging, memorable, and tasty adventures. From understanding chemical reactions through baking to exploring geological formations with edible ingredients, we bring learning to life in the most delightful way. We focus on the benefits of the process: fostering a love for learning, building confidence, developing key skills like problem-solving and fine motor control, and creating joyful family memories that will be cherished for years to come.
So, as you equip your little one with their trusty sheriff badge, ready for a new quest, remember that the adventure of learning never truly ends. For consistent, screen-free "edutainment" that sparks endless curiosity and creativity, we invite you to become a part of The Chef's Club today! Imagine a new, exciting themed adventure delivered right to your door every month, complete with pre-measured dry ingredients, specialty supplies, and free shipping in the US. Our flexible 3, 6, and 12-month pre-paid plans are perfect for gifting or ensuring long-term enrichment, guaranteeing a steady stream of delicious learning experiences.
Join us in celebrating the power of hands-on discovery, where every child can be a chef, a scientist, and an artist, all in one wonderful, educational journey.
Conclusion
The humble sheriff badge craft for kids is far more than just a simple art project; it's a gateway to boundless imagination, essential skill development, and heartwarming family bonding. We've explored how a few basic materials can be transformed into a symbol of justice and adventure, fostering fine motor skills, promoting creative thinking, and encouraging rich storytelling. Whether your child is cutting paper stars, layering cardboard for a 3D effect, or repurposing household items, they are actively engaging in problem-solving, decision-making, and building confidence in their own abilities.
At I'm the Chef Too!, we champion these kinds of tangible, hands-on learning experiences. Our mission is to provide children with "edutainment" that blends the excitement of food with the fascinating worlds of STEM and the arts, all within a screen-free environment. We believe that learning should be an adventure, filled with discovery, creativity, and delicious outcomes. Just as a sheriff badge empowers a child to imagine themselves as a hero, our unique cooking kits empower them to explore complex subjects through engaging, practical activities developed by mothers and educators.
Don't let the learning stop at the craft table! Continue to cultivate that spark of curiosity and creativity. For a continuous stream of innovative, educational, and undeniably fun experiences that truly blend learning and play, there's no better partner than I'm the Chef Too!. We invite you to make "edutainment" a regular part of your family's routine. Join the adventure, foster a love for learning, and create delicious memories that will last a lifetime.
Ready to embark on a new culinary and STEM journey every month? Join The Chef's Club today and bring the magic of hands-on discovery right to your kitchen!
FAQ Section
Q1: What age is the sheriff badge craft suitable for? A1: Sheriff badge crafts can be adapted for a wide range of ages!
- Toddlers (2-3 years) with adult help: Focus on pre-cut shapes, gluing, and simple coloring. Safety pins should be avoided; use tape or magnets instead.
- Preschoolers (4-5 years): They can practice cutting with child-safe scissors, do most of the gluing, and enjoy decorating.
- School-aged children (6+ years): Can follow more complex instructions, cut intricate shapes, paint, and add detailed embellishments, with supervision for advanced tools.
- Older children: Can explore advanced techniques like 3D layering, wood-burning (with extreme adult supervision), or intricate design work.
Q2: What are the best materials for a durable sheriff badge? A2: For durability, consider these options:
- Thick Cardboard: Cereal boxes or corrugated cardboard provide a sturdy base.
- Craft Foam: It's flexible, doesn't tear easily, and holds its shape well.
- Wood Blanks: Unfinished wood stars from a craft store, once painted and sealed, are the most durable option.
- Lamination: If using paper, laminating the finished badge will make it waterproof and tear-resistant.
Q3: How can I make the sheriff badge craft more educational? A3: The educational possibilities are vast!
- History: Discuss the role of sheriffs in different historical periods, especially the Wild West.
- Geography: Create an imaginary town map for your sheriff, marking key locations.
- Literacy: Write "Wanted" posters, sheriff's "laws," or a short story about your sheriff's adventures.
- Numeracy: Count "gold nuggets" (rocks), "cattle" (toy animals), or track "criminals" (number games).
- STEM: Discuss the geometry of the star, the physics of how a badge stays on a shirt, or experiment with materials (e.g., how different glues work). Relate it to real-world STEM concepts, much like we do with our I'm the Chef Too! kits that blend cooking with science and engineering.
Q4: Can these badges be used for a themed party or event? A4: Absolutely! Sheriff badge crafts are perfect for:
- Birthday Parties: As an activity during the party and a take-home favor.
- Wild West or Cowboy/Cowgirl Themed Events: Kids can wear their badges as part of a costume.
- Classroom Activities: For a unit on community helpers, American history, or imaginative play centers.
- Playdates: A fun, collaborative activity for friends.
Q5: How do I make a sheriff badge safe to wear for younger children? A5: Safety is key, especially for little ones.
- Avoid Safety Pins for Under 3s: Small parts and sharp points are choking and injury hazards.
-
Use Alternatives:
- Self-adhesive Magnets: Attach a magnet strip to the back of the badge and another to the inside of the shirt.
- Velcro Dots: Glue one side of a Velcro dot to the badge and the other to the clothing.
- Double-Sided Tape: A temporary but easy solution for attaching to clothing.
- Ribbon/String: Punch a hole in the top of the badge and thread a ribbon through to wear it as a necklace (ensure the ribbon is break-away for safety).
- Wear as a Prop: Instead of attaching, kids can simply hold the badge or tuck it into a pocket.
Remember, adult supervision is always recommended to ensure children are using materials safely and appropriately.